
I imagine there is duty to pay on top of that?Just ordered one from rhd Japan £68 posted
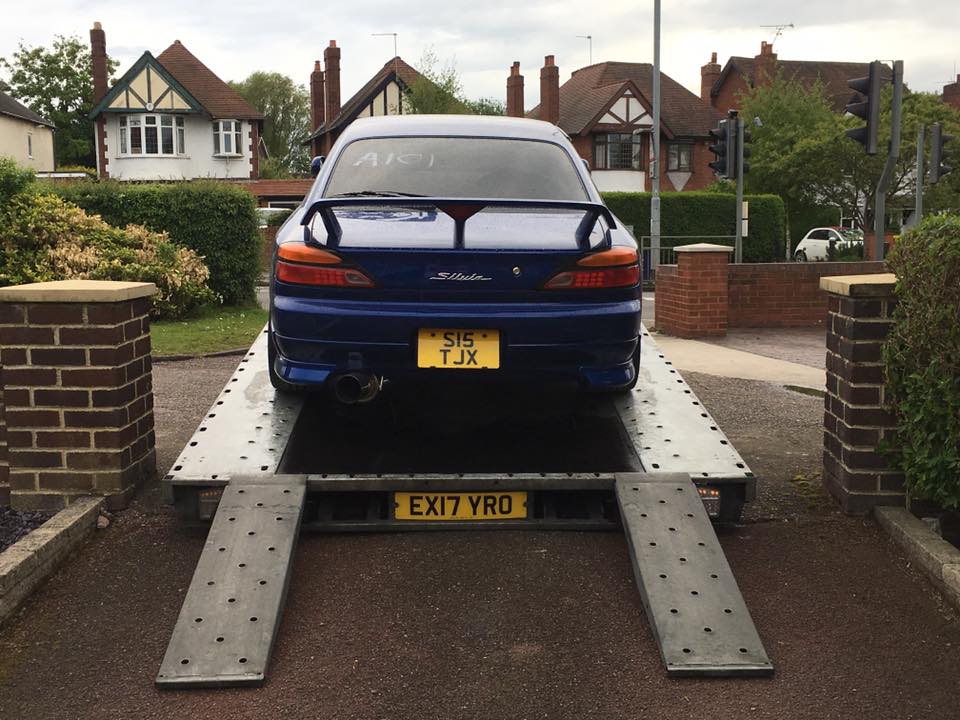
After 18 months of lusting, I now own a Blue S15 Spec R!
We shall see, but don't normally get charged on smaller items
- Joined
- 17 January 2012
- Messages
- 323
- Reaction score
- 0
- Points
- 0
- Location
- Essex
- Country
-

- @kwalker88
Don't count on it. My other half ordered me the Yashio factory gaitor, push button and gearknob for the S15 and got stung with import charges and holding fees from parcel force. The added costs were crazy!
My brother orders small things all the time , never been charged yet
I have been wanting rid of the factory re-trimmed seats for some time. After attending Autosport International last weekend, I managed to nab a great buy on a set of Corbeau RRB's. These seats are as close to bucket seats as you will probably get whilst retaining the recline ability. They are also super comfortable and modernise the cabin somewhat. I have them fitted up to Bride rails (purchased from the previous owner of my car) and they were practically a bolt in fit with no modification necessary whatsoever.

Last edited:
Keifer1903
Instagram Staff

Looks amazing rich!
Sent from my iPhone using Tapatalk
Sent from my iPhone using Tapatalk
I was looking at similar Rich, do they feel as low as the stocks?I have been wanting rid of the factory re-trimmed seats for some time. After attending Autosport International last weekend, I managed to nab a great buy on a set of Corbeau RRB's. These seats are as close to bucket seats as you will probably get whilst retaining the recline ability. They are also super comfortable and modernise the cabin somewhat. I have them fitted up to Bride rails (purchased from the previous owner of my car) and they were practically a bolt in fit with no modification necessary whatsoever.
View attachment 1423
Sent from my SM-G531F using Tapatalk
They do when they are slid to the back of the rails, which I think is a quirk of the Bride rails.I was looking at similar Rich, do they feel as low as the stocks?
Sent from my SM-G531F using Tapatalk
tooley
When only sideways will do!
- Joined
- 10 October 2009
- Messages
- 1,770
- Reaction score
- 2
- Points
- 0
- Location
- West Midlands / South Wales
- Country
-

Looking good man! my mate put some blue suede Evo recline Recaro's in his S15 and modified rails to fit. Makes a big difference to the interior look.
Cheers dude! I haven't driven it yet but it just feels a more "special" place to sit. It looks more modern too, which is a bonus.Looking good man! my mate put some blue suede Evo recline Recaro's in his S15 and modified rails to fit. Makes a big difference to the interior look.
So, around June time last year the Silvia started burning oil after a prolonged idle period (5mins+, as noticed whilst queuing for the Channel Tunnel crossing). I took some advice from a few reputable sources and concluded that it was most likely the factory turbo that has been subject to circa 30K miles of raised boost pressure.
Through Torque GT, who originally imported the car, I have purchased a Garret GT2871R 52 trim, 0.64 A/R. This has also had some porting work done by Protuner on the exhaust housing wastegate port to increase flow, which will in-turn increase the ability to control boost when it gets mapped. The actuator supplied with the new turbo has been tested and is set to open at 10psi, which is too low, however it does appear adjustable - so I'll have to play with that in due course or purchase a HKS adjustable item,

To match the new turbo, I opted to get my Tomei Expreme manifold and Tomei turbo elbow coated in Performance 1's Volcanic satin black ceramic coating. I'll just say if anyone is looking for similar work then go through a company/website called Fastfoxperformance as you will get it for around half the price of going direct, yet ironically Fastfox is just an eCommerce solution for Performance 1 Coatings and you ship it directly anyway. Overall experience was very good and hopefully this will help to keep under-bonnet temps down along with keeping internal exhaust temperatures hot, and as such improving the speed of the exhaust gases exiting the engine.
You will also notice in the first picture a small crack that I had spotted when inspecting the manifold. This has been repaired and should hopefully last for another few years. If it cracks again then I shall purchase a different manifold.


I have also sourced a set of Nismo 740cc injectors from RHDJapan as they came in over £100 cheaper than anywhere in the UK could supply them for. These should be good for 400bhp and will be controllable by the Nistune ECU board that is already fitted.

Now, it's clear that I'm going to go for a little more power by this point. On the stock turbo it had been estimated to be running around 300bhp. At Santapod it ran a 13.01 at 107mph which is probably a better indicator of power. I have decided that I will be happy with 350bhp, but being honest I would like to hit 400bhp. The new turbo will be at it's limits by that stage but I have decided to add Tomei 256 Poncams to help it get there (and also because they sound awesome!). These were also sourced through Torque GT at a competitive price.

And, of course, a clutch to handle the extra power. The stock S15 item was on it's very last legs at 70'900 miles (it did around 30K of upped power though!). I did my research and went for the ACT Heavy Duty Organic clutch kit that is very well rated by everyone that uses it. They do an "extreme" version that has a higher clamping force but I don't want a ridiculously heavy clutch pedal and I would rather the clutch remain a sacrificial part of the drive-train in hopes of prolonging the life of the gearbox and diff.
So, it was at around this point that I had decided to order a full Nissan gasket set, Cosworth metal 1.1mm head gasket and ARP head studs to provide some reliability with the extra power than the car will hopefully have when mapped. The parts arrived, I stripped the head off the car, which was relatively simple given there are in-depth guides available online, and sent the head off for inspection/machining. It came back having had some repair work to the number one exhaust cam journal which was scored (unknown how that occurred), new exhaust valve guides (worn beyond tolerance and possibly a cause of the smoke) and the usual acid dip, valves re-cut, surface faces skimmed 4 thou, brand new Nissan OEM exhaust manifold studs and a paint job in silver.


I also picked up a new knock sensor loom from Wiring Specialties in the States for a great price. Love the sticker!

Everything was put back together, the refreshed cylinder head was on and I was just using my freshly made tool for measuring the valve shim heights... This is when DISASTER struck!
One of the tiny screws from the back of my brand new dial gauge fell out of the back and into oblivion. I could only assume it had fell into the head, hopefully one of the oil ways, and could be flushed into the sump. I poured a few litres of oil through the head and whipped the sump off hoping to find it - no success. What I did find was a partially blocked oil pick-up that had the remains of some flaky cam cover paint (a modification done before my ownership).
Offending screw can be seen missing in action below.

It was at the this point that I decided to just pull the engine out, strip it down completely and rebuild. The paranoia would have got to me otherwise as I couldn't risk starting the engine knowing.

I took the engine down to DY Engine Services in Bristol as they come very highly recommended and seeing on their Facebook that they have built an engine for Josh Cook (touring car driver), I can only imagine that they do a very good job, So far, I'm very impressed anyway. The rough spec that I've gone for will be;
- Complete engine refresh
- CP forged pistons
- Manley forged con rods
- ACL bearings
- Tomei Poncams
- Tomei rocker arm stoppers
- Brian Crower valve springs
- Brian Crower valve guides
- Candy blue cam cover
- All new stainless bolts throughout
- Metal head gasket
- Squish pads removed from the cylinder head (to help prevent detonation)
- Valves re-cut etc
- Cylinder head and block painted siliver
The build is in-progress at the moment and comments so far are that the engine was actually in excellent condition and one of the best SR's they have seen. The only damage reported was that two intake valve guides were damaged (I question whether this was done by the previous machine shop, and seen as they were asked to fully inspect the head and never reported that damage, and that the car hasn't been run since, I think it may be a fair assumption).
Here are some current pics:


Through Torque GT, who originally imported the car, I have purchased a Garret GT2871R 52 trim, 0.64 A/R. This has also had some porting work done by Protuner on the exhaust housing wastegate port to increase flow, which will in-turn increase the ability to control boost when it gets mapped. The actuator supplied with the new turbo has been tested and is set to open at 10psi, which is too low, however it does appear adjustable - so I'll have to play with that in due course or purchase a HKS adjustable item,
To match the new turbo, I opted to get my Tomei Expreme manifold and Tomei turbo elbow coated in Performance 1's Volcanic satin black ceramic coating. I'll just say if anyone is looking for similar work then go through a company/website called Fastfoxperformance as you will get it for around half the price of going direct, yet ironically Fastfox is just an eCommerce solution for Performance 1 Coatings and you ship it directly anyway. Overall experience was very good and hopefully this will help to keep under-bonnet temps down along with keeping internal exhaust temperatures hot, and as such improving the speed of the exhaust gases exiting the engine.
You will also notice in the first picture a small crack that I had spotted when inspecting the manifold. This has been repaired and should hopefully last for another few years. If it cracks again then I shall purchase a different manifold.
I have also sourced a set of Nismo 740cc injectors from RHDJapan as they came in over £100 cheaper than anywhere in the UK could supply them for. These should be good for 400bhp and will be controllable by the Nistune ECU board that is already fitted.
Now, it's clear that I'm going to go for a little more power by this point. On the stock turbo it had been estimated to be running around 300bhp. At Santapod it ran a 13.01 at 107mph which is probably a better indicator of power. I have decided that I will be happy with 350bhp, but being honest I would like to hit 400bhp. The new turbo will be at it's limits by that stage but I have decided to add Tomei 256 Poncams to help it get there (and also because they sound awesome!). These were also sourced through Torque GT at a competitive price.
And, of course, a clutch to handle the extra power. The stock S15 item was on it's very last legs at 70'900 miles (it did around 30K of upped power though!). I did my research and went for the ACT Heavy Duty Organic clutch kit that is very well rated by everyone that uses it. They do an "extreme" version that has a higher clamping force but I don't want a ridiculously heavy clutch pedal and I would rather the clutch remain a sacrificial part of the drive-train in hopes of prolonging the life of the gearbox and diff.
So, it was at around this point that I had decided to order a full Nissan gasket set, Cosworth metal 1.1mm head gasket and ARP head studs to provide some reliability with the extra power than the car will hopefully have when mapped. The parts arrived, I stripped the head off the car, which was relatively simple given there are in-depth guides available online, and sent the head off for inspection/machining. It came back having had some repair work to the number one exhaust cam journal which was scored (unknown how that occurred), new exhaust valve guides (worn beyond tolerance and possibly a cause of the smoke) and the usual acid dip, valves re-cut, surface faces skimmed 4 thou, brand new Nissan OEM exhaust manifold studs and a paint job in silver.
I also picked up a new knock sensor loom from Wiring Specialties in the States for a great price. Love the sticker!
Everything was put back together, the refreshed cylinder head was on and I was just using my freshly made tool for measuring the valve shim heights... This is when DISASTER struck!
One of the tiny screws from the back of my brand new dial gauge fell out of the back and into oblivion. I could only assume it had fell into the head, hopefully one of the oil ways, and could be flushed into the sump. I poured a few litres of oil through the head and whipped the sump off hoping to find it - no success. What I did find was a partially blocked oil pick-up that had the remains of some flaky cam cover paint (a modification done before my ownership).
Offending screw can be seen missing in action below.
It was at the this point that I decided to just pull the engine out, strip it down completely and rebuild. The paranoia would have got to me otherwise as I couldn't risk starting the engine knowing.
I took the engine down to DY Engine Services in Bristol as they come very highly recommended and seeing on their Facebook that they have built an engine for Josh Cook (touring car driver), I can only imagine that they do a very good job, So far, I'm very impressed anyway. The rough spec that I've gone for will be;
- Complete engine refresh
- CP forged pistons
- Manley forged con rods
- ACL bearings
- Tomei Poncams
- Tomei rocker arm stoppers
- Brian Crower valve springs
- Brian Crower valve guides
- Candy blue cam cover
- All new stainless bolts throughout
- Metal head gasket
- Squish pads removed from the cylinder head (to help prevent detonation)
- Valves re-cut etc
- Cylinder head and block painted siliver
The build is in-progress at the moment and comments so far are that the engine was actually in excellent condition and one of the best SR's they have seen. The only damage reported was that two intake valve guides were damaged (I question whether this was done by the previous machine shop, and seen as they were asked to fully inspect the head and never reported that damage, and that the car hasn't been run since, I think it may be a fair assumption).
Here are some current pics:
Last edited:
Keifer1903
Instagram Staff
Impressive work going on there rich. Keep it up.
Sent from my iPhone using Tapatalk
Sent from my iPhone using Tapatalk
I'm pretty doubtful it's going to be ready to be honest, but lets see what the next week bringscutting it fine for japfest Rich haha keep up the good work mate :jaw:
")
So, updates...
There's a lot to update but I'll condense it down.
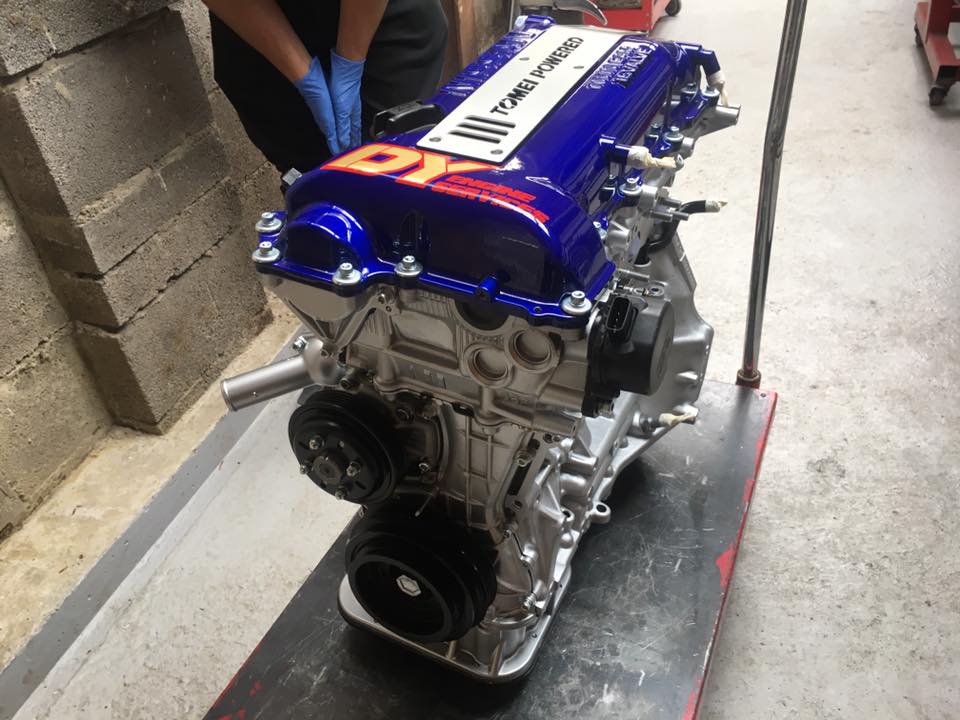
Firstly, my forged engine is now complete and returned from DY Engine Services in Bristol. Dave has done a phenomenal job with attention to detail that is second to none. I am very impressed with his work, his communication and enthusiasm. If it goes as good as it looks then this will be awesome!
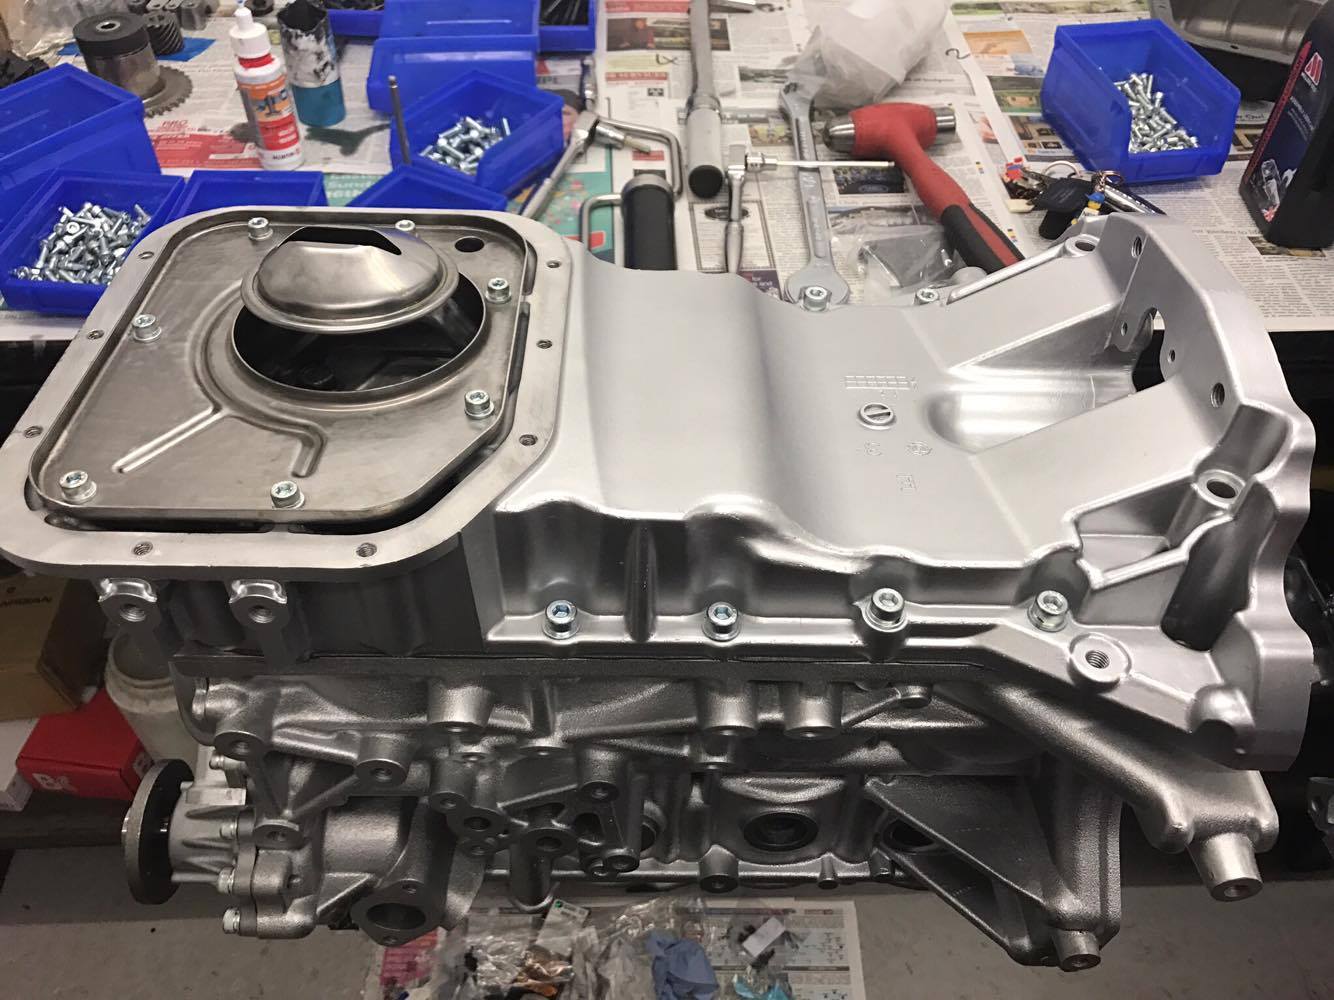
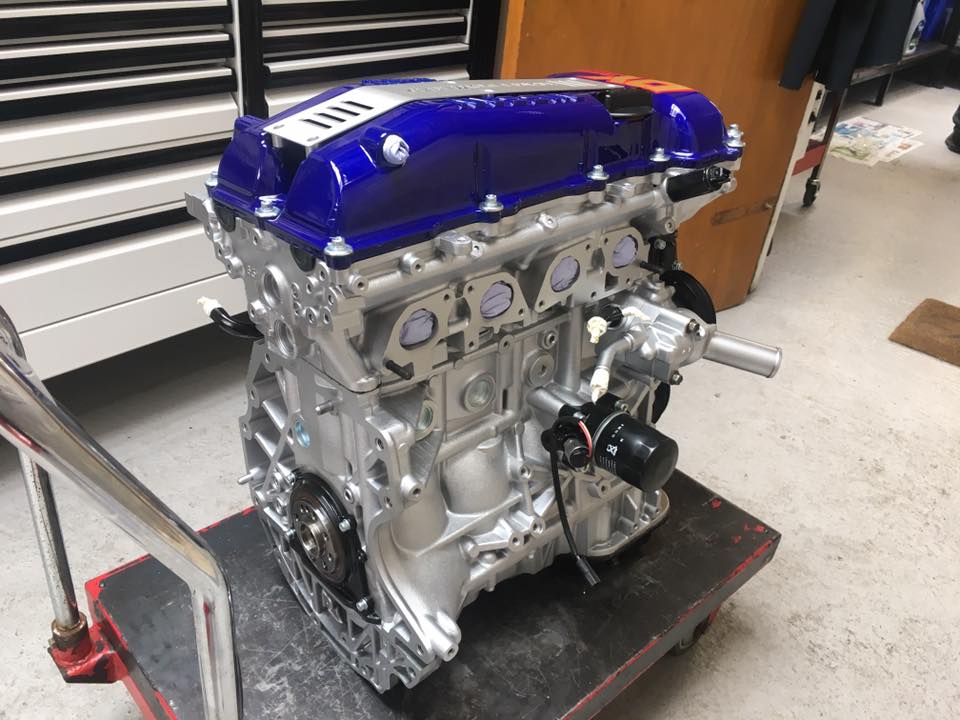
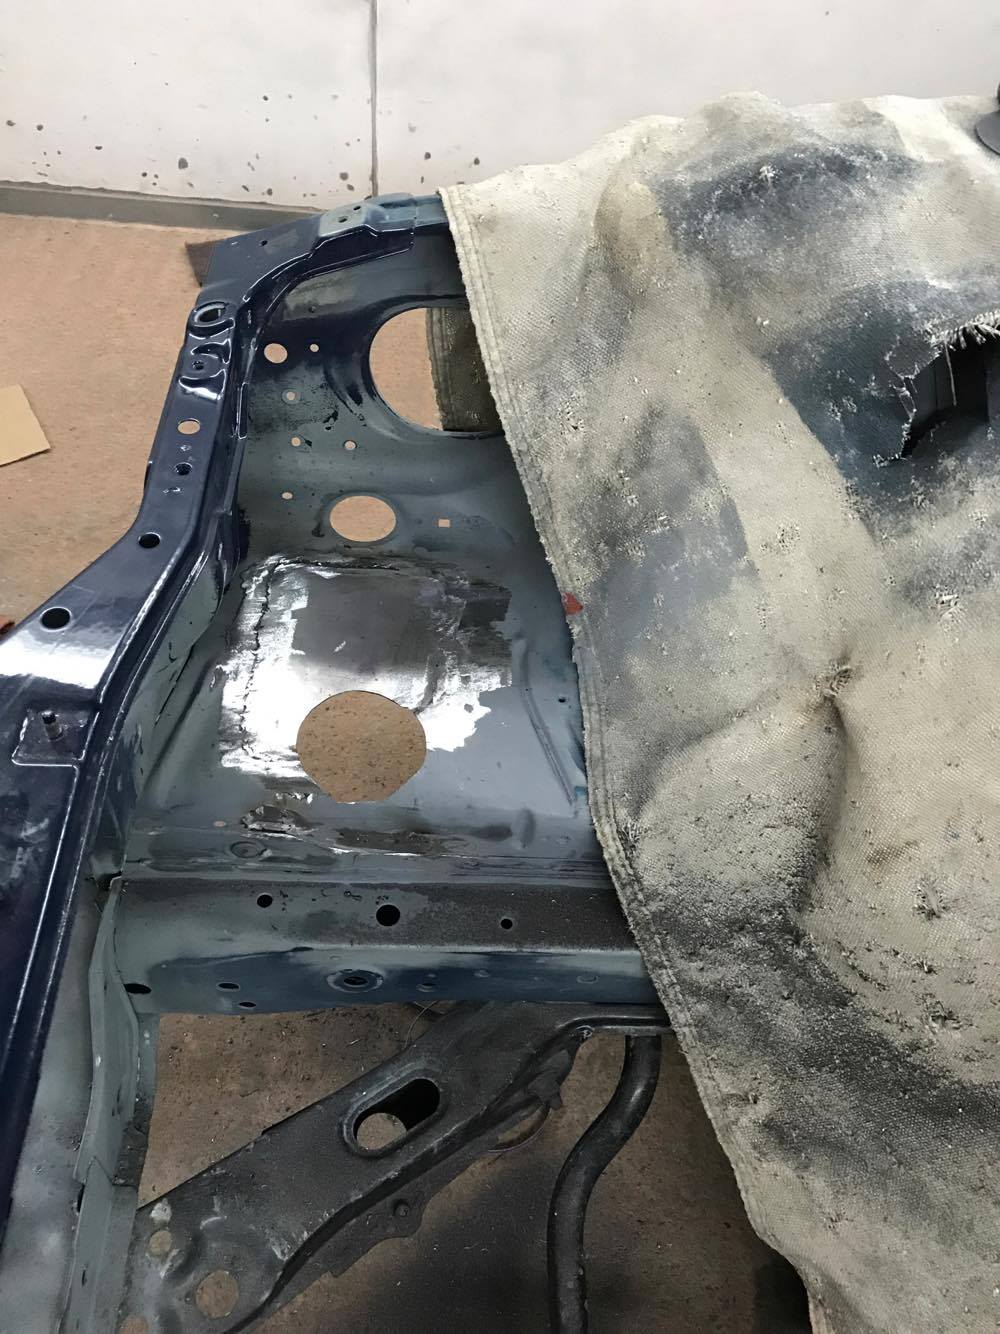
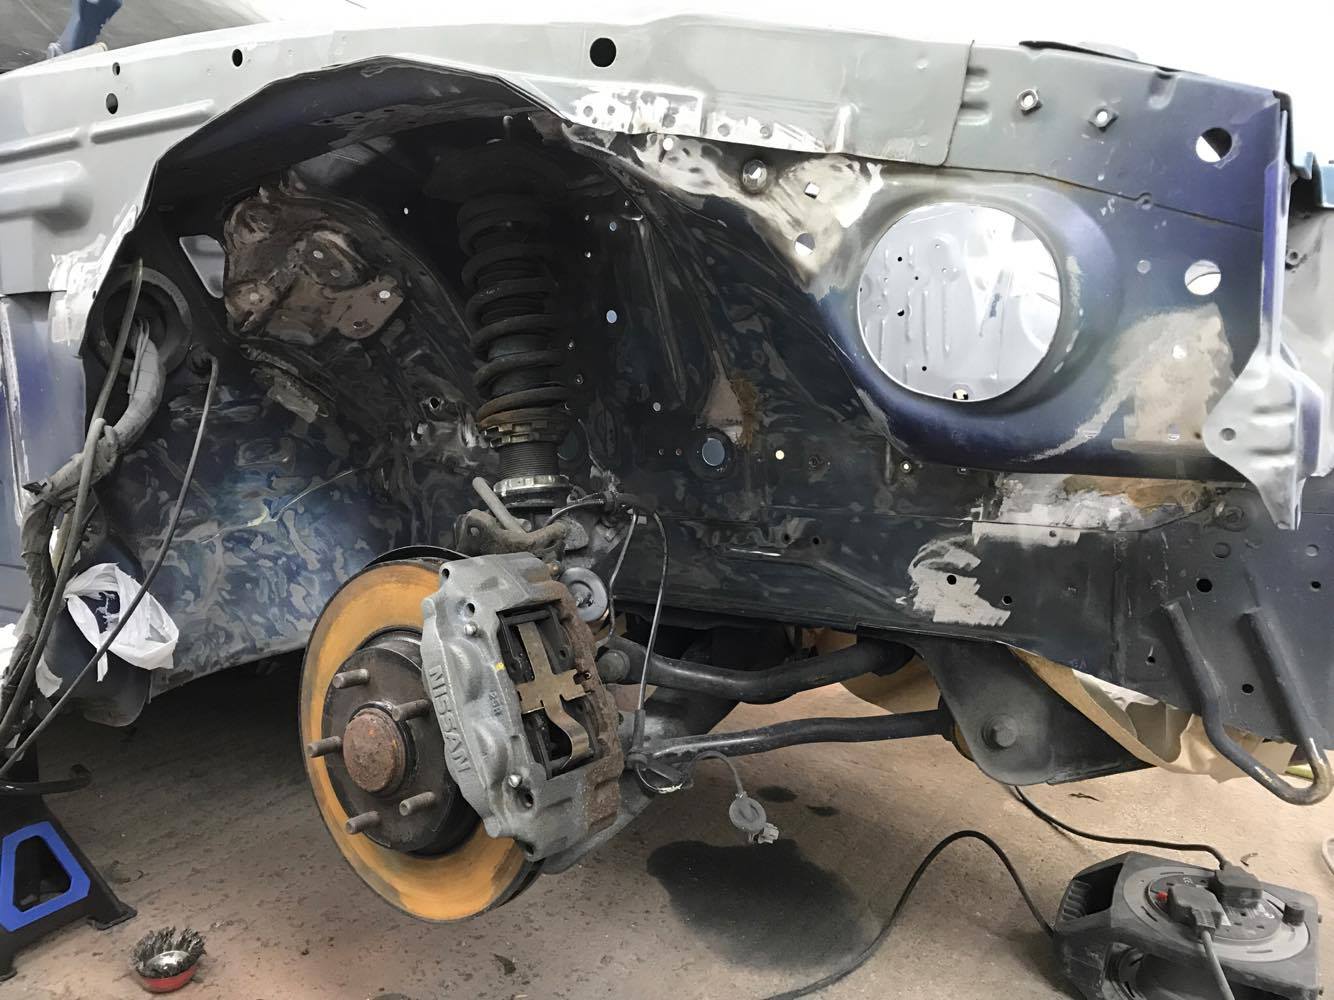
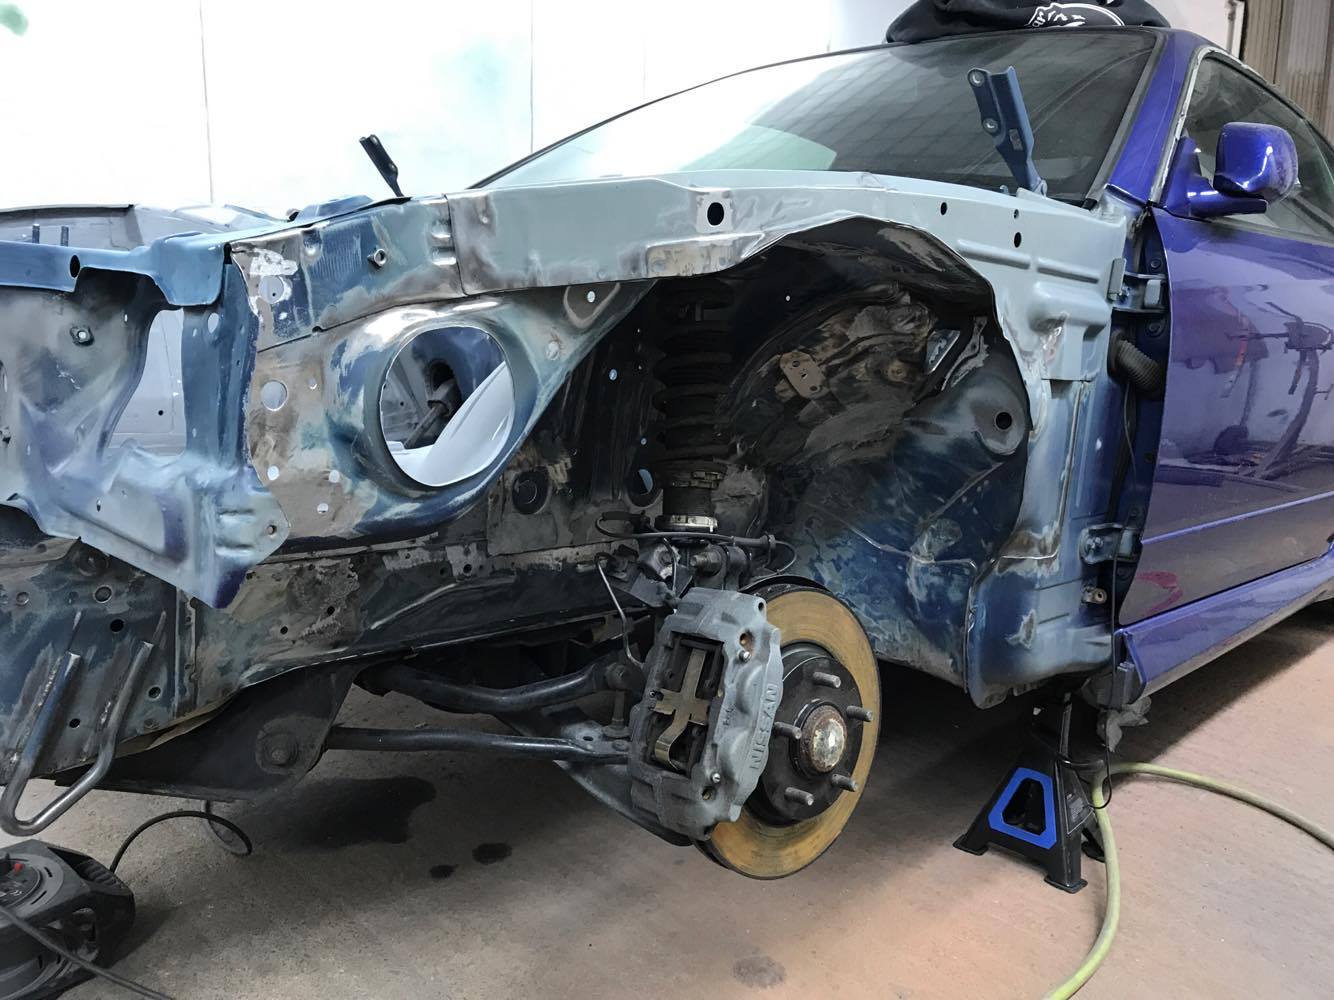
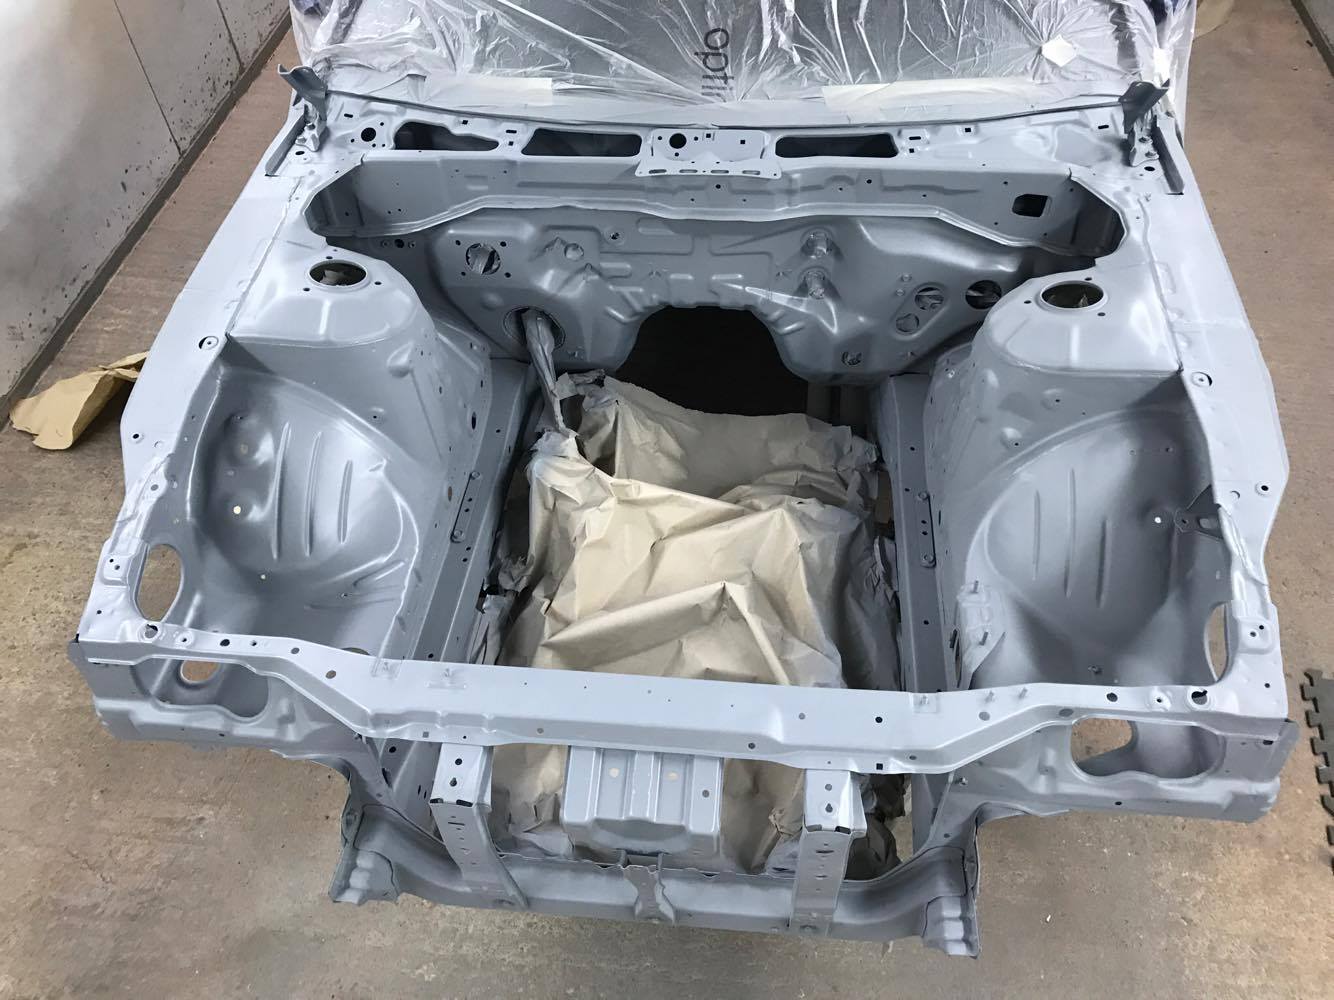
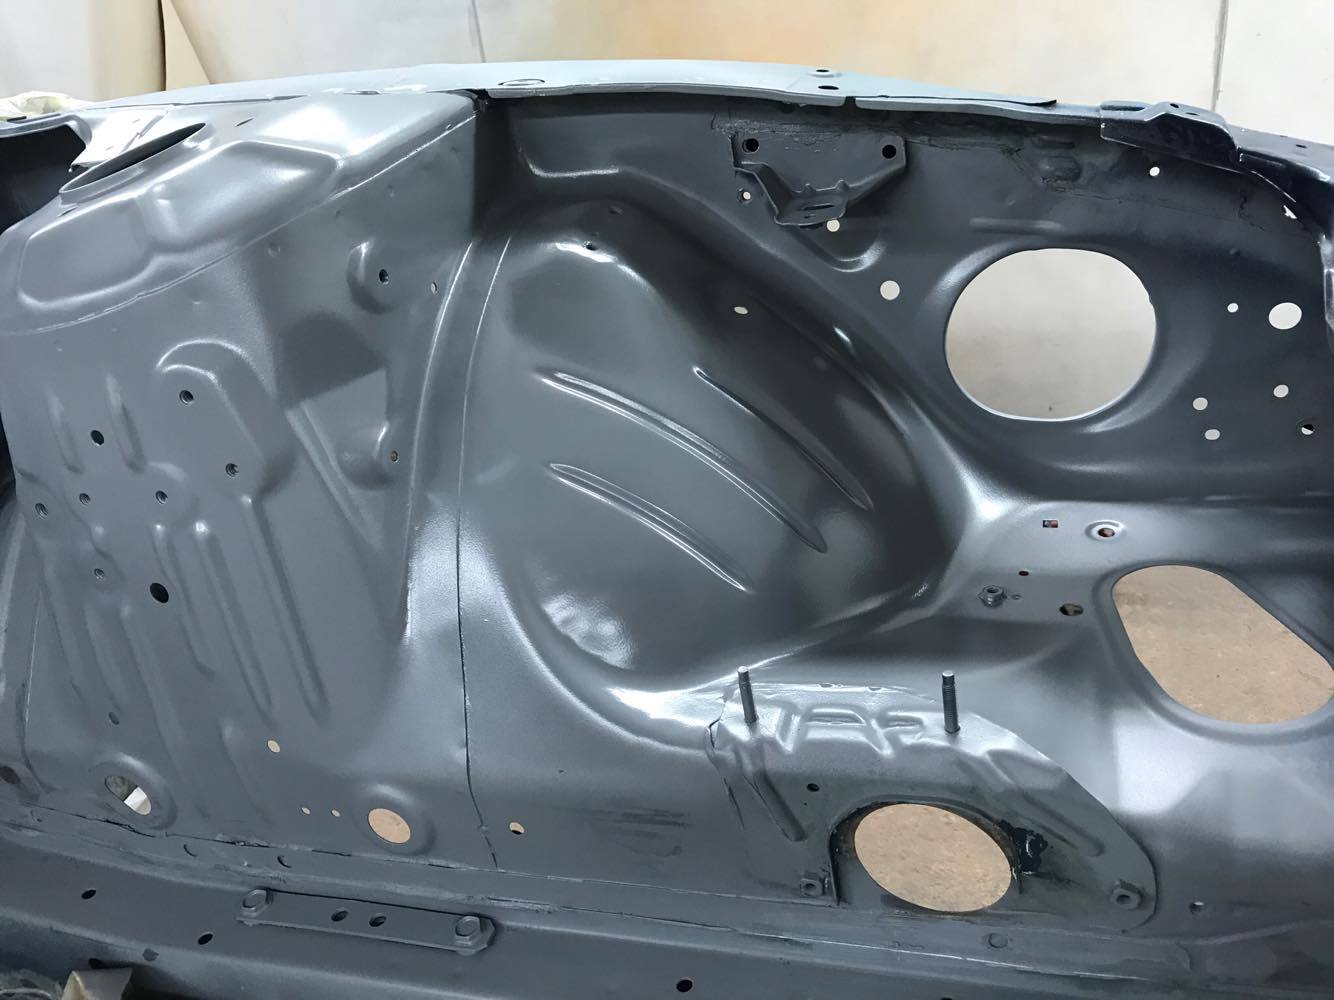
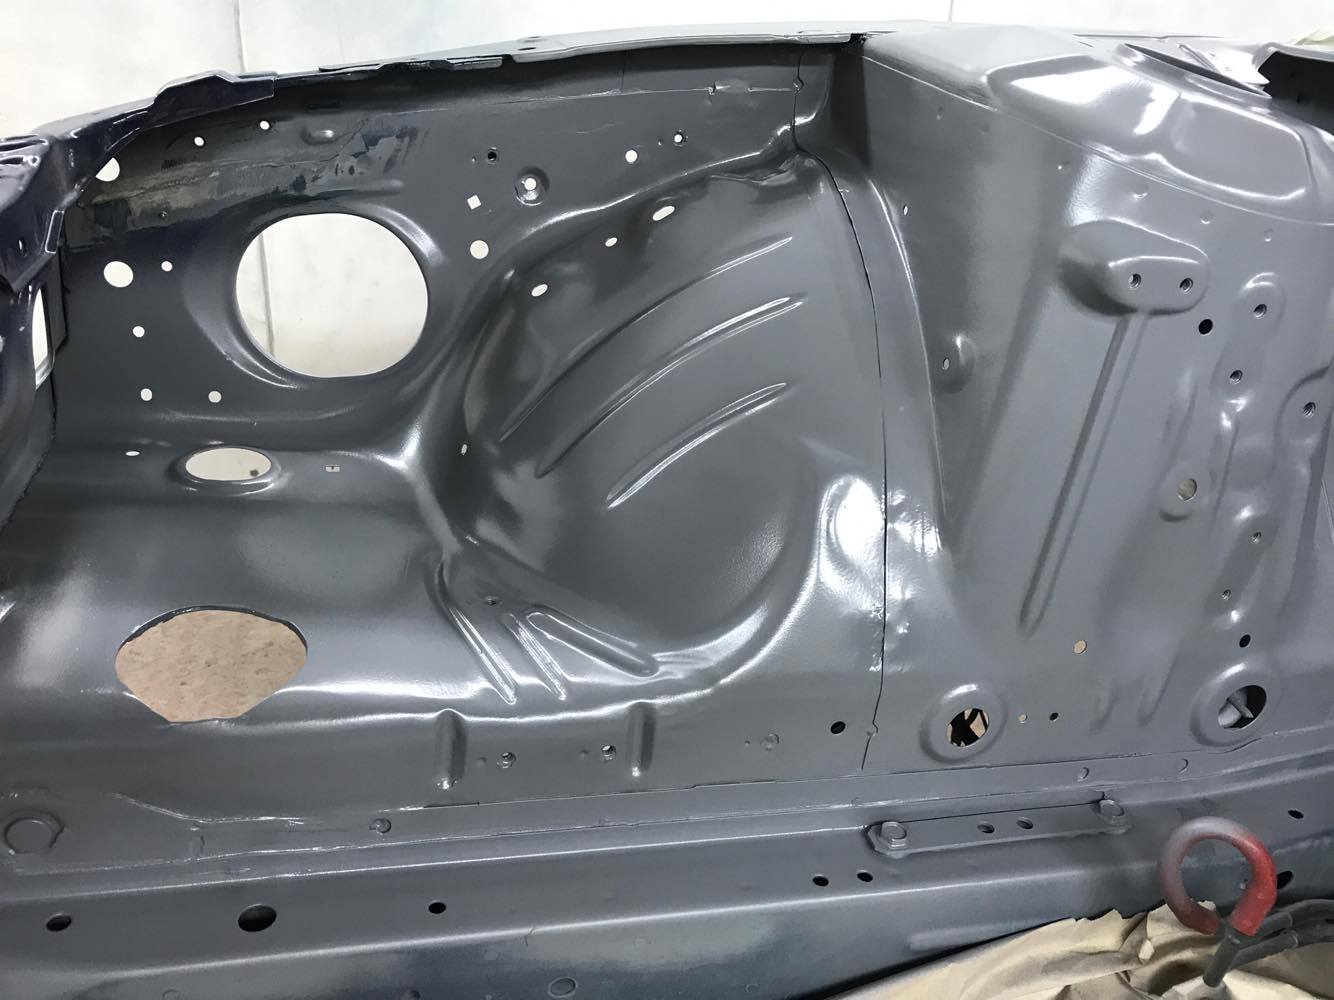
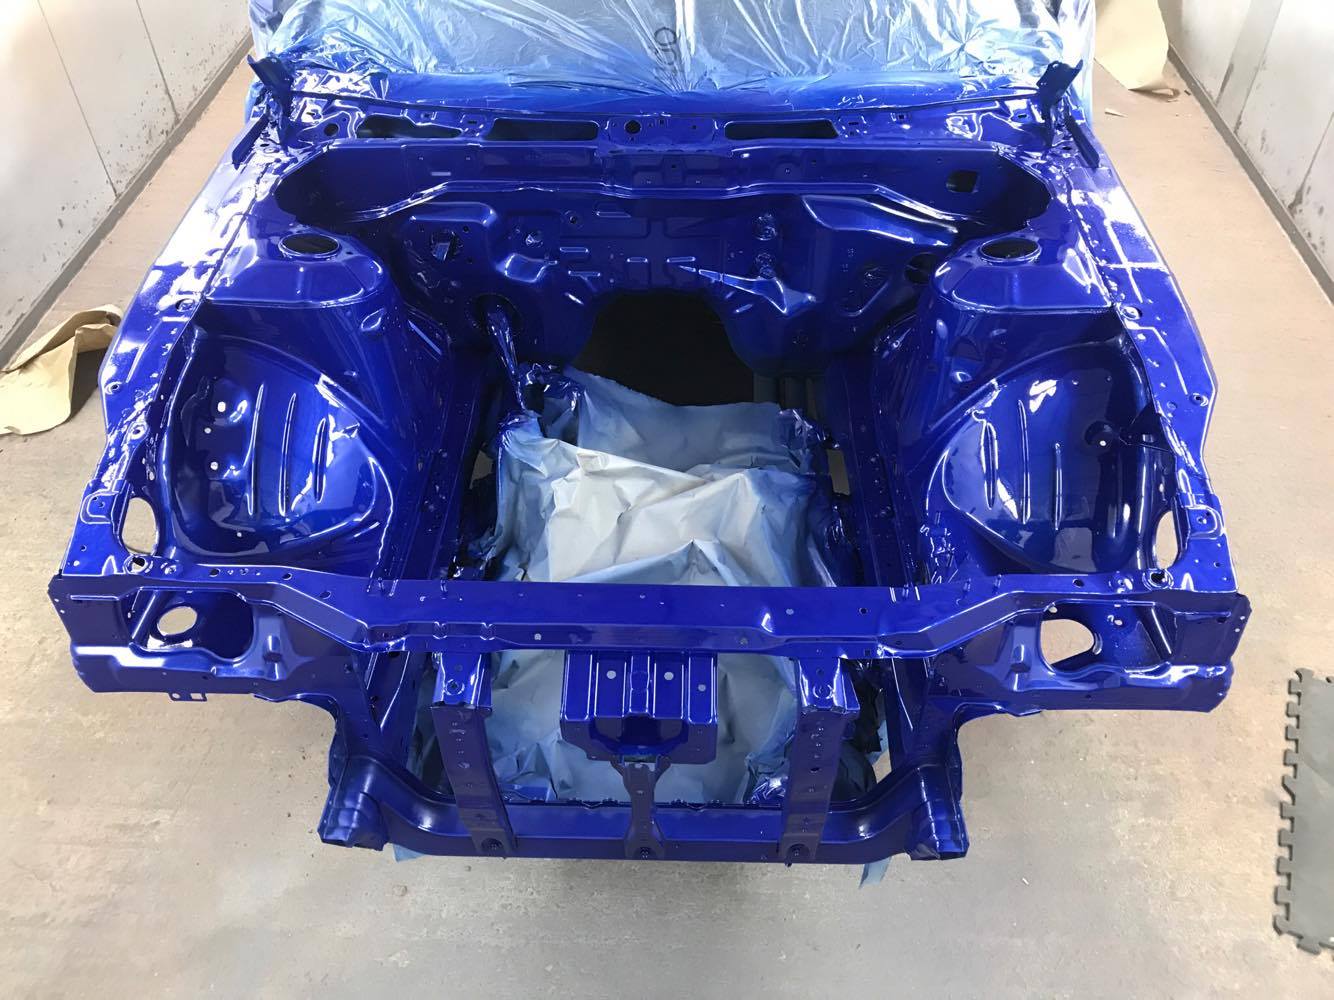
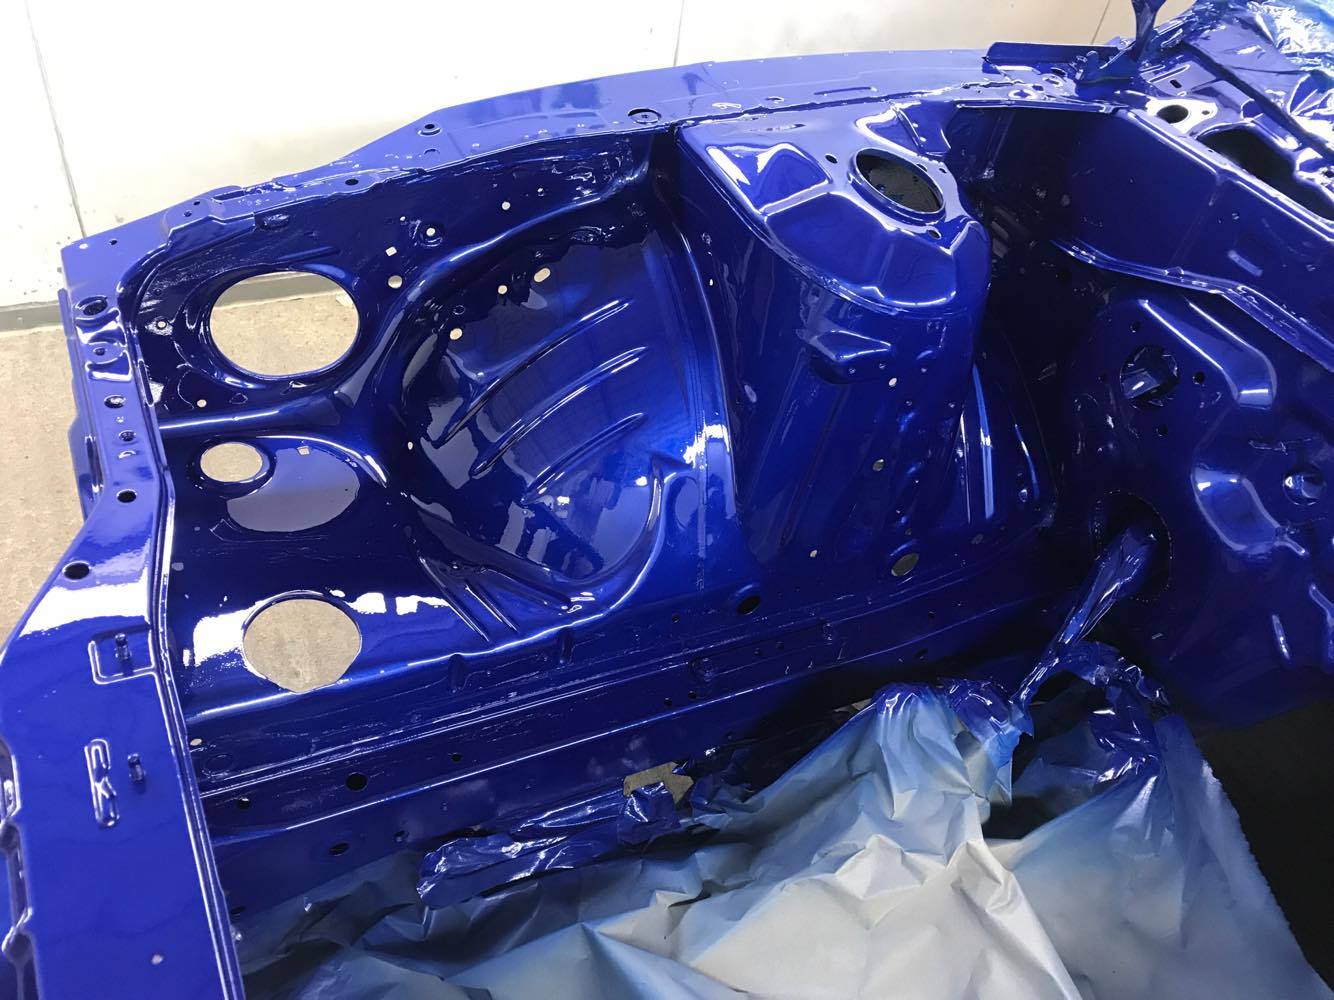
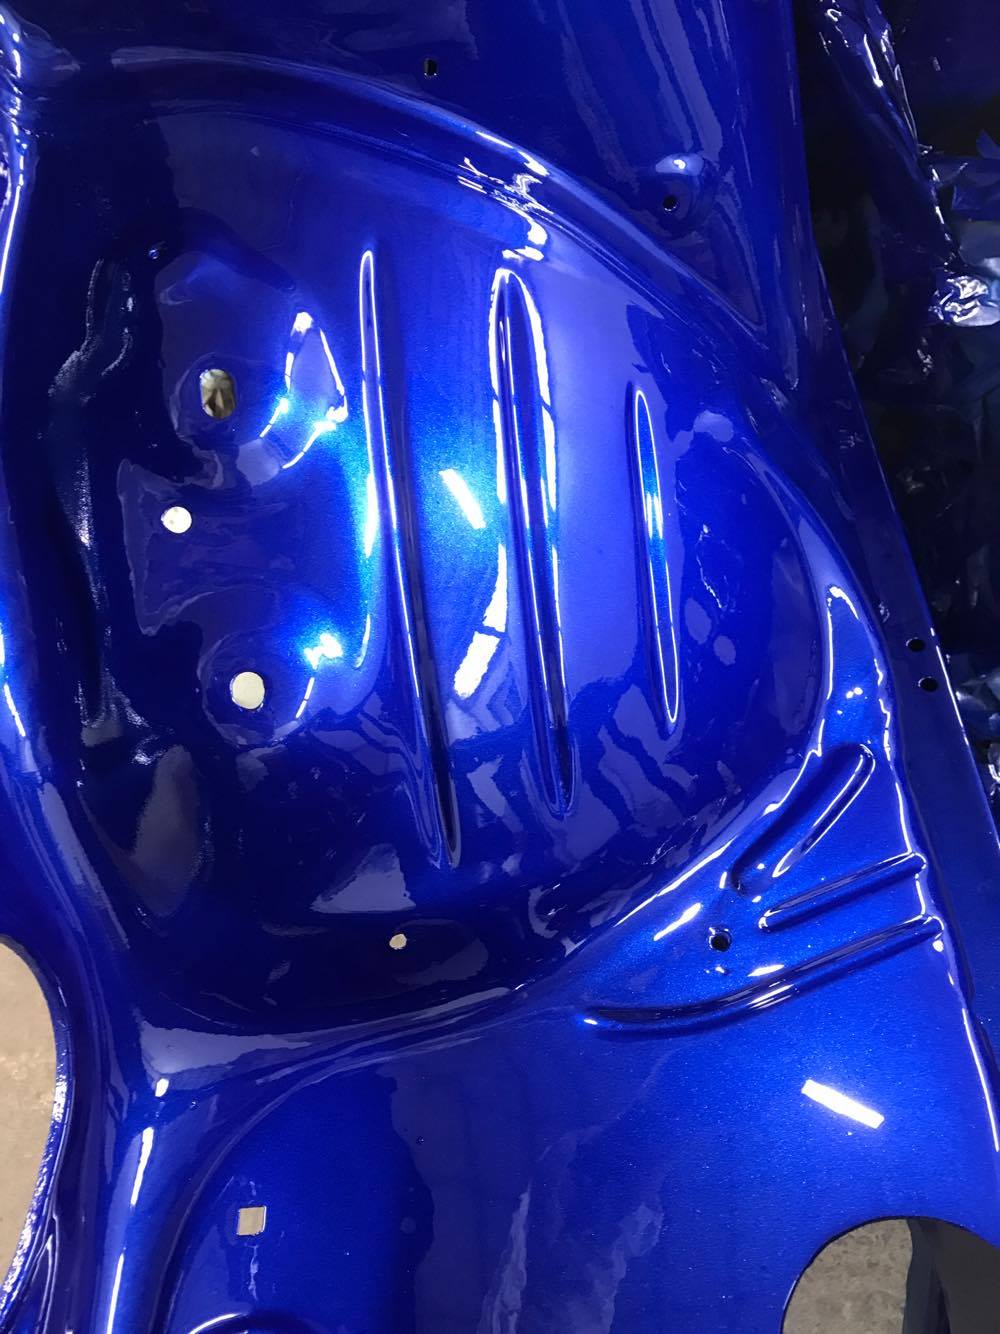
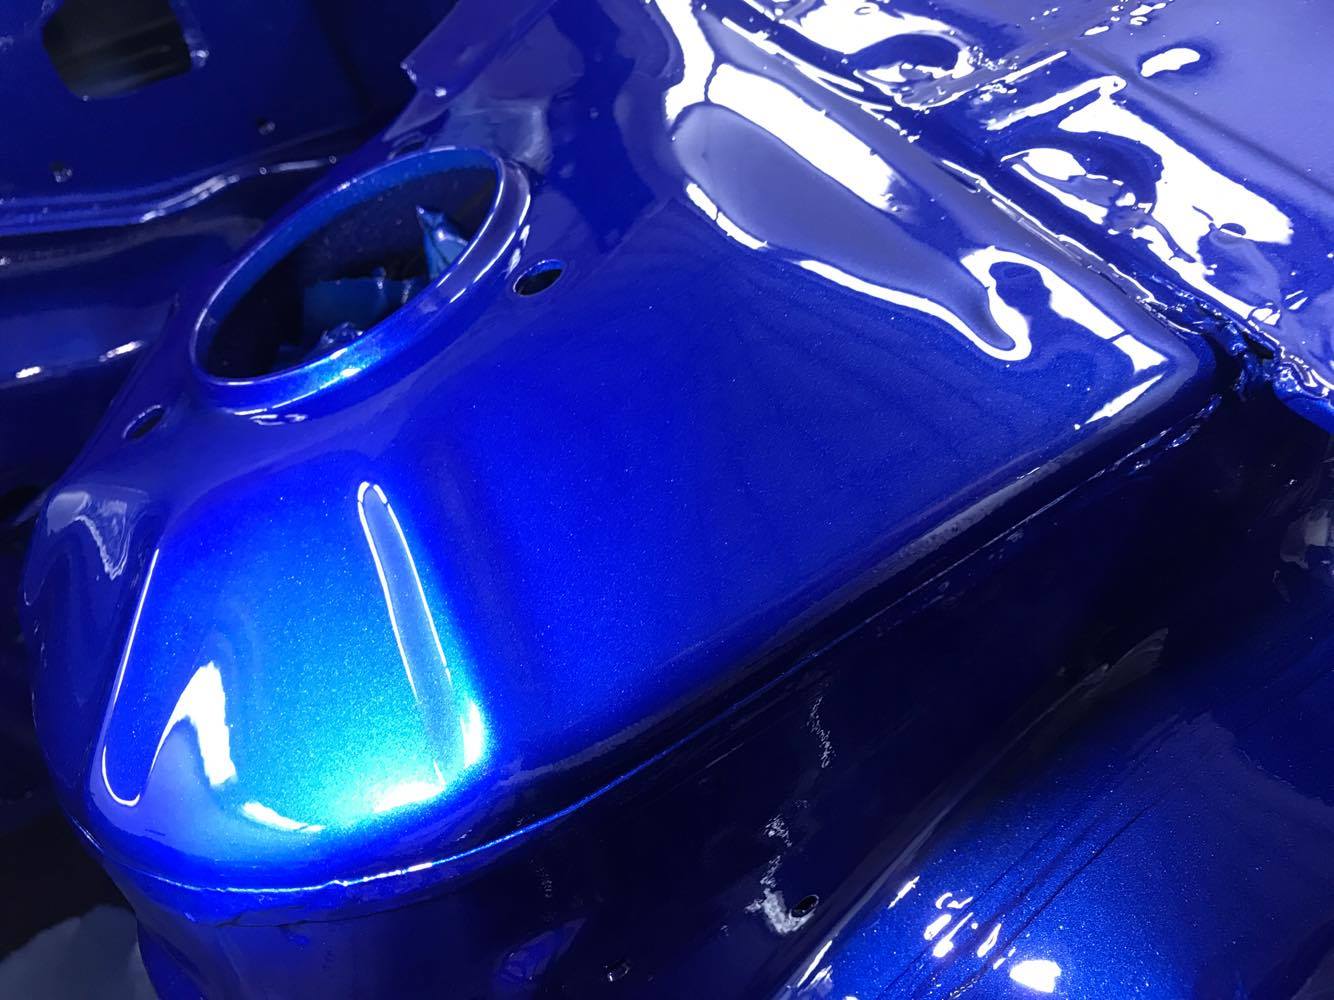
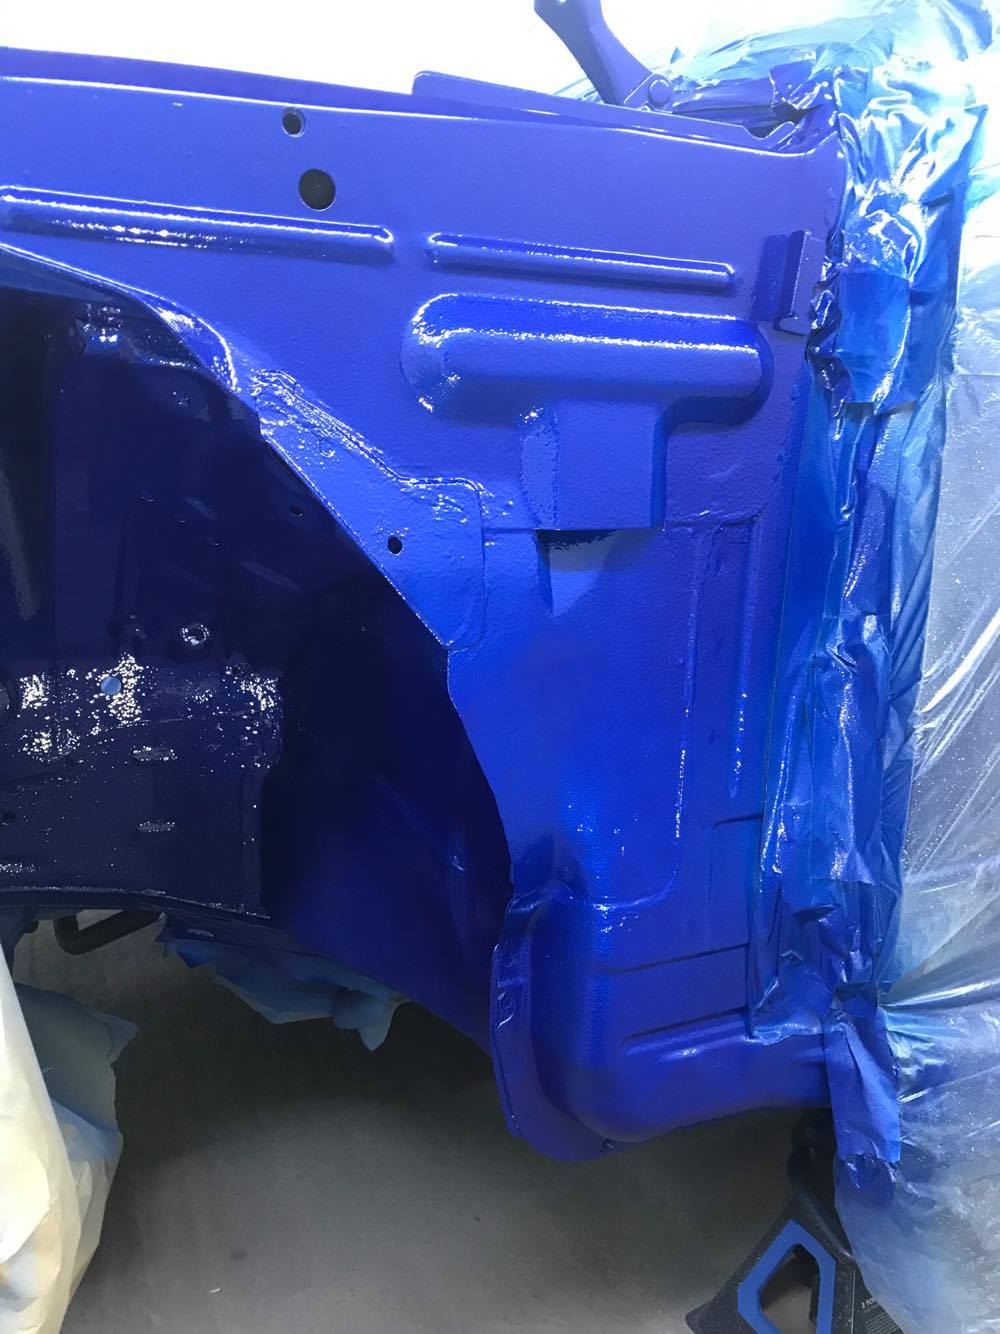
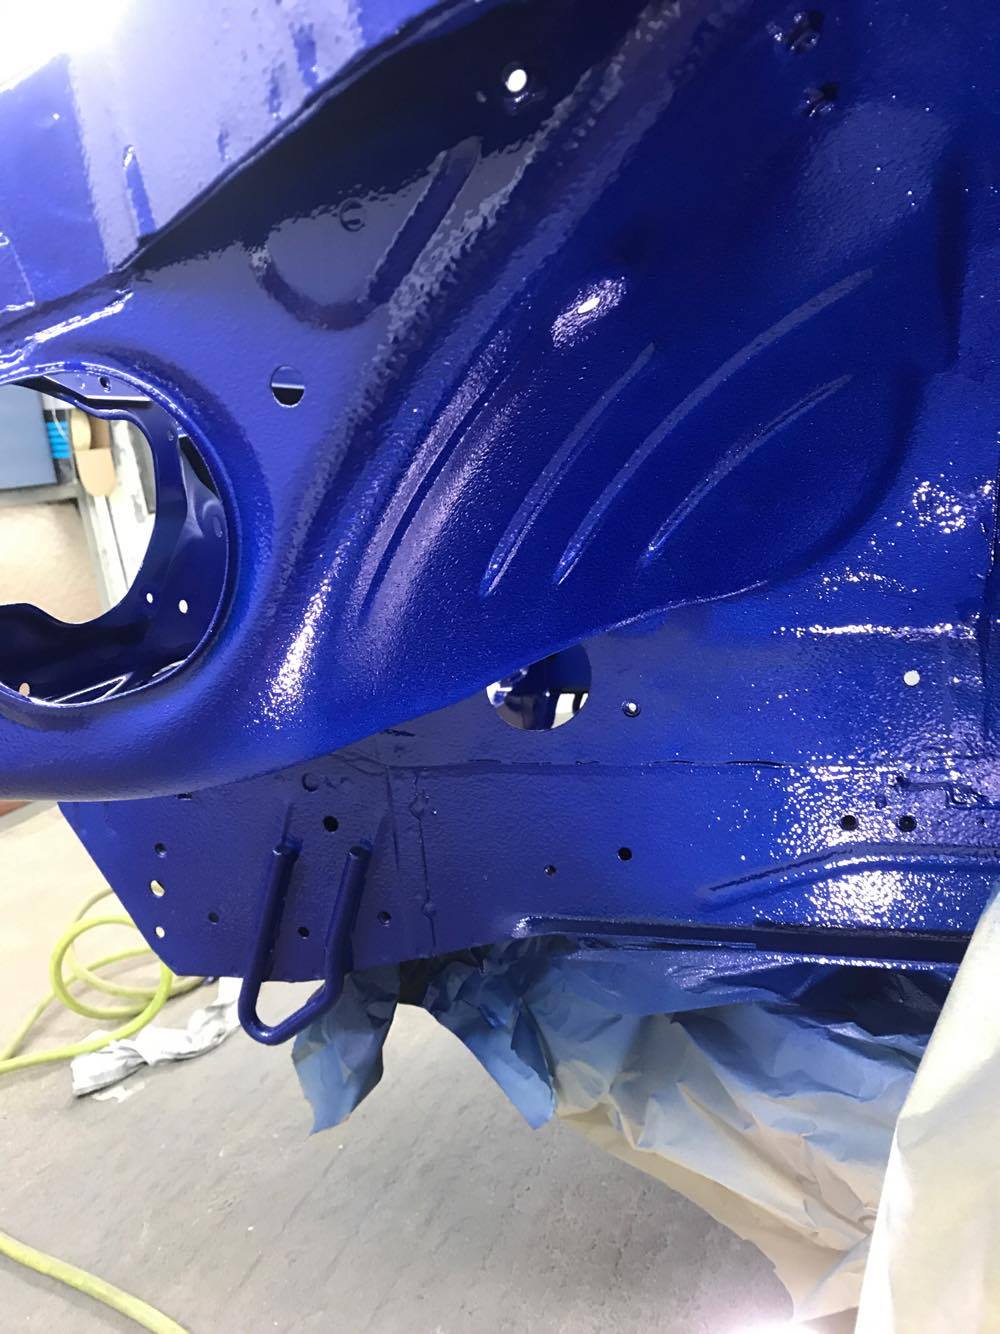
To match the fresh engine I opted to get the engine bay colour coded at the same time. It went off to Big Bear Kustoms for colour coding and battery tray removal. It also had the factory seam sealer removed, any rust treated/removed and was re-seam sealed. The whole front end has had the same treatment including stone chipping the inner arches. Again, super happy with the workmanship and I will be returning in the future to get the rest of the car up to the same standard.

There's a lot to update but I'll condense it down.
Firstly, my forged engine is now complete and returned from DY Engine Services in Bristol. Dave has done a phenomenal job with attention to detail that is second to none. I am very impressed with his work, his communication and enthusiasm. If it goes as good as it looks then this will be awesome!
To match the fresh engine I opted to get the engine bay colour coded at the same time. It went off to Big Bear Kustoms for colour coding and battery tray removal. It also had the factory seam sealer removed, any rust treated/removed and was re-seam sealed. The whole front end has had the same treatment including stone chipping the inner arches. Again, super happy with the workmanship and I will be returning in the future to get the rest of the car up to the same standard.
Keifer1903
Instagram Staff
Amazing quality of work buddy. Keep it up.
Sent from my iPhone using Tapatalk
Sent from my iPhone using Tapatalk
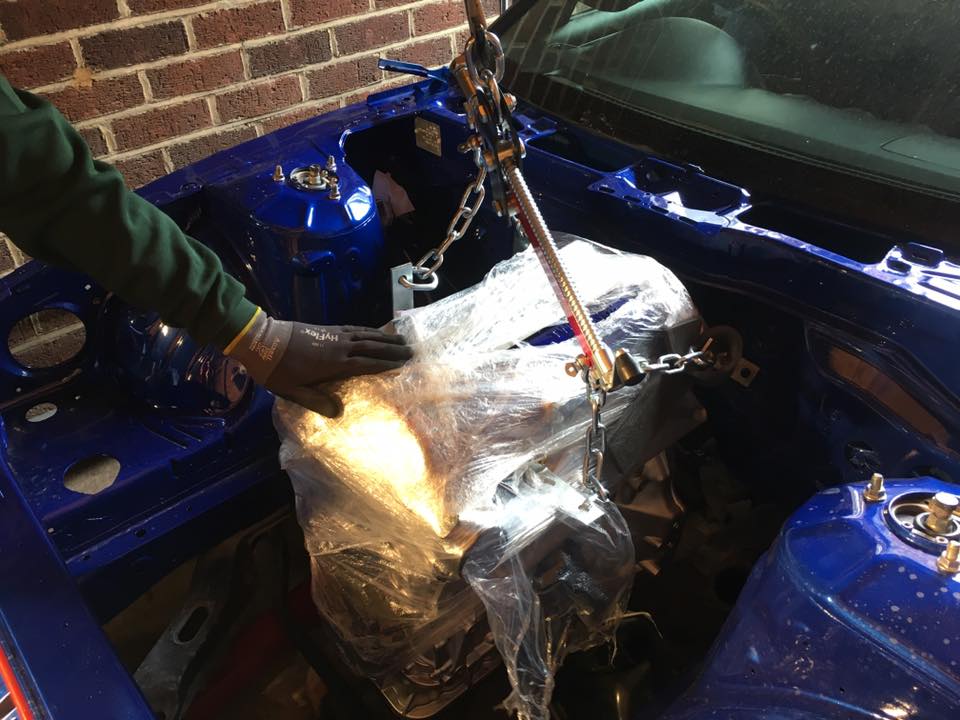
With the car returned, and a small window of opportunity to lend an engine crane, we dropped the engine into place.
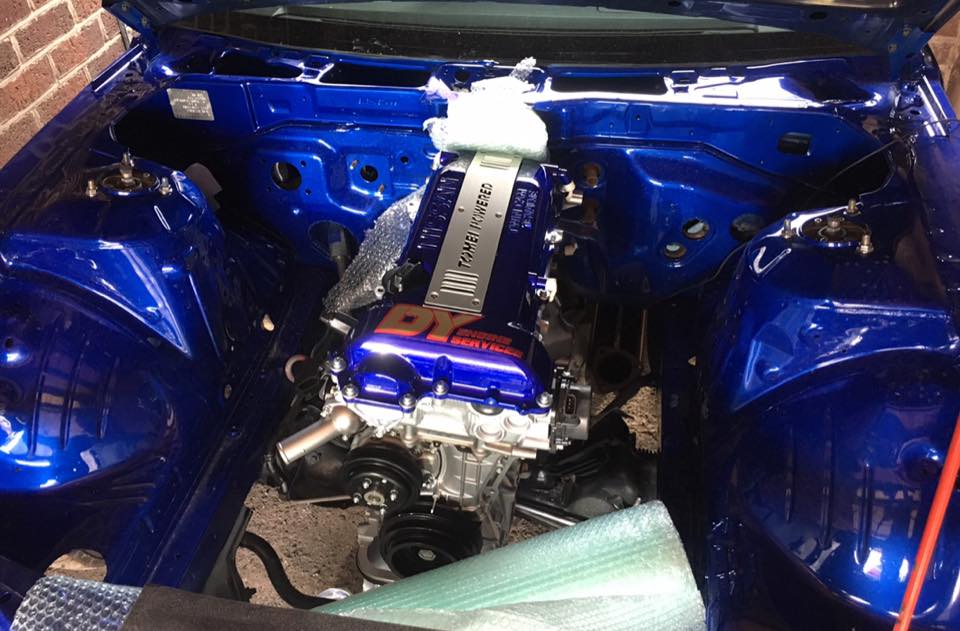
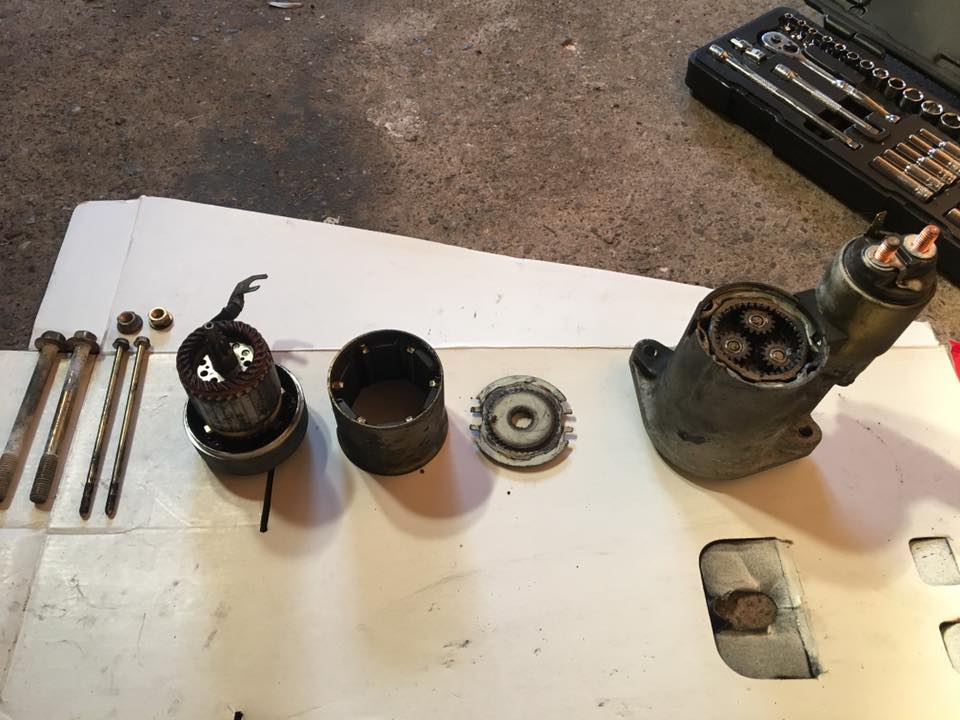
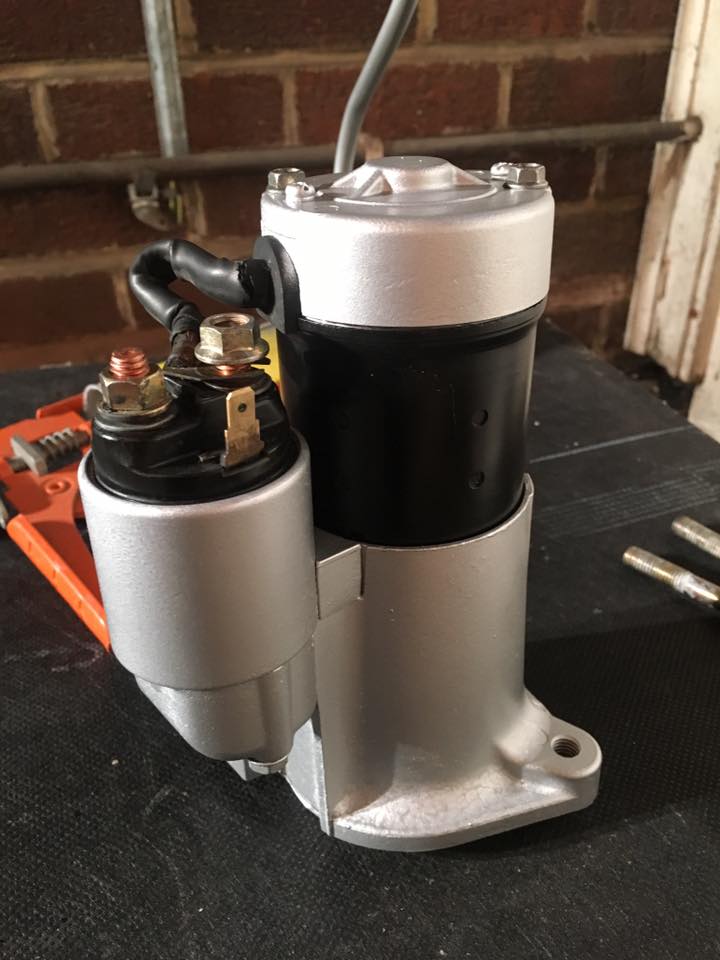
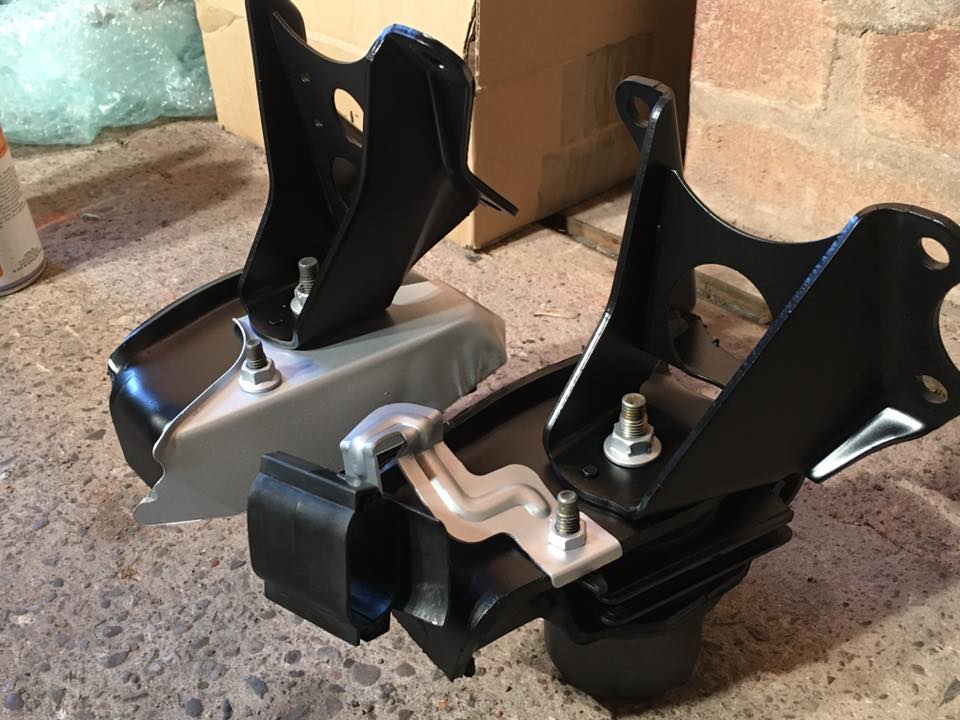
I have also been taking the opportunity to paint some parts up to bring them up to standard. Not every part will be done, but I'll do some of the more obvious bits and pieces as I fancy. Ultimate goal is to make it look smart and presentable but most importantly functional.
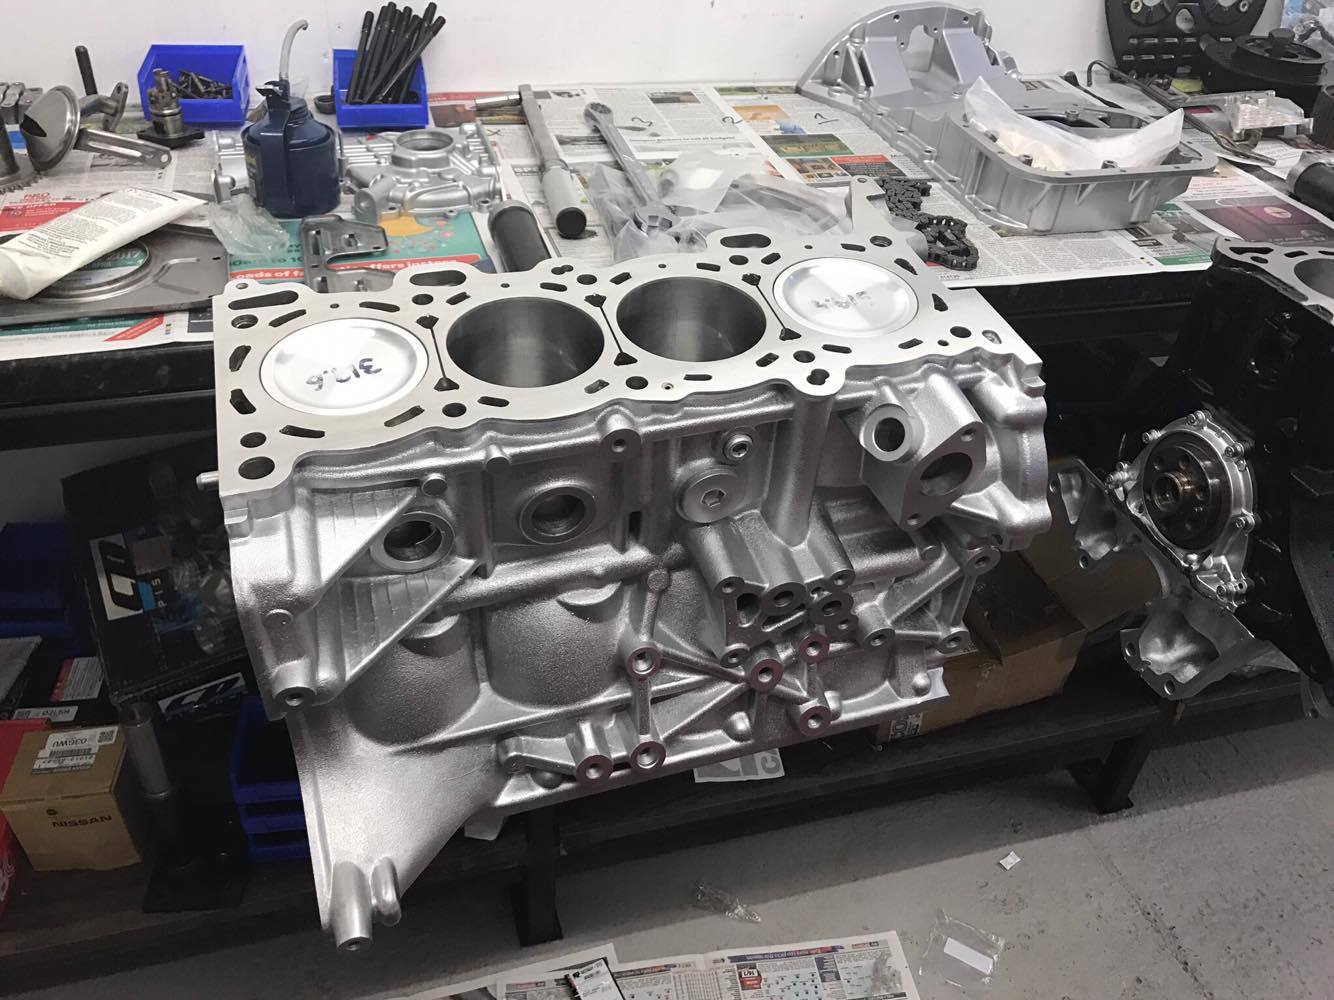
A quick overview of the engine rebuild for anybody who is interested.
-Strip engine, acid dip, clean, paint and powder coat all components (Candy Blue cam cover)
-Inspect and polish crank shaft
-Supply and fit all 16 Brian Crower valve guides
-Rebore cylinder block with deck plate
-Reface cylinder block and oil pump
-3 angle valve seats
-Remove squish pads from cylinder head
-New OEM Nissan exhaust manifold nuts/studs
-Full new gasket set
-New stem seals
-New water pump
-New oil pump
-New timing chain kit and guides
-ARP head studs
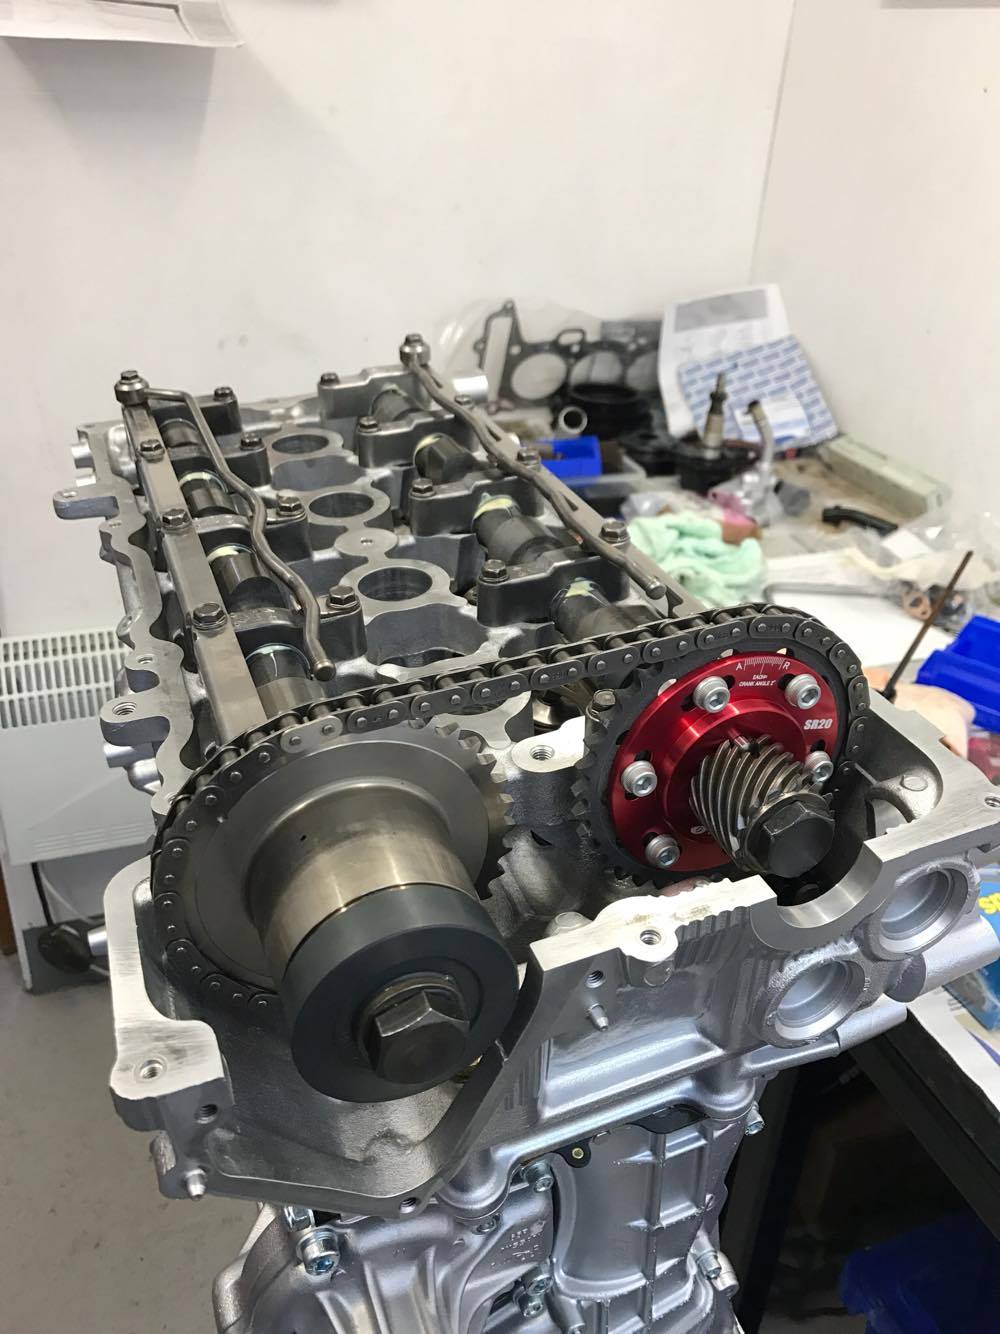
-Tomei 256 inlet and exhaust Poncams
-Tomei adjustable exhaust cam pulley
-Rocker arm stoppers
-New thrust washers
-ACL Race main and big end bearings
-CP forged pistons
-Manley steel con rods
-1.5mm Tomei head gasket
-Brian Crower valve springs
-Brian Crower titanium valve spring retainers
-New core plugs
-All new bolts throughout (replaced with stainless cap head where appropriate)
-Modified internal cam cover to accept rocker stoppers
-Timing chain guide
-Tomei spark plug cover
-Zinc plated all ancillary bolts
-Strip engine, acid dip, clean, paint and powder coat all components (Candy Blue cam cover)
-Inspect and polish crank shaft
-Supply and fit all 16 Brian Crower valve guides
-Rebore cylinder block with deck plate
-Reface cylinder block and oil pump
-3 angle valve seats
-Remove squish pads from cylinder head
-New OEM Nissan exhaust manifold nuts/studs
-Full new gasket set
-New stem seals
-New water pump
-New oil pump
-New timing chain kit and guides
-ARP head studs
-Tomei 256 inlet and exhaust Poncams
-Tomei adjustable exhaust cam pulley
-Rocker arm stoppers
-New thrust washers
-ACL Race main and big end bearings
-CP forged pistons
-Manley steel con rods
-1.5mm Tomei head gasket
-Brian Crower valve springs
-Brian Crower titanium valve spring retainers
-New core plugs
-All new bolts throughout (replaced with stainless cap head where appropriate)
-Modified internal cam cover to accept rocker stoppers
-Timing chain guide
-Tomei spark plug cover
-Zinc plated all ancillary bolts
Amazing build mate, what mods did you have to do to the cam cover for the rocker stops. I'm currently faffing with a spare one so would be good to know before I get it painted
Thank you for the kind comments!Amazing build mate, what mods did you have to do to the cam cover for the rocker stops. I'm currently faffing with a spare one so would be good to know before I get it painted
Unfortunately, I can't specifically detail the cam cover modification as it was done by the engine builder. I have however taken a look online and read that it is literally just a small piece of internal webbing that needs to be trimmed back. Check the link below.
http://www.at-r.fi/content/images/media/project_200sx_s14/s14_p03_4398.jpg
About Us
This owners club has been made in the benefit of owners of the Nissan Silvia chassis, allowing them to socially integrate and share their knowledge and advice.
We also intend to create events and social activities for members to take part in to help members meet and get to know each other.
We also intend to create events and social activities for members to take part in to help members meet and get to know each other.
Online statistics
- Members online
- 0
- Guests online
- 925
- Total visitors
- 925
Totals may include hidden visitors.