What's new

My S15... slow street build

Topper

Flying Scotsman
Joined
14 November 2005
Messages
4,312
Reaction score
0
Points
0
Location
Scotland
Website
www.s15oc.com
Country
x2 with the no helmets.......

Also, are you parked or did you go off - new tires cant be that great :)
 
Joined
24 July 2010
Messages
127
Reaction score
0
Points
0
Location
QLD - Australia
Website
www.omgpham.com
Country
Cool shots. Beefy tread!
Did the steering feel / effort change much from a 215 -> 245?

...and no helmets?
QLD can't be called a nanny state ;)
Steering immediately felt heavier driving around town, but quickly got used to that.

And yeah morning track sessions are pretty relaxed, no helmet needed. Time attack/sprint style events all require helmets though. On a plus side, these morning sessions cost only $20 and by far the easiest/safest way to test out any new mods.

x2 with the no helmets.......

Also, are you parked or did you go off - new tires cant be that great :)
Haha yeah I went off, was feeling way over confident. Was doing 160km/h @ 100M from the corner, wayyyyyyyyyyyy too fast and a lot of people went off at that corner too. I need more practice...
 
Joined
24 July 2010
Messages
127
Reaction score
0
Points
0
Location
QLD - Australia
Website
www.omgpham.com
Country
Because you have to remove the stock thermo AC cooling fan when installing Falcon AU fans, I wanted to try my best to keep the stock fan features while installing new dual Falcon AU fans. I've seen a few people/companies use the AC clutch +12v as a trigger to bypass the thermo switch and turn on the fans for AC use. This is all good but it also means that the fan will be running non-stop while AC is on even if you're driving at speed.

So I searched through the S15 service manual to figure out how the stock thermo fan is controlled. Turns out the thermo fan is controlled by various factors like coolant temp, vehicle speed and air conditioner switch. So the ECU has the ability to turn the fan on when AC is on, but also shut it off when vehicle is at speed.


Then I checked the ECU wiring diagram to figure out which pins control the fan relay. The ECU floats a ground on pin9 (LOW speed) and pin10 (HIGH speed), so I just remove those two fan relays and use pin9 and pin10 to trigger my own fan relays.

S15 ECU Diagram - http://omgpham.com/mystuff/s15-ecu-fan-02.jpg

So I drew up the diagram below, I stole most of it from the Ford forums. So this keeps both LOW and HIGH speed, uses a dual thermo switch and still allows the ECU to control the fans for AC use. When on LOW speed, both fans are run in series for 6V each. HIGH speed, fans are run in parallel for the full 12V each.


Does this all look safe and good to go? Is it possible to put fuses somewhere to protect the ECU, if any protection is needed?
 
Last edited:
Joined
2 February 2010
Messages
13
Reaction score
0
Points
0
Location
ireland
Country
what did you get done to get the arches like that and did you need to get paint work done after it???mad how a set of wheels and d flares make such a difference to these cars,,savage lookin
 

craig8585

I'm so cool, I have my own fan thread :p
🔥 Contributing Member 🔥
Joined
16 November 2007
Messages
4,118
Reaction score
0
Points
0
Location
Lichfield, UK
Country
I like the amount of effort you have put into this. It looks like it should work really well :)
 
Joined
24 July 2010
Messages
127
Reaction score
0
Points
0
Location
QLD - Australia
Website
www.omgpham.com
Country
bleeehhhhh more uni and business stuff today so couldn't get much done today either =(

I picked up my intake manifold from Clifton Engineering, had them drill and tap a thread for the temp sender for me. I wanted the fan controller temp sender to be as close as possible to the stock senders.


Then I got back home and finished laying down the wires for the Defi sensors and fan controller temp sender. Was also able to make up ONE braided hose, going from the oil filter block to the relocator. Was my first time making a braided hose, and I did not enjoy it at all.

 
Joined
24 July 2010
Messages
127
Reaction score
0
Points
0
Location
QLD - Australia
Website
www.omgpham.com
Country
Some more photos of me making up braided hoses, I enjoy doing it now =)

http://omgpham.com/oil-cooler-x-thermo-fan-day-4


Test mounting the cooler core, fit pretty well I must admit. The S15 front vents are perfect for it.


Adding extra bracing to keep the cooler core secure. Just used some aluminium plate I had laying.


Braided hoses fitted up and routed into engine bay.
 

Larsz

Joined
9 September 2008
Messages
149
Reaction score
0
Points
16
Location
Netherlands
Country
Good spot for one. Im looking into it in the future! Nice write up to on the thermo fan! Keep on going :)
 
Joined
24 July 2010
Messages
127
Reaction score
0
Points
0
Location
QLD - Australia
Website
www.omgpham.com
Country
http://omgpham.com/oil-cooler-x-thermo-fan-day-6

I was made aware this morning that the orientation of my oil cooler core was incorrect. Having both inlet/outlet located on the bottom causes air pockets to occur, and also very ineffecient cooling. The ideal way to mount the cooler core is to have it vertical with inlet at the bottom and outlet at the top. As oil enters the bottom and fills up the core, air is pushed out of the system.

So spent most of the morning making new brackets to re-mount the cooler core. Fortunately I didn't have to make any new braided hose, the existing ones were the correct lengths =)

New brackets made up.


All mounted up for a test fitting.

Also spent the morning prepping the relay/box. Two factory relays were removed and the rest were re-arranged to make some room for the new relays. All wires that won't be used were heat-shrinked and tucked away. Wires that are to be used were tagged for tomorrow.


Also finished up the Defi sensor wires and tidied it all up. You can also see the extra wire I ran for the fan controller temp sensor.

 
Joined
24 July 2010
Messages
127
Reaction score
0
Points
0
Location
QLD - Australia
Website
www.omgpham.com
Country
The Ford Falcon thermo fans had to be trimmed to fit up nicely with the radiator and engine bay. Just used an angle grinder and Dremel. The thermo fans were then attached to the radiator by using some thermo fan zip ties, they work pretty damn well.


Fan mounted up to the radiator.

Installing the radiator/fans back into the engine bay was a tight squeeze, fits like a glove. Had to move the AC drier slightly too, but once the radiator/fan is in you can move the AC drier back into it's original position.


Joined
24 July 2010
Messages
127
Reaction score
0
Points
0
Location
QLD - Australia
Website
www.omgpham.com
Country
Wiring in the thermo fan relays was pretty straight forward as I've been planning this for awhile now. Will do a indepth build log for the thermo fans in the next couple of weeks.

In the mean time you can read some technical details here -
http://omgpham.com/nissan-s15-thermo-fan-setup

I wanted to install all the relays and fuse into the factory relay box, so I went to the local wreckers to buy some Nissan relay sockets. These are great because they click into the relay box, very neat looking. I also picked up some Ford relays since they were rated for the fans.

Wiring the socket up.


Test fitting the relays into the socket.


All done!
 

Topper

Flying Scotsman
Joined
14 November 2005
Messages
4,312
Reaction score
0
Points
0
Location
Scotland
Website
www.s15oc.com
Country
Fan and cowling setup looks very good/neat. What rad is that you have it mounted to? Fordy?
 
Joined
24 July 2010
Messages
127
Reaction score
0
Points
0
Location
QLD - Australia
Website
www.omgpham.com
Country
On my never ending quest to clean up my engine bay, I decided to replace my Cusco oil catch can with something proper.

By random chance I stumbled upon the perfect candidate, 42 Draft Designs' Stealth Oil Catch Can. I ordered it locally through the Australian distributor, who's also located in Brisbane.

Carformance - http://www.carformance.com.au/products/42-draft-designs/stealth-oil-catch-can.html


What I like most about their design, is the fact that it actually has a four layer filter which will catch any oil. This means that the gases will return to your intake without any oil/oil vapours. Aesthetics wise, the can is very clean and factory looking. The reason why I purchases the crinkle black finish =)

The multi-layer filter used inside the 42 Draft Designs catch can.

When I ordered the catch can, also ordered the optional quick drain fitting. It's just like a little tap with a hose so you can easily drain any oil, rather then removing the catch can to remove the drain plug and empty it out manually. Well worth the extra $10, and Carformance stocks them as well.


The plan was to mount it nicely in the front of the engine bay, so I mocked up a template for the bracket on some plastic. I then transferred it to paper and then photocopied it so I could glue it to the aluminium.


I used my trusty angle grinder to roughly cut out the bracket. Then cleaned it up with my Dremel, a metal file and sandpaper.


This is the can all mounted up with the custom bracket, the filtered fumes are vented back into the intake to keep it legal. The hoses are 3/4" and were purchased from Enzed awhile ago, they are oil safe and can withstand the heat inside an engine bay. They are made by Parker and part number is 611-12.

 
Joined
24 July 2010
Messages
127
Reaction score
0
Points
0
Location
QLD - Australia
Website
www.omgpham.com
Country
So a few updates, but here is the first one - http://omgpham.com/thermostats-x-headlights

There hasn't been going on much lately, mainly a lot of reading and researching. But will cover all that in a later post =)

I've read about the many benefits and disadvantages of upgrading the thermostats in our SR20DET engines awhile ago, overall it's an interesting topic that can be quite complicated depending on your setup. The main concern with running a lower threshold thermostat means that because it starts to open earlier, your radiator will start cooling the coolant earlier. This will lead to your engine running cooler and possibly too cold, your engine will never reach the optimal operating temperatures.

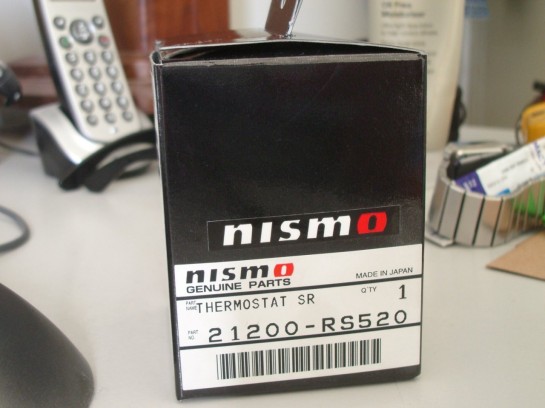
A Nismo thermostat popped up for sale, so I decided to experiment =)


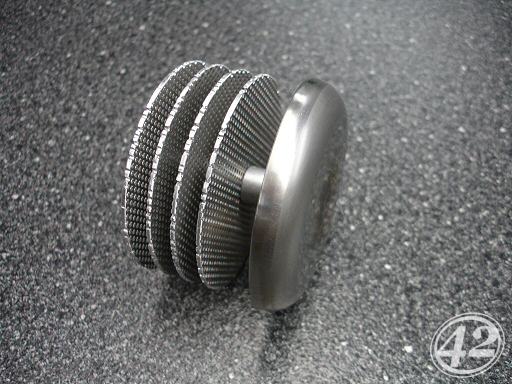
Before installing the Nismo thermostat, I popped it into some water and made sure that it was functioning correctly. The Nismo unit starts to open at 62.5C and is fully open by around 76C. Compared to a stock unit which starts to open at 76.5C and full opens at around 90C.

After installation, started her up and monitored coolant temps. The temps increased at the same rate and reached 83C like usual and then the thermos kicked in to drop it back to 78C. There was pretty much no difference when idling! Now the improvements were found when the thermos kicked in, they stayed on for less duration to drop that 5C. My theory is that because the Nismo thermostat is opened fully at 78-83C that means more coolant is flowing, so the engine is being cooled down faster. With the stock thermostat, it's only partially open at 78-83C so won't cool as fast.

So that myth about over cooling is busted... well not really. The reason my S15 didn't over cool was because I run thermos instead of a clutch fan. Because thermos are completely off during warm up, the engine temps are allowed to rise at the same rate. But in a car with a clutch fan, the clutch fan is never really "off" so it's constantly cooling down the radiator and it doesn't allow the engine to reach optimal temperature. As soon as the Nismo thermostat opens at 62.5C, cold coolant starts flowing and cooling down the engine. It's also important to know that when a clutch fan is "off" it's actually spinning at 25% capacity relative to the water pump RPM, and it reaches a maximum of 75%.

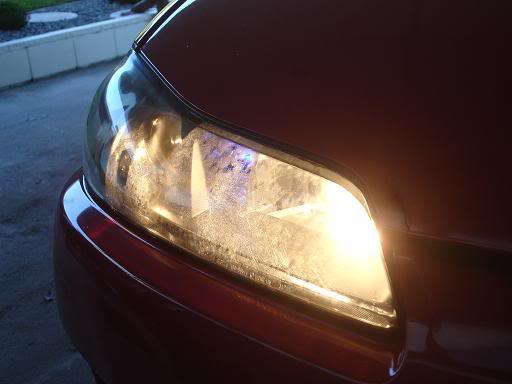
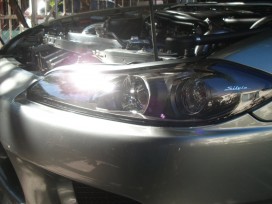
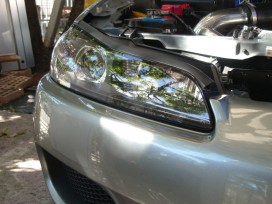
Cloudy S15 headlights....


During the last couple of weeks, I also ordered a pair of brand new headlights for the S15. The old ones were cracked and cloudy, was filling up with water and dust. So when I called up Nissan to get some prices, they wanted $1300AUD for the pair!!! GTFO I said, then I looked on Yahoo Japan and it worked out to be around $1000-$1200AUD landed...

I decided to try my luck and look at suppliers in the US. Damn they get everything for so much less over there, I paid around half of what Nissan Australia wanted for the pair! Strange thing is, the S15 was never sold in the US and it's not a legal grey import either because of the RHD issue. Anyway, a few weeks later they arrived at my door and I went about installing them.

The ones I ordered are the JDM versions, very similar to the ADM except they have a different shaped parker light, and the rear house is black instead of clear.


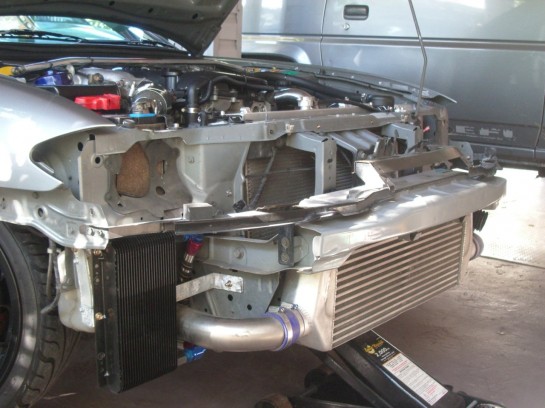
Wasn't a completely straight forward process like I thought it would be. Because I have my intercooler piping running through the battery tray, a small battery placed side ways had to be used. Because the battery being sideways, it was hitting against the headlight's rear cover. After looking at my old headlight, it was obvious the previous owner simply removed the cover and allowed the elements to get inside the headlight assembly.

I decided to do it properly and cut out a circular piece out of some plastic. I then fixed it to the rear of the headlight with some silicone sealant. It's also very easy to remove if I ever need to replace a bulb.

That's it for now, but there will be a large post in two weeks talking about the aerodynamics of cooling. Have a few awesome parts arriving too, so stay tuned!
 
Top