
The method I used here caused no clips to snap, no plastics to melt, and generally, no damage AT ALL to the headlight unit. ")
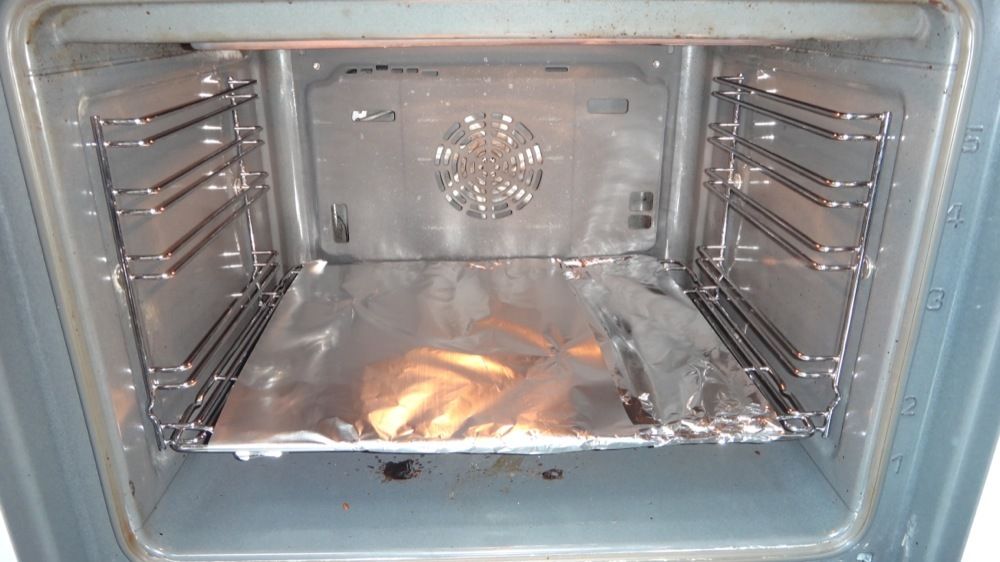
First, preheat oven to 90'c and arrange the shelves so that you can squeeze your headlight in. I used tin foil to prevent tray imprints on my headlight, and also to prevent direct metal contact, and meltage! I did mine like so:
Whilst this is happening, ensure you remove the wiring loom from the rear (it all unclips pretty simply), as a melted wiring loom would be a bad start to the day. Also, around the back of the unit are 5 small screws holding the lens to the big black housing. Remove them!
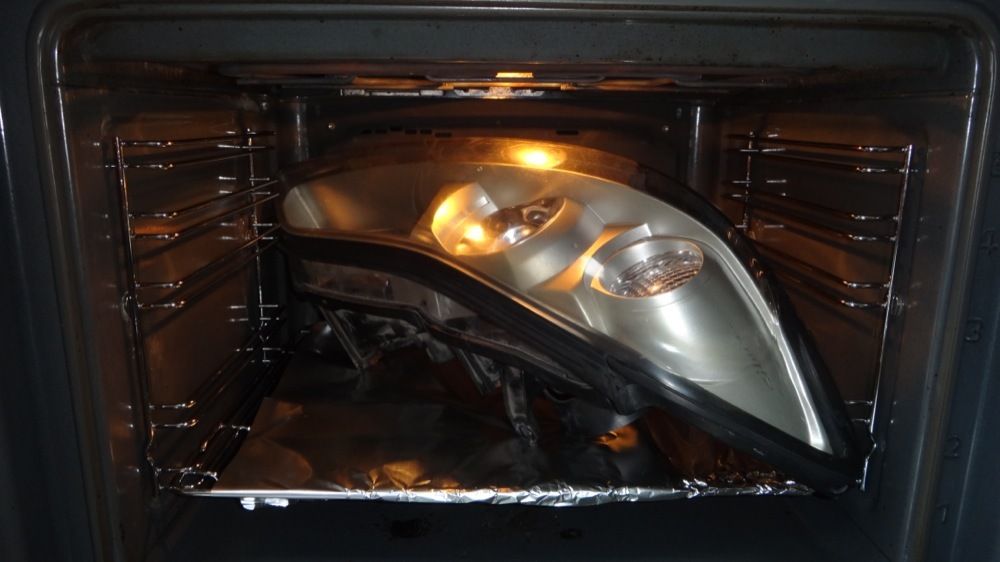
Once oven is up to temp, slot the headlight in, ensuring that it is not touching any sides, and preferably lense upwards. This prevents any chance of anything staining the lense when it gets hot. (Yes it was a tight fit in my oven, but worked!):
Now, make yourself a nice Yorkshire Tea and wait for 10 minutes.
Once your ten minutes are up, the headlight unit itself will feel pretty warm. But not too hot to hold. (Just make sure you dont touch any metal bolts with your hands... Also the projector part of the unit is solid metal.. so take care!
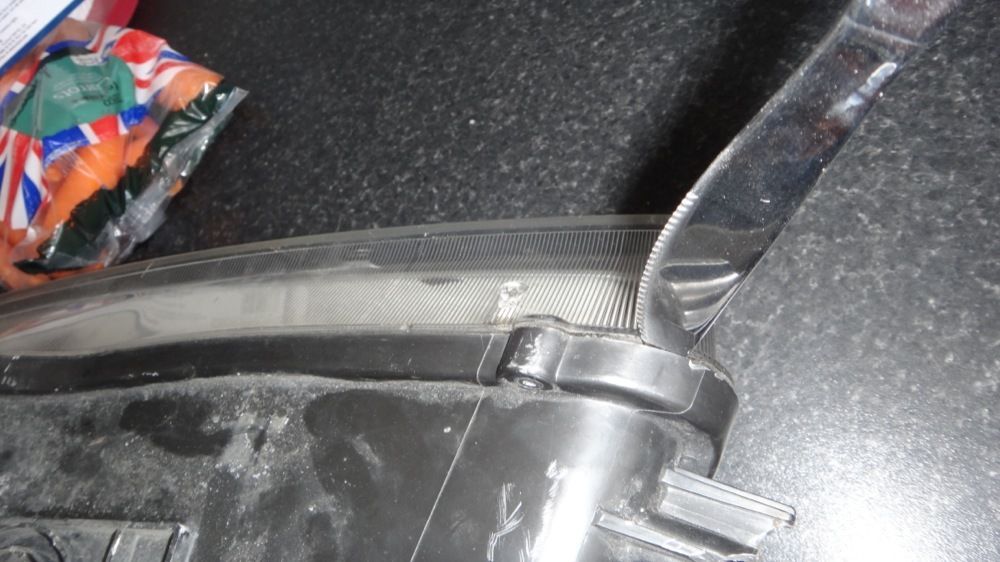
You can then proceed to find a small gap to stick a blunt knife into and pry yourself a finger grab:
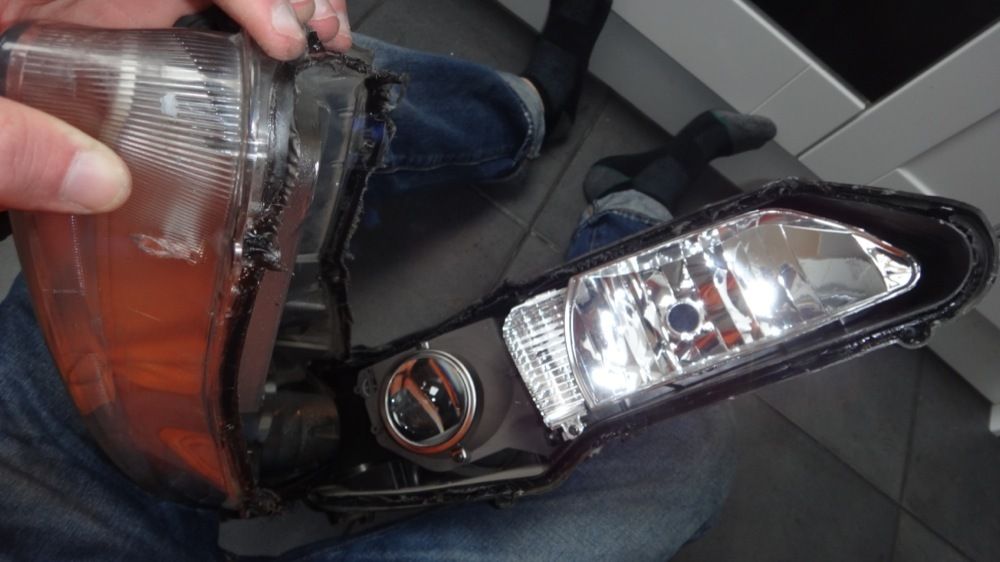
Once you've got a bit of a crack appearing, then you need to apply some brute force as the glue is out of reach of the knife. You really do have to get two hands on it and pull like mad. I started with the full beam side as this was the easiest to get a hold of:
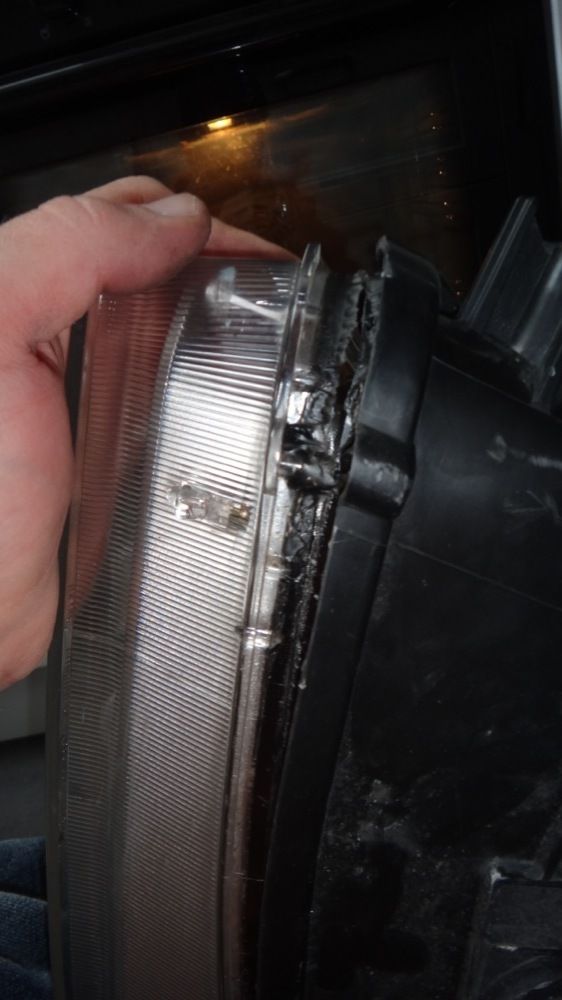
Keep on pulling and it will peel away as the plastic is still soft. (the black plastic will be a lot softer than the lens. use that to your advantage.
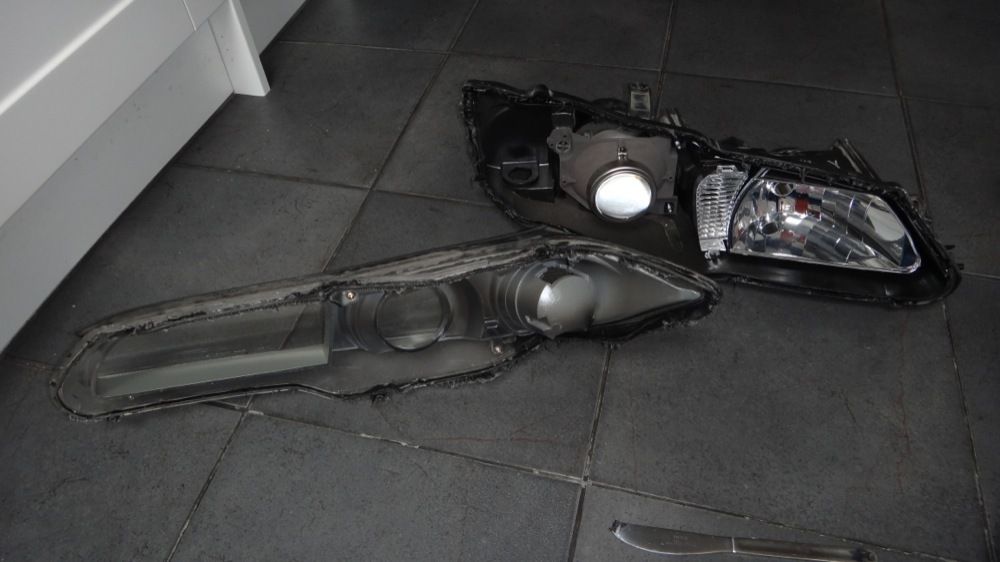
And hey, Voila! One times, split headlight:
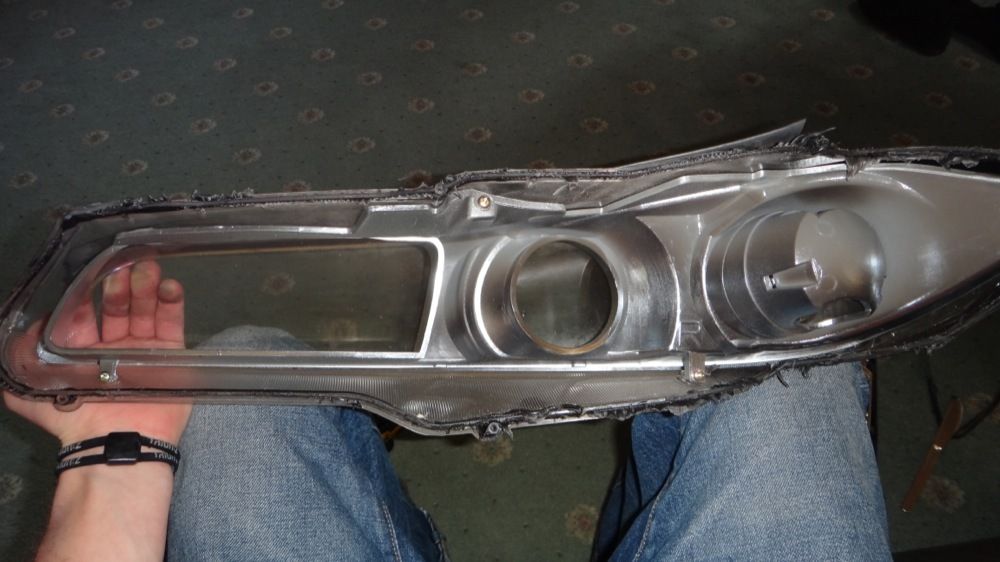
The remainder is pretty simple to take apart using the variety of 8mm bolts and screws holding stuff in place.
The projector lamp and full beam however need to be fully unscrewed using them 4 massive heads on the back of the unit. Once they're fully undone, it'll just fall out.
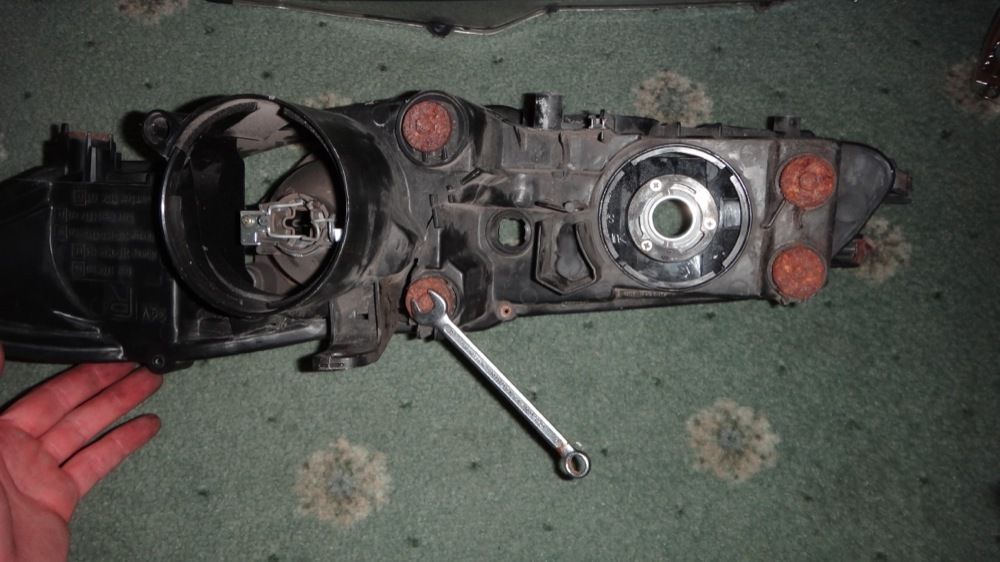
Fully disassembled:

Enjoy!
First, preheat oven to 90'c and arrange the shelves so that you can squeeze your headlight in. I used tin foil to prevent tray imprints on my headlight, and also to prevent direct metal contact, and meltage! I did mine like so:
Whilst this is happening, ensure you remove the wiring loom from the rear (it all unclips pretty simply), as a melted wiring loom would be a bad start to the day. Also, around the back of the unit are 5 small screws holding the lens to the big black housing. Remove them!
Once oven is up to temp, slot the headlight in, ensuring that it is not touching any sides, and preferably lense upwards. This prevents any chance of anything staining the lense when it gets hot. (Yes it was a tight fit in my oven, but worked!):
Now, make yourself a nice Yorkshire Tea and wait for 10 minutes.
Once your ten minutes are up, the headlight unit itself will feel pretty warm. But not too hot to hold. (Just make sure you dont touch any metal bolts with your hands... Also the projector part of the unit is solid metal.. so take care!
You can then proceed to find a small gap to stick a blunt knife into and pry yourself a finger grab:
Once you've got a bit of a crack appearing, then you need to apply some brute force as the glue is out of reach of the knife. You really do have to get two hands on it and pull like mad. I started with the full beam side as this was the easiest to get a hold of:
Keep on pulling and it will peel away as the plastic is still soft. (the black plastic will be a lot softer than the lens. use that to your advantage.
And hey, Voila! One times, split headlight:
The remainder is pretty simple to take apart using the variety of 8mm bolts and screws holding stuff in place.
The projector lamp and full beam however need to be fully unscrewed using them 4 massive heads on the back of the unit. Once they're fully undone, it'll just fall out.
Fully disassembled:
Enjoy!


