
This guide was made by 'Adams' on SXOC...
The job is really simple - all the tools needed are a 8mm and 10mm socket spanner, a screwdriver plus some instant gasket.
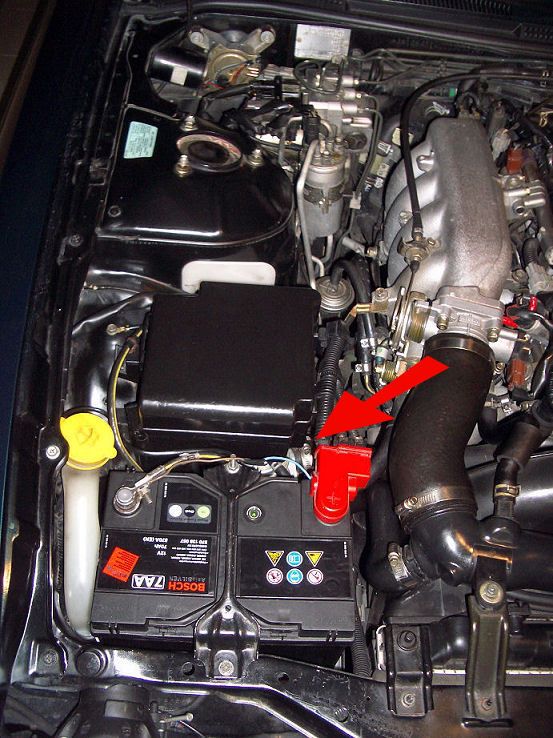
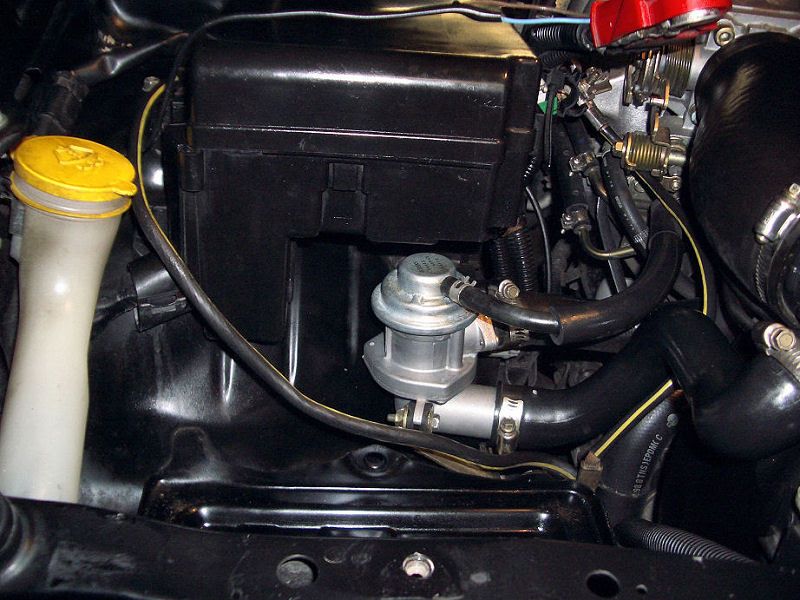
1) The factory DV is located behind the battery, just under the fuse box:
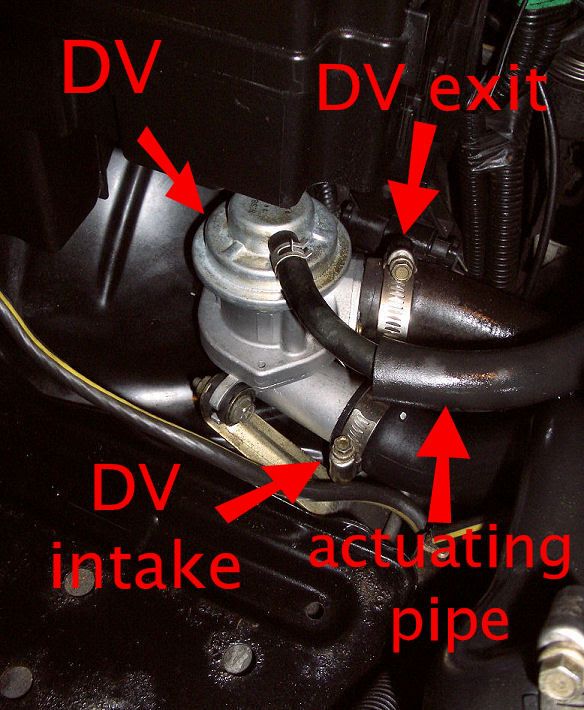
2) First you need to remove the battery, so undo the negative and than the positive terminal, remove the 2 screws (10mm) holding the battery bracket and finally remove the battery itself. (it might be a good idea to un clip the positive cable from its holder on the fuse box in order to move it out of the way during DV removal). Then you should be able to see the DV:
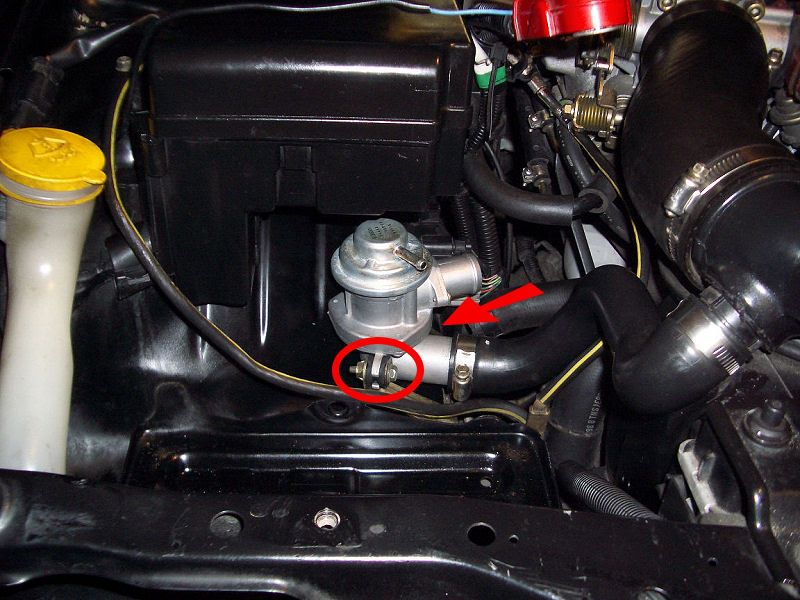
3) Now you need to remove all the pipes from the DV. The most difficult one to take of is the DV intake as it's made of plastic not rubber. I found it easier to unscrew the DV from it's holder - 2x 10mm screws shown below - and then remove the last pipe by moving the DV itself:
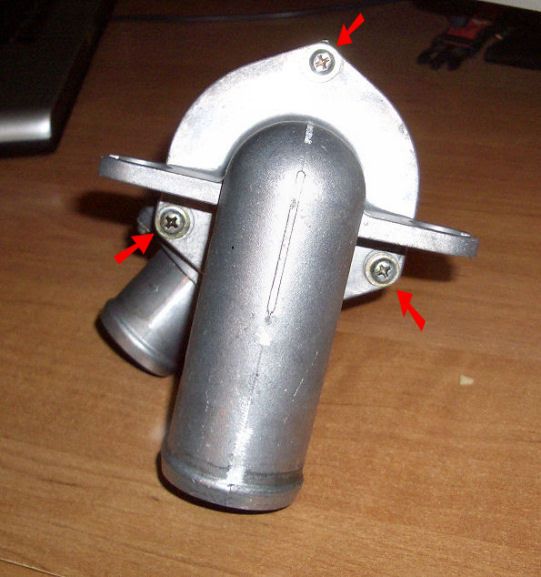
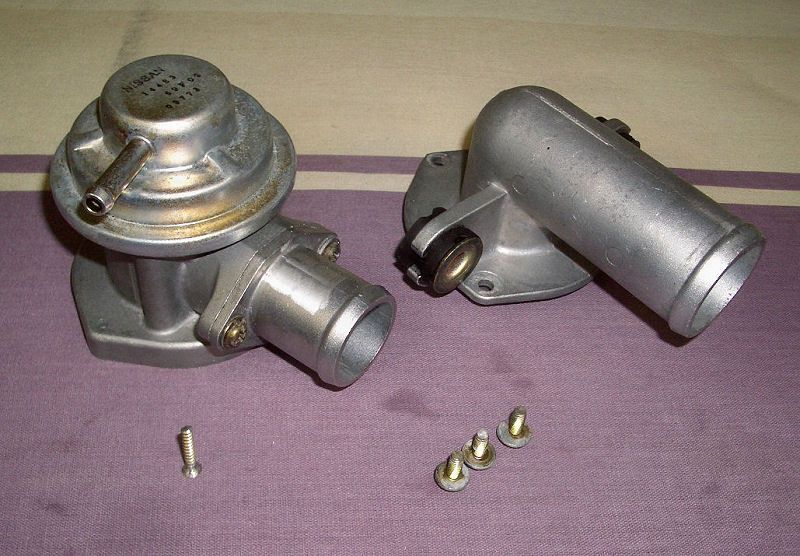
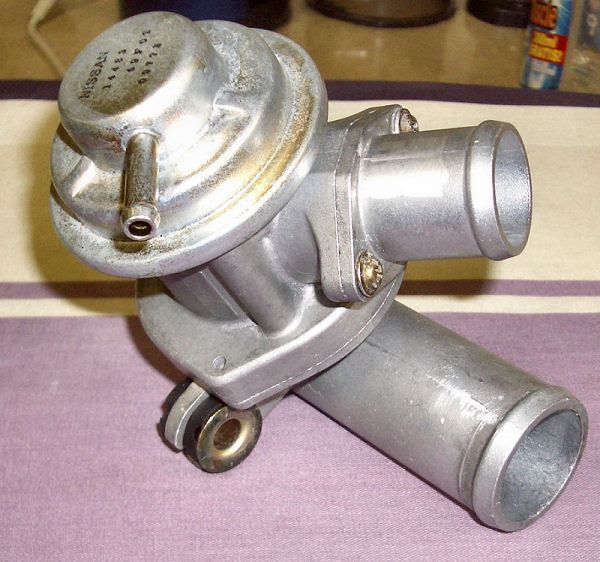
4) When you manage to work the DV lose you need to take it apart - only 3 bolts secure it:
5) That's how it looks taken apart:
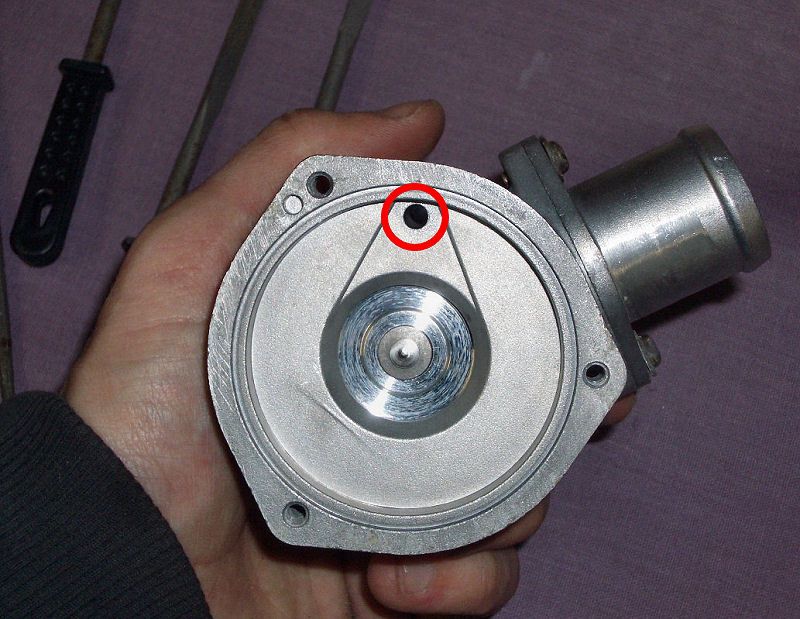
6) The hole we need to block is located on the underside of the upper half:
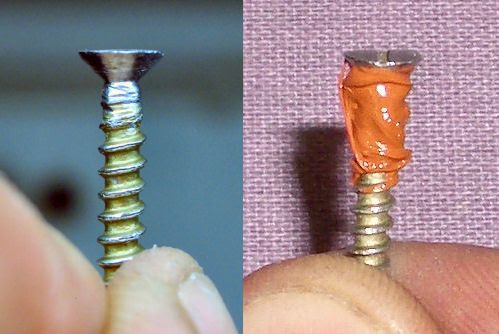
7) I used a small screw plus some instant gasket to seal the hole. If you go that way you have to be careful as the head of the screw may be too big and won't let the upper and lower parts of the DV align correctly (an you'll get a boost leak) - it's quite a tight fit:
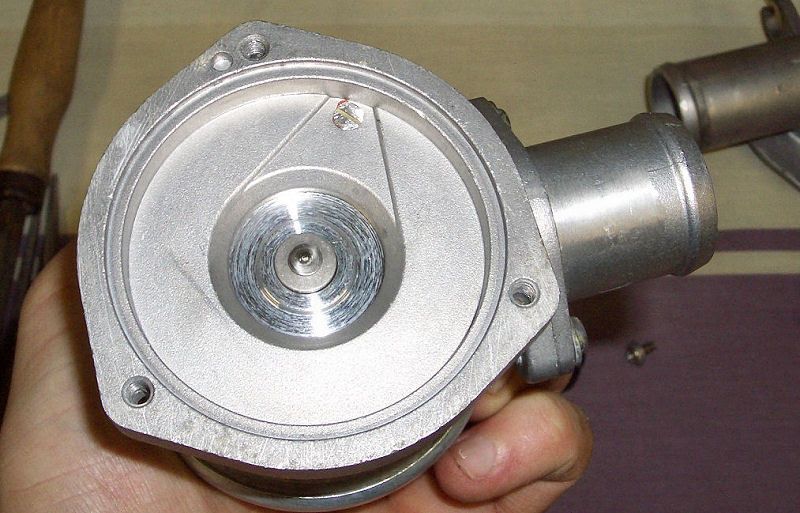
8) And blocked:
9) Than put the DV back together - be sure all the bolts (3
 ) are tight!
10) Attach all the pipes (3
 ) and mount the DV back in place. Then it's only the battery and you are good to go!
Basically I think it might be a better idea to tap the hole in the DV and seal it with a small bolt as Egon suggested, but the above method should work fine - the screw ain't got nowhere to go!
The job is really simple - all the tools needed are a 8mm and 10mm socket spanner, a screwdriver plus some instant gasket.
1) The factory DV is located behind the battery, just under the fuse box:
2) First you need to remove the battery, so undo the negative and than the positive terminal, remove the 2 screws (10mm) holding the battery bracket and finally remove the battery itself. (it might be a good idea to un clip the positive cable from its holder on the fuse box in order to move it out of the way during DV removal). Then you should be able to see the DV:
3) Now you need to remove all the pipes from the DV. The most difficult one to take of is the DV intake as it's made of plastic not rubber. I found it easier to unscrew the DV from it's holder - 2x 10mm screws shown below - and then remove the last pipe by moving the DV itself:
4) When you manage to work the DV lose you need to take it apart - only 3 bolts secure it:
5) That's how it looks taken apart:
6) The hole we need to block is located on the underside of the upper half:
7) I used a small screw plus some instant gasket to seal the hole. If you go that way you have to be careful as the head of the screw may be too big and won't let the upper and lower parts of the DV align correctly (an you'll get a boost leak) - it's quite a tight fit:
8) And blocked:
9) Than put the DV back together - be sure all the bolts (3
10) Attach all the pipes (3
Basically I think it might be a better idea to tap the hole in the DV and seal it with a small bolt as Egon suggested, but the above method should work fine - the screw ain't got nowhere to go!

")

