
Looking awesome buddy b!
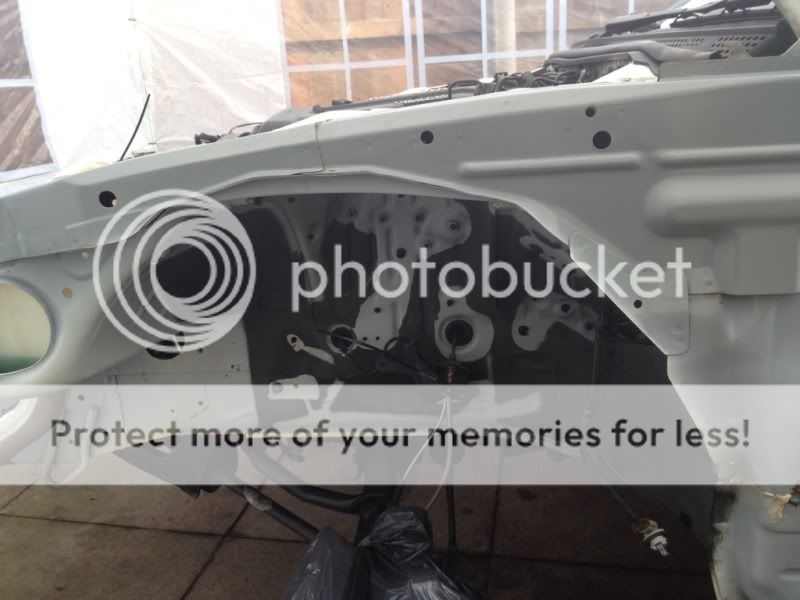
Was your car under sealed to start with? whats the best way to remove undersealer before hand? mayeb a job for the future ")
- Joined
- 18 September 2011
- Messages
- 726
- Reaction score
- 1
- Points
- 0
- Location
- West Midlands, England
- Country
-

No dude, it was a fresh import with me being the first owner. See:Was your car under sealed to start with? whats the best way to remove undersealer before hand? mayeb a job for the future
Yes mate get on it, a lot of people leave it too late and then have to repair rust. Get on it ASAP!
- Joined
- 18 September 2011
- Messages
- 726
- Reaction score
- 1
- Points
- 0
- Location
- West Midlands, England
- Country
-
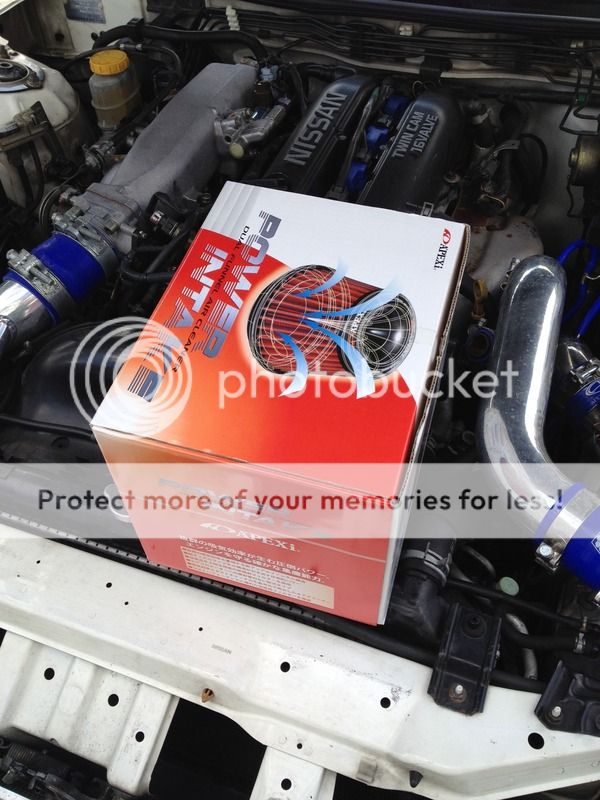
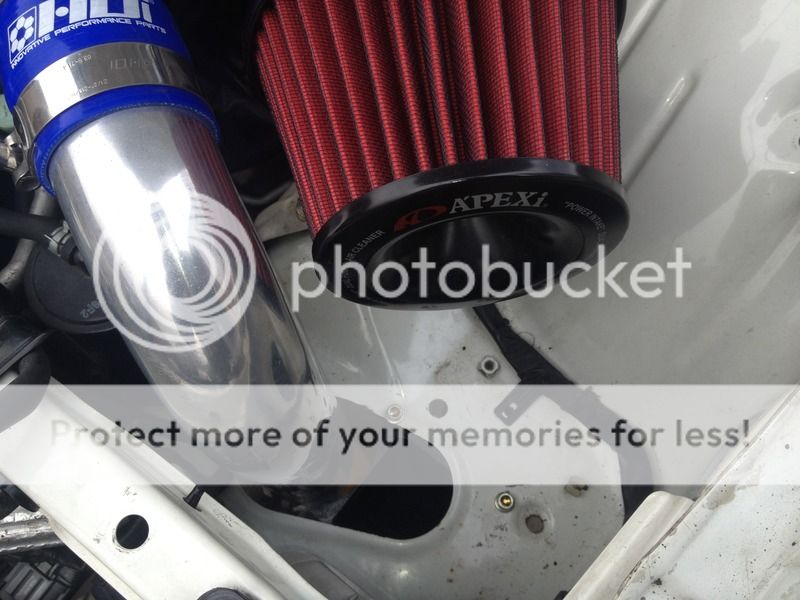
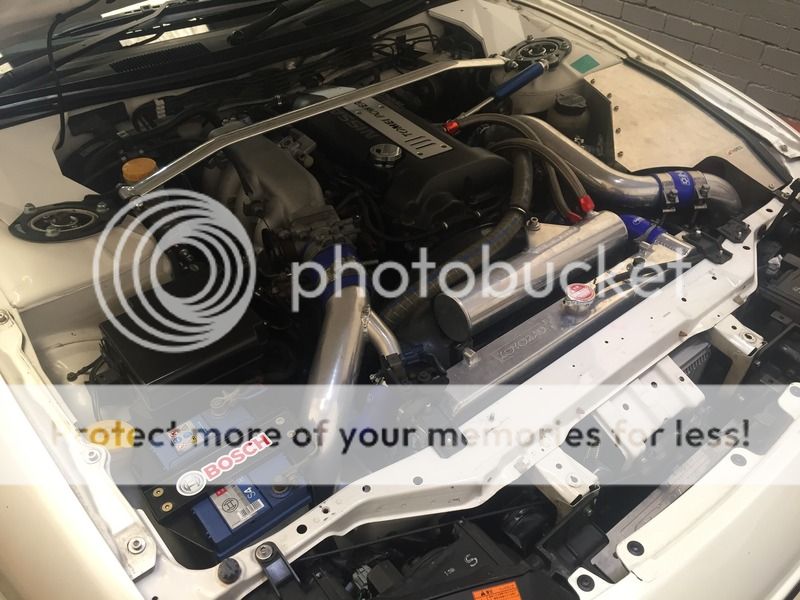
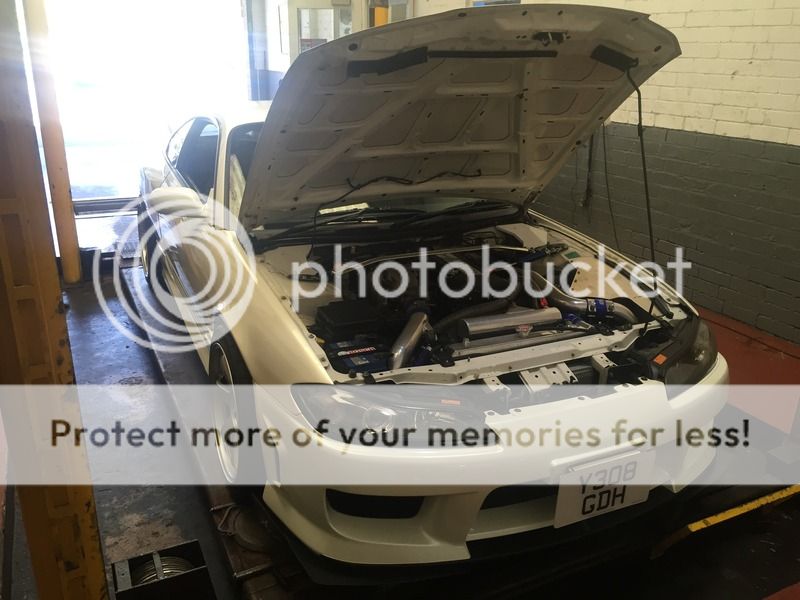
Gave her a nice new Apexi filter, and also an Apexi Air Box
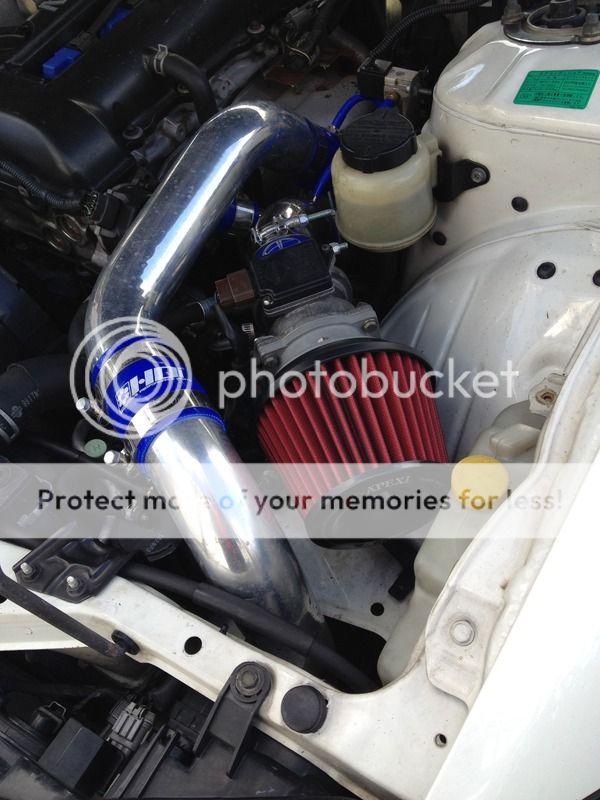
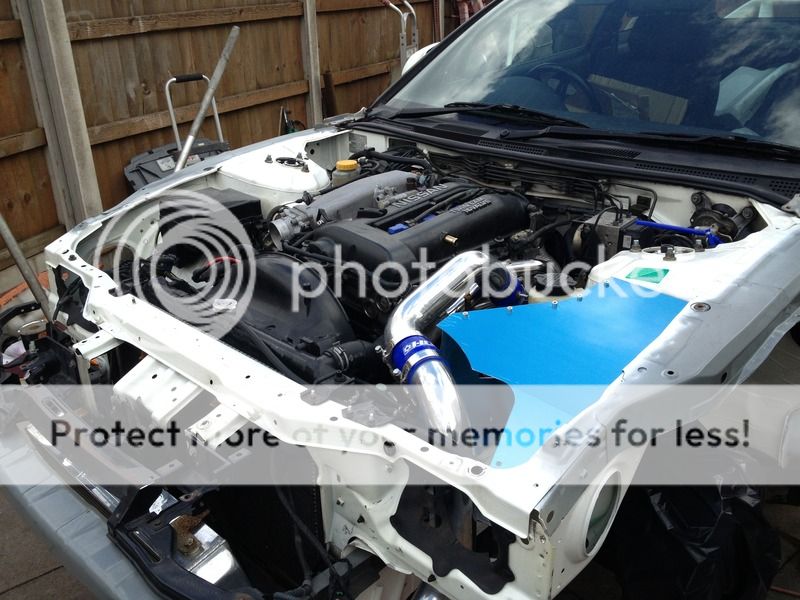
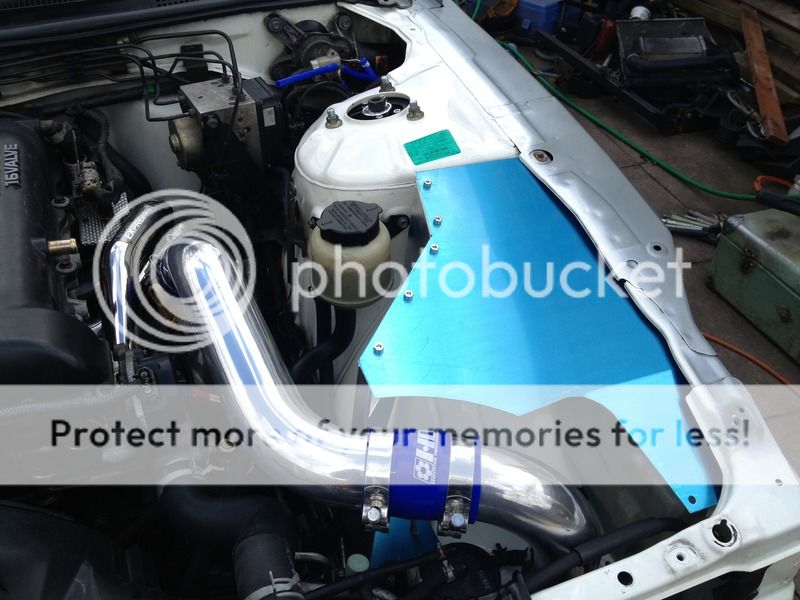
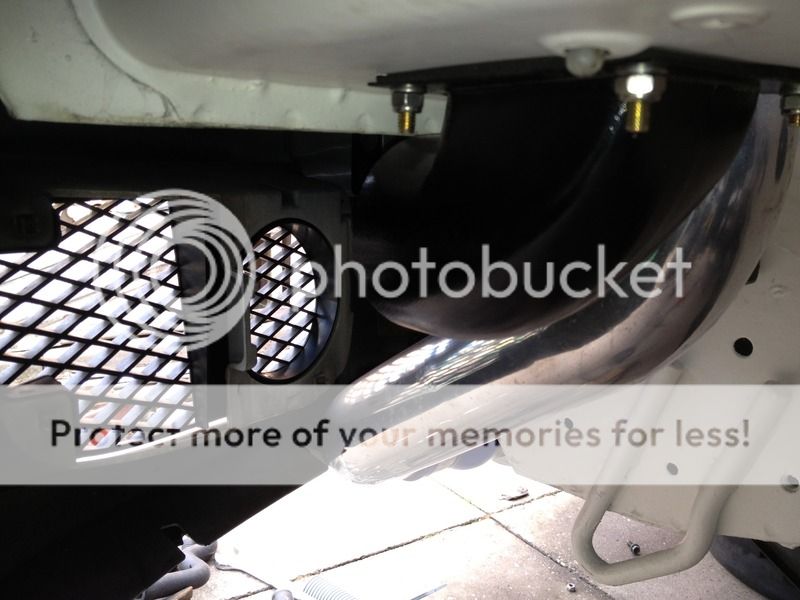
I wanted to get a bit more air flow directly to the filter, so i made a nice little 90 degree air intake to draw air from the bumper grille, up through the oem intercooler pipe cutout, directly to the apexi filter
Next was Kazama Auto Oil Catch Tank and i opted for braided lines instead of the supplied rubber hoses
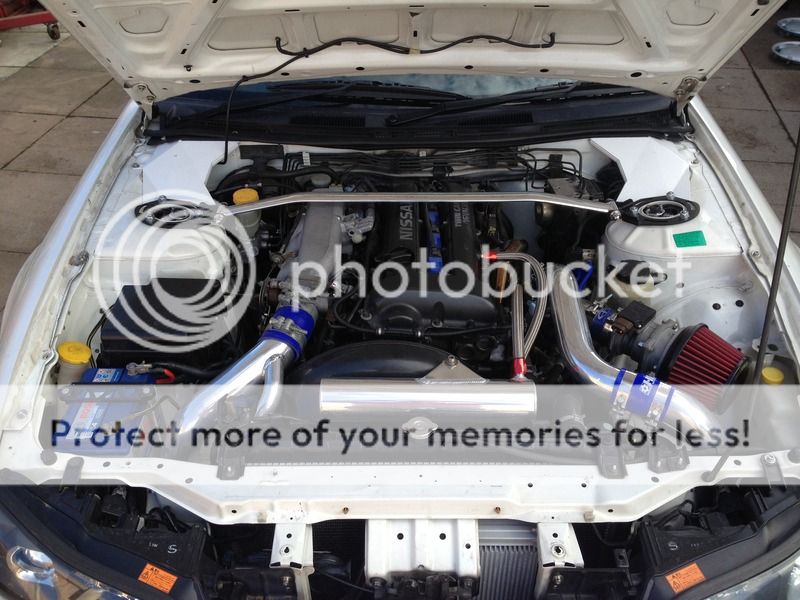
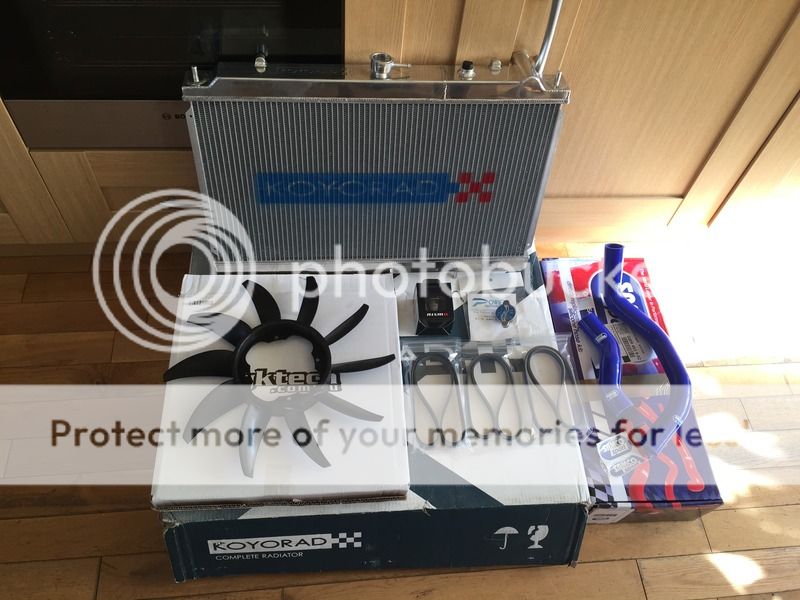
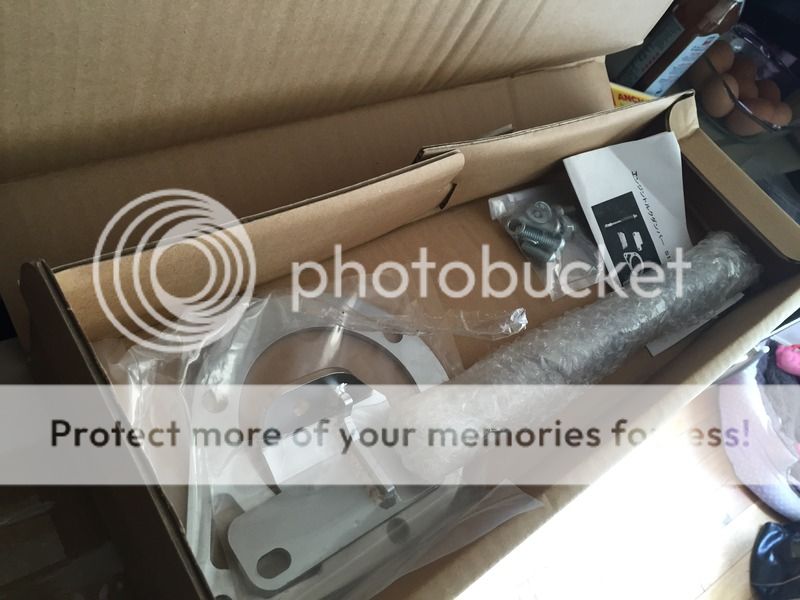
Next was to address the cooling. Having already fitted a lovely MOCAL oil cooler kit, i went ahead and ordered a Nismo cooler thermostat, a Koyo Rad, GKTech Fan, samco hoses and Power Enterprises Aux Belt Kit
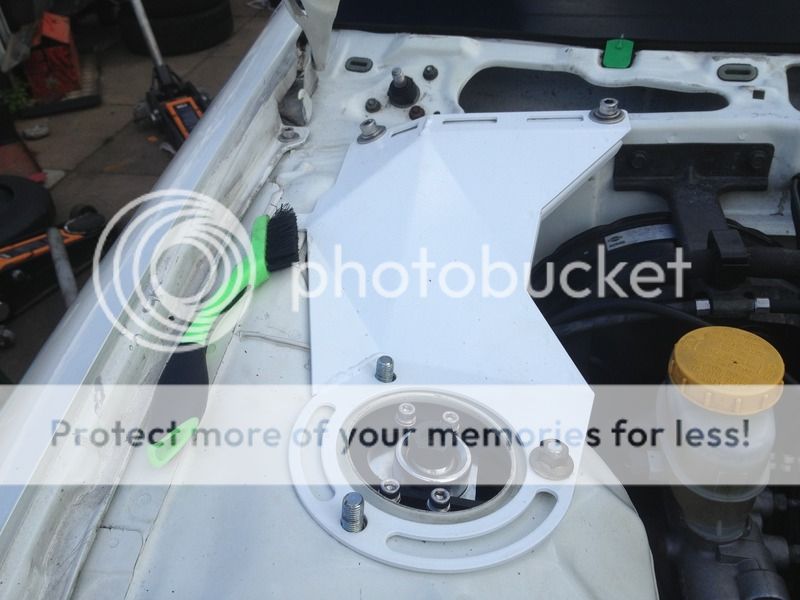
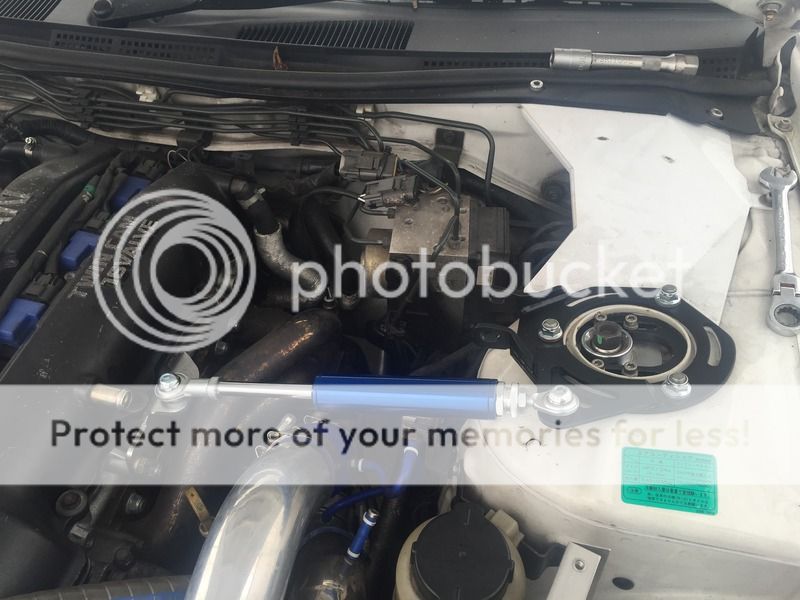
I also fitted some super rare Nagisa Auto Shakitto Shock Tower Braces, customising the strut brace mounts to fit on top, and also customizing the Engine Torque damper bracket - cutting it down and having it welded onto the Strut Bracket.


I wanted to get a bit more air flow directly to the filter, so i made a nice little 90 degree air intake to draw air from the bumper grille, up through the oem intercooler pipe cutout, directly to the apexi filter


Next was Kazama Auto Oil Catch Tank and i opted for braided lines instead of the supplied rubber hoses

Next was to address the cooling. Having already fitted a lovely MOCAL oil cooler kit, i went ahead and ordered a Nismo cooler thermostat, a Koyo Rad, GKTech Fan, samco hoses and Power Enterprises Aux Belt Kit

I also fitted some super rare Nagisa Auto Shakitto Shock Tower Braces, customising the strut brace mounts to fit on top, and also customizing the Engine Torque damper bracket - cutting it down and having it welded onto the Strut Bracket.


Last edited:
Mine was undersealed on import but not to the extent you have gone. In hindsight i wish id done it ,myself so i knew what was underneath. when i get round to poly bushing stuff and maybe changing the diff id like to seal all under the tank etc.
- Joined
- 18 September 2011
- Messages
- 726
- Reaction score
- 1
- Points
- 0
- Location
- West Midlands, England
- Country
-
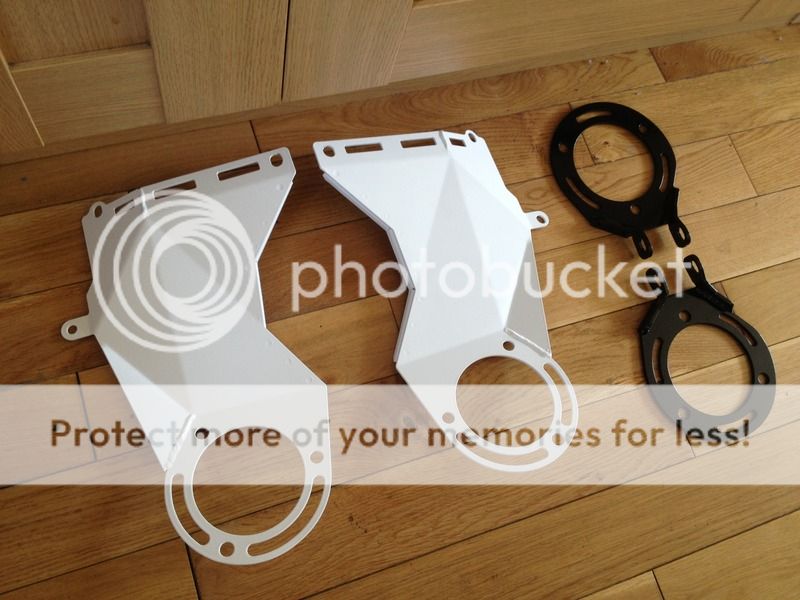
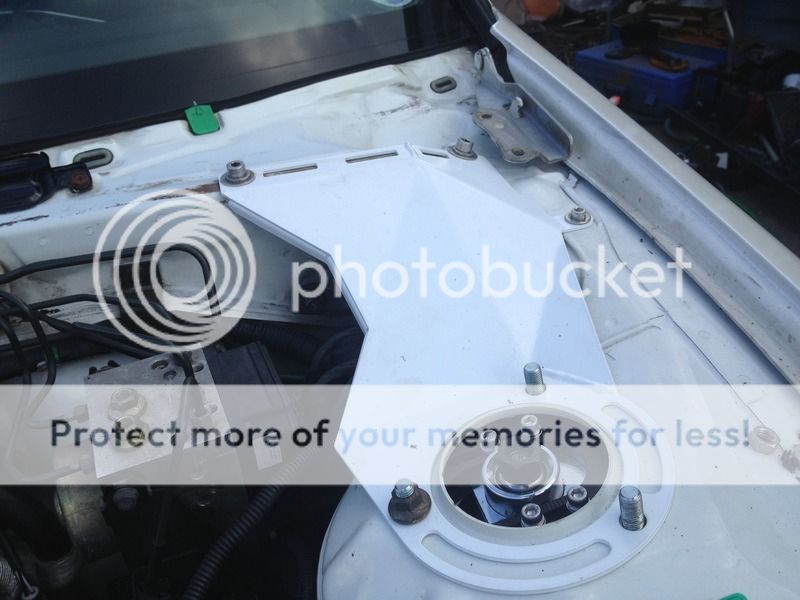
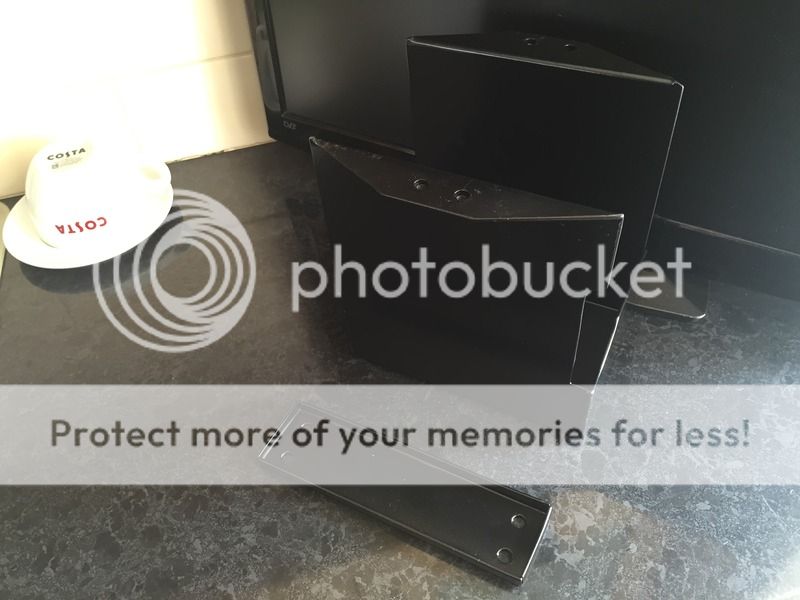
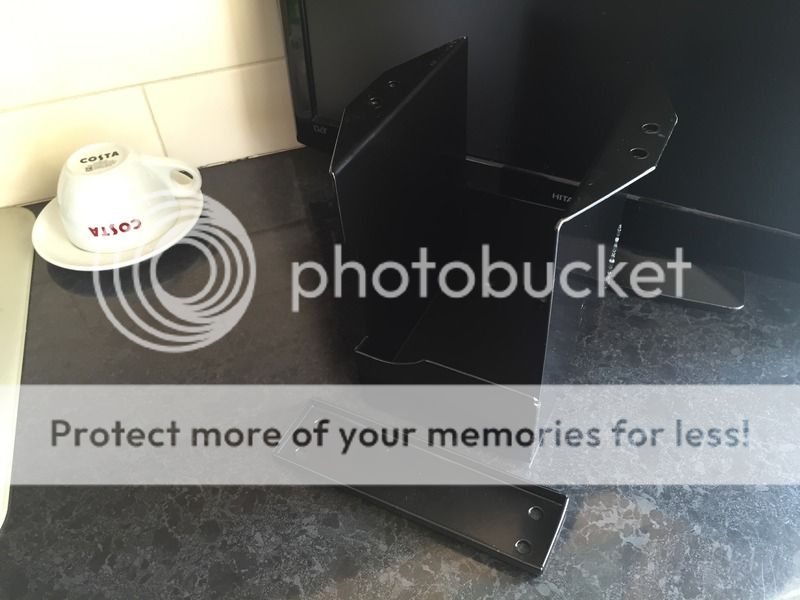
Next i wanted to tackle the issue of the rolacted battery. As we all have to do, turn the battery 90 degrees when fitting a FMIC, they never look very neat. I spoke to James Tooley and he was selling his custom made battery box.
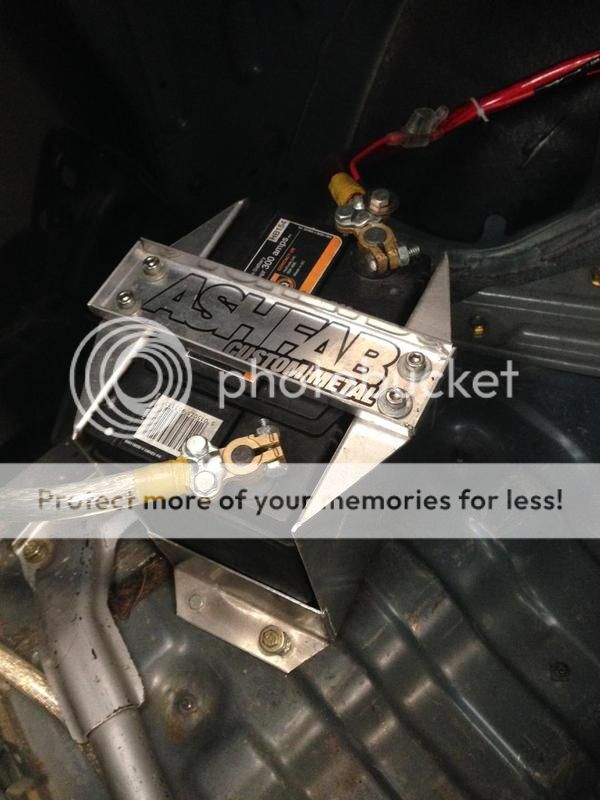
It was the perfect size
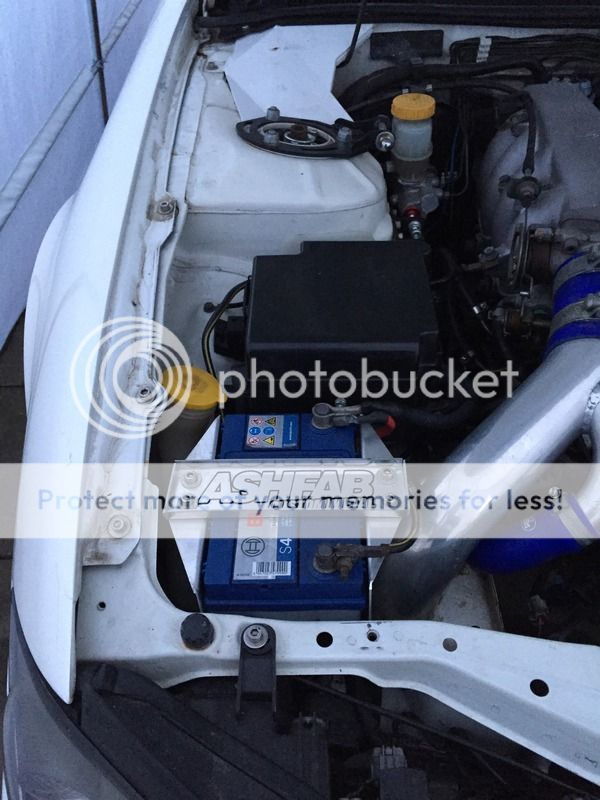
To clear the rear of the headlight, some trimming was necessary
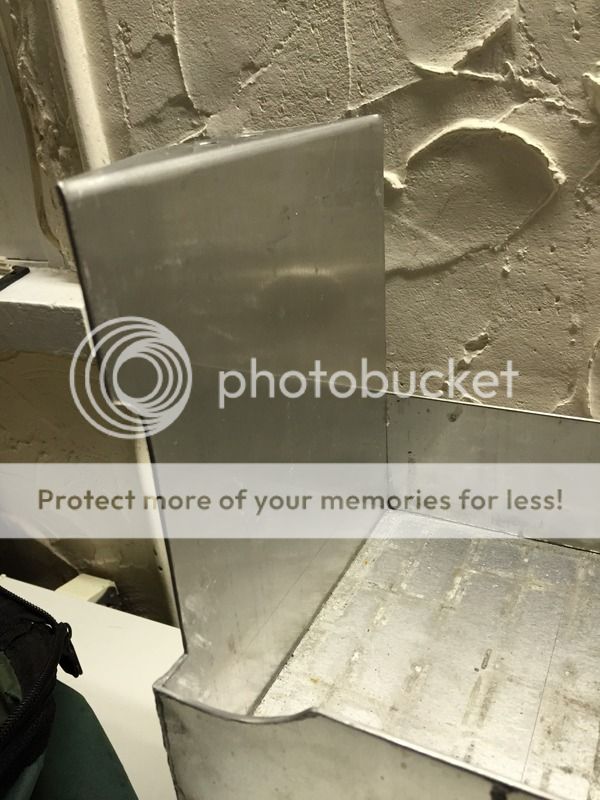
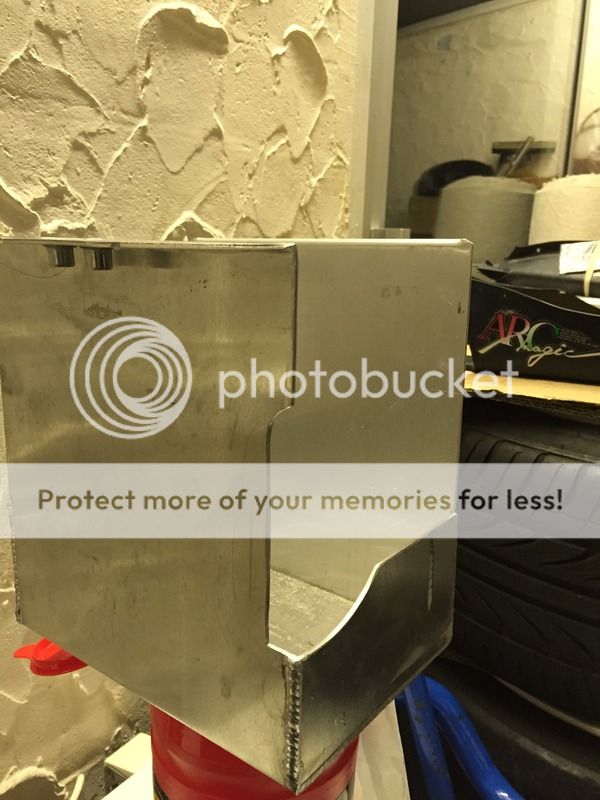
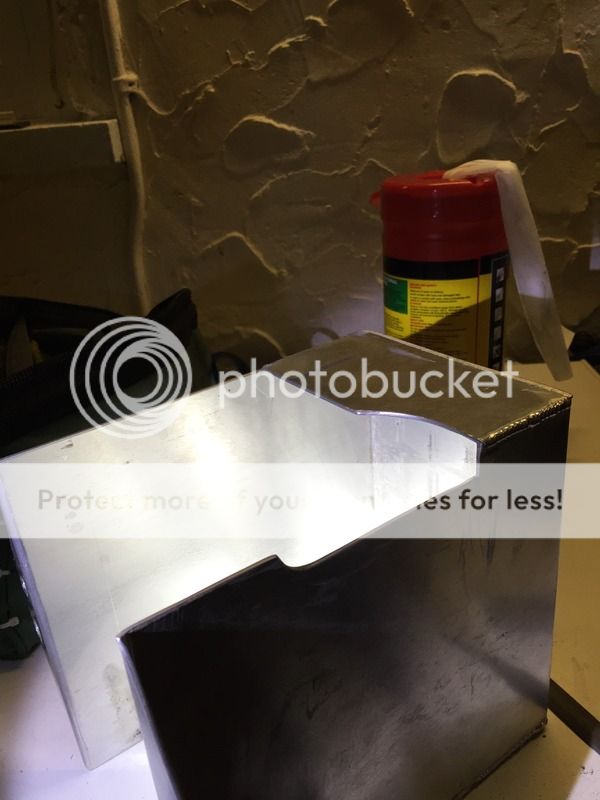
To secure it, i installed x4 Rivnut's on the bottom of the battery tray, so it can be removed if needed.
Powdercoated black for a more OEM look.

It was the perfect size

To clear the rear of the headlight, some trimming was necessary


To secure it, i installed x4 Rivnut's on the bottom of the battery tray, so it can be removed if needed.
Powdercoated black for a more OEM look.


- Joined
- 18 September 2011
- Messages
- 726
- Reaction score
- 1
- Points
- 0
- Location
- West Midlands, England
- Country
-
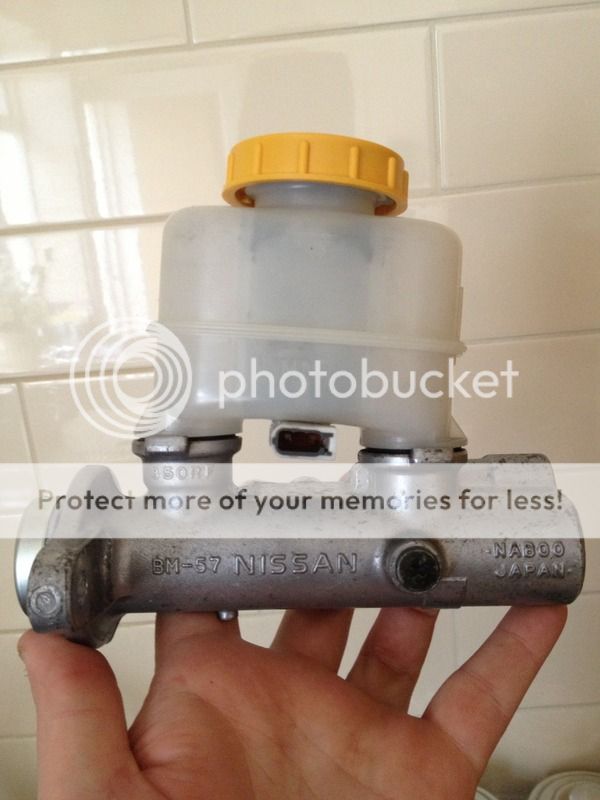
Next up was to fit a BM57 to cope with the K-Sport 8-pot's up front, and the planned Z32/R33 Rear brake conversion
Out with the old
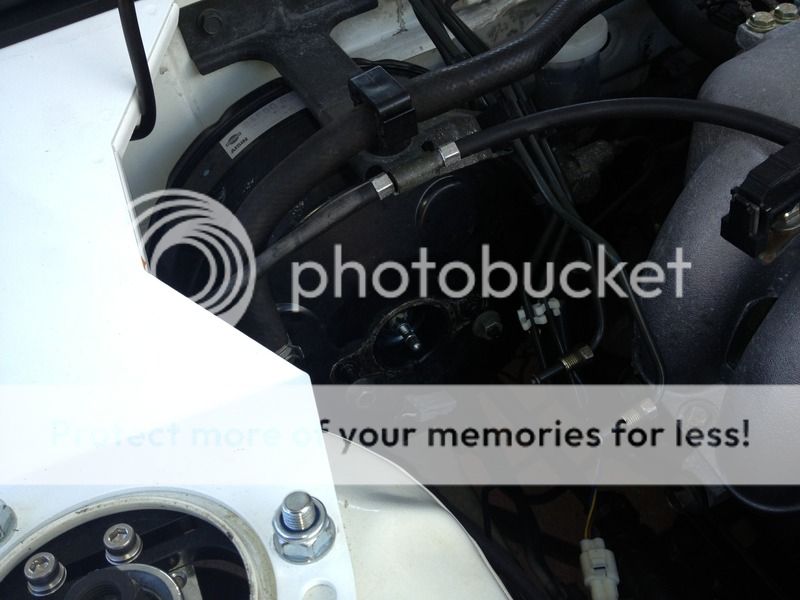
Some people cut the pig tail abs plug off the donor Z32, and splice it into the S15 loom. This is not necessary. Simply swap over the reservoirs, like so
Fitted! Along with a Master Cylinder Brace
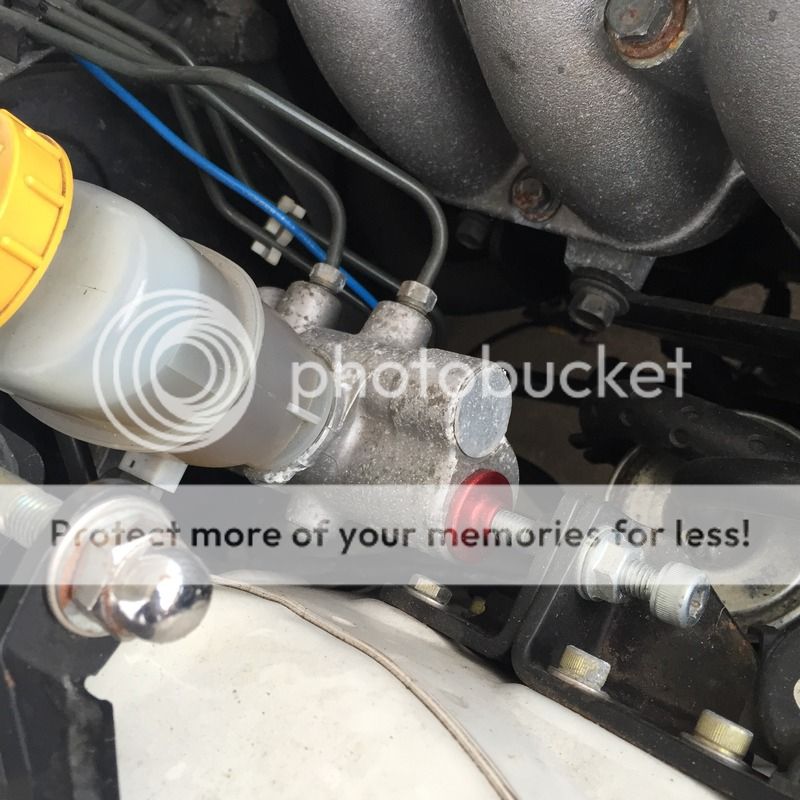
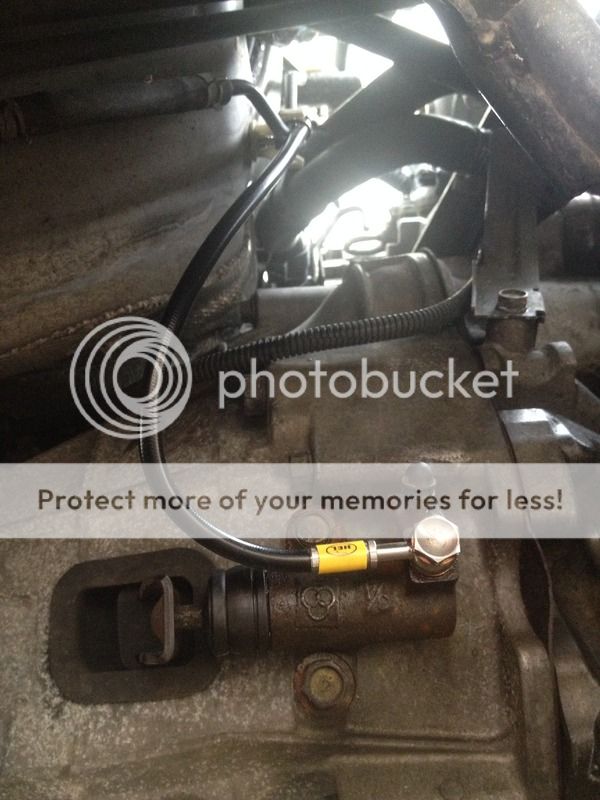
Next was to fit a HEL Braided Clutch Line
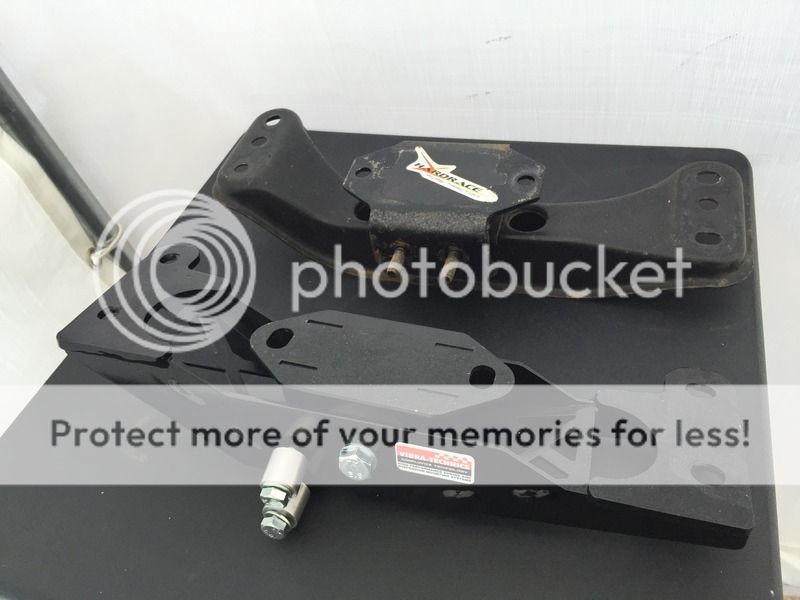
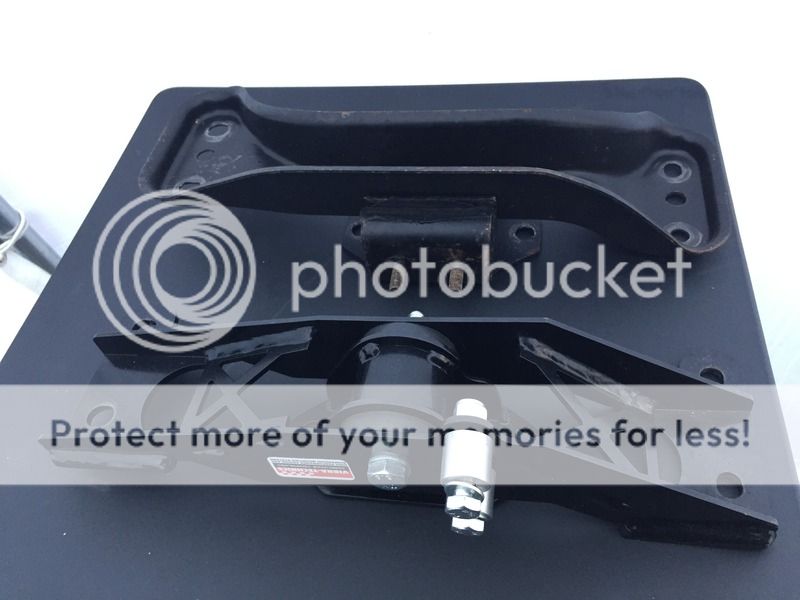
I also fitted a Vibratecnics Gearbox mount. Comparison of designs
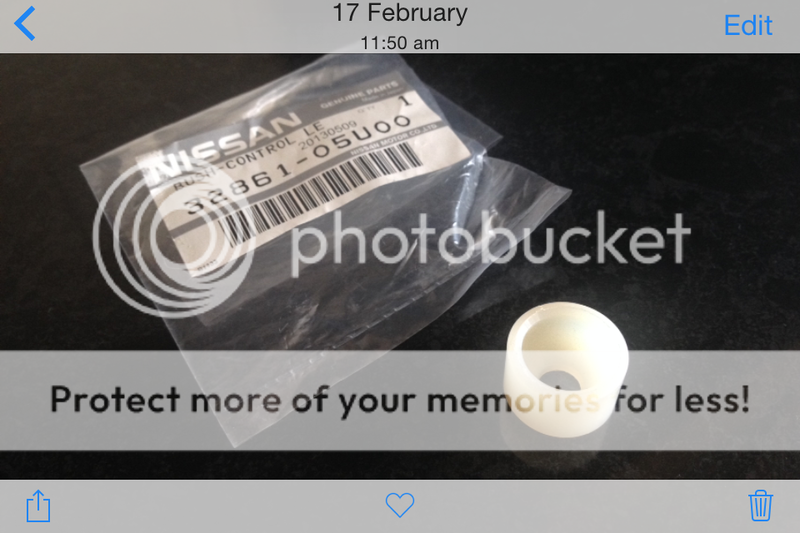
Also a new nylon bush was fitted to the shifter
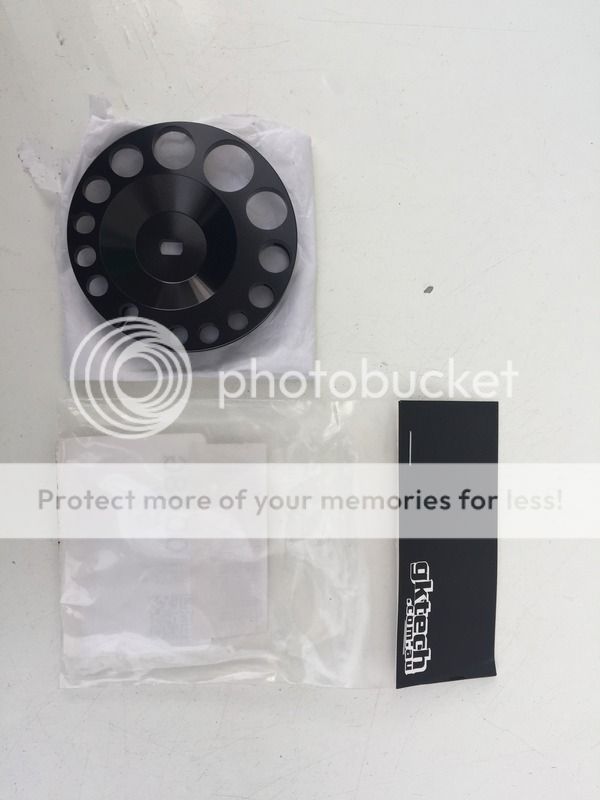
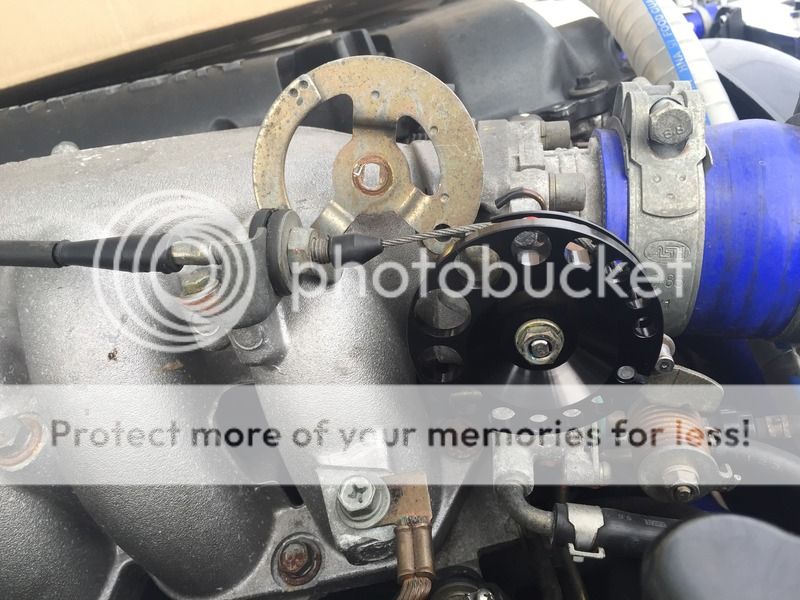
Also installed a GKTech Throttle wheel. The eccentric design makes the travel of the throttle cable down low in the rev range longer, and gives more control, whilst up in the top end it is shorter for instant response.
Out with the old

Some people cut the pig tail abs plug off the donor Z32, and splice it into the S15 loom. This is not necessary. Simply swap over the reservoirs, like so

Fitted! Along with a Master Cylinder Brace

Next was to fit a HEL Braided Clutch Line


I also fitted a Vibratecnics Gearbox mount. Comparison of designs


Also a new nylon bush was fitted to the shifter

Also installed a GKTech Throttle wheel. The eccentric design makes the travel of the throttle cable down low in the rev range longer, and gives more control, whilst up in the top end it is shorter for instant response.


Last edited:
tooley
When only sideways will do!
- Joined
- 10 October 2009
- Messages
- 1,770
- Reaction score
- 2
- Points
- 0
- Location
- West Midlands / South Wales
- Country
-

hahaha you still have it!
Car is looking wicked man! keep it up.
Car is looking wicked man! keep it up.
- Joined
- 18 September 2011
- Messages
- 726
- Reaction score
- 1
- Points
- 0
- Location
- West Midlands, England
- Country
-
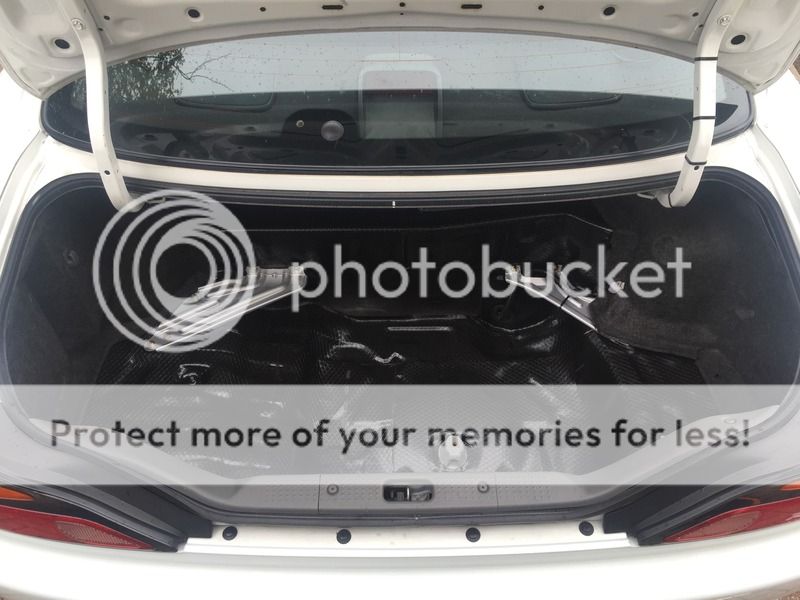
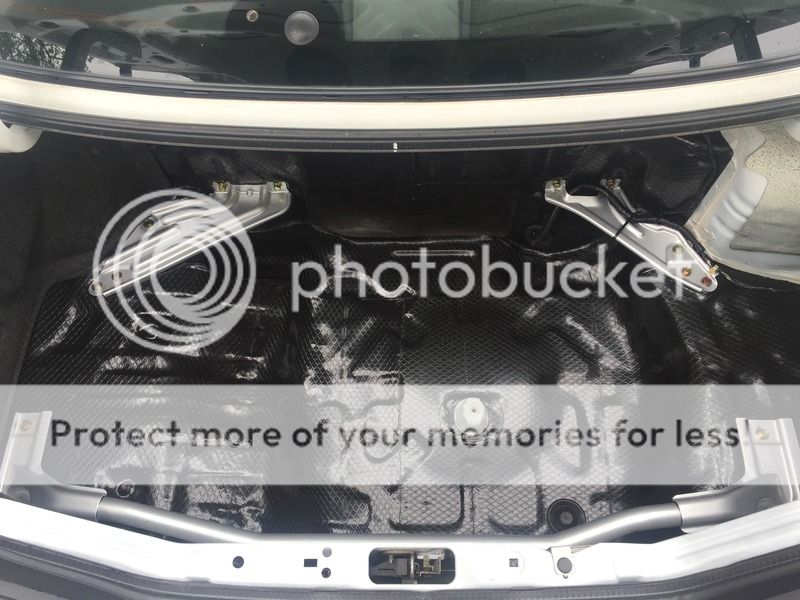
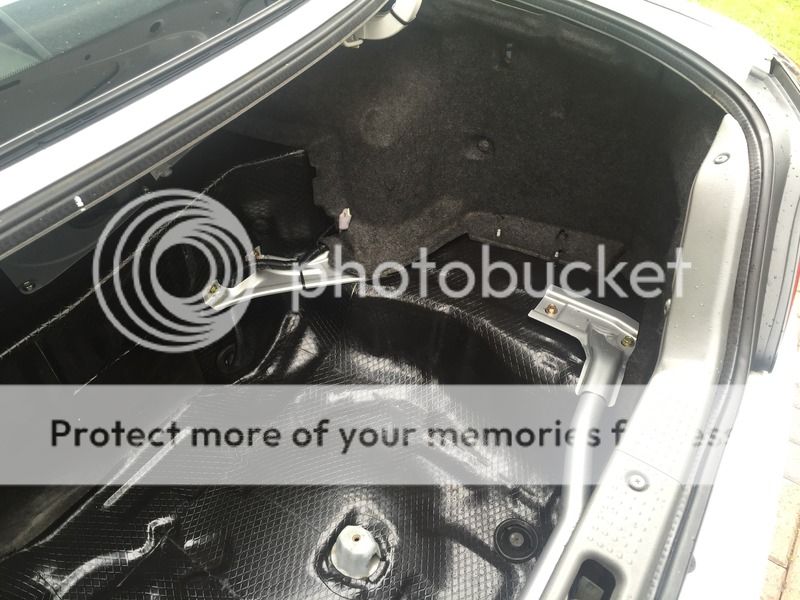
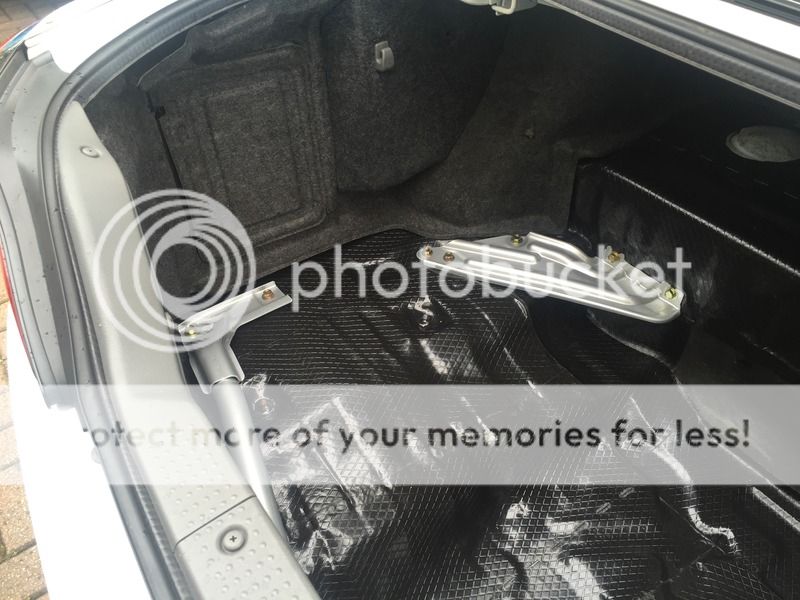
Something that bugged me since i imported the car, was the booming boot space. Nissan didn't exactly go to town on the boot interior.
With the freshly installed Energy Poly Bushes, the transmission drone could possibly be an issue, so to combat that & make the cabin a nicer place to be, i picked up some sound deadening.
It also gave me an excuse to have the boot braces shotblasted and powdercoated at the same time, and give the carpers a good clean.
I started off small, covering the underside of the Fuel Tank Cover

Then the tedious job of marking out and cutting and forming it with a heat gun - But the outcome was fantastic i think, well worth a weekend of graft.
With the freshly installed Energy Poly Bushes, the transmission drone could possibly be an issue, so to combat that & make the cabin a nicer place to be, i picked up some sound deadening.

It also gave me an excuse to have the boot braces shotblasted and powdercoated at the same time, and give the carpers a good clean.

I started off small, covering the underside of the Fuel Tank Cover


Then the tedious job of marking out and cutting and forming it with a heat gun - But the outcome was fantastic i think, well worth a weekend of graft.


- Joined
- 18 September 2011
- Messages
- 726
- Reaction score
- 1
- Points
- 0
- Location
- West Midlands, England
- Country
-
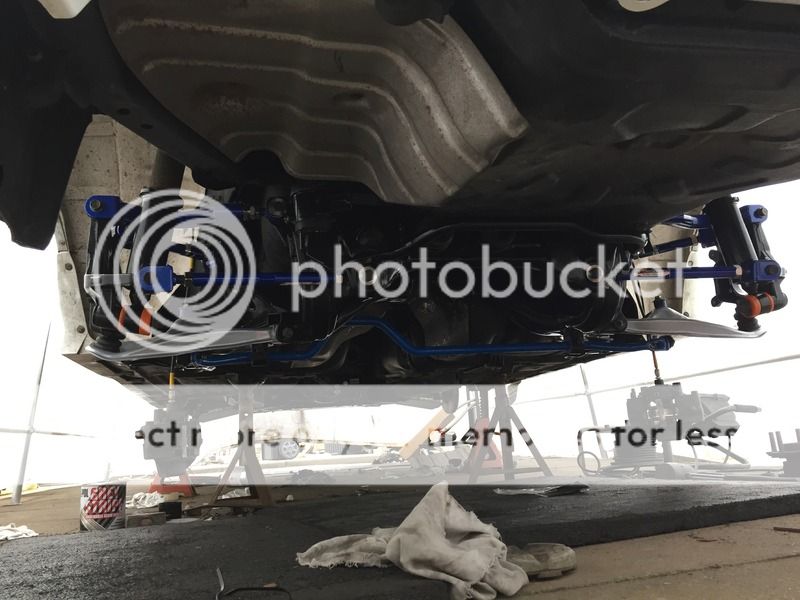
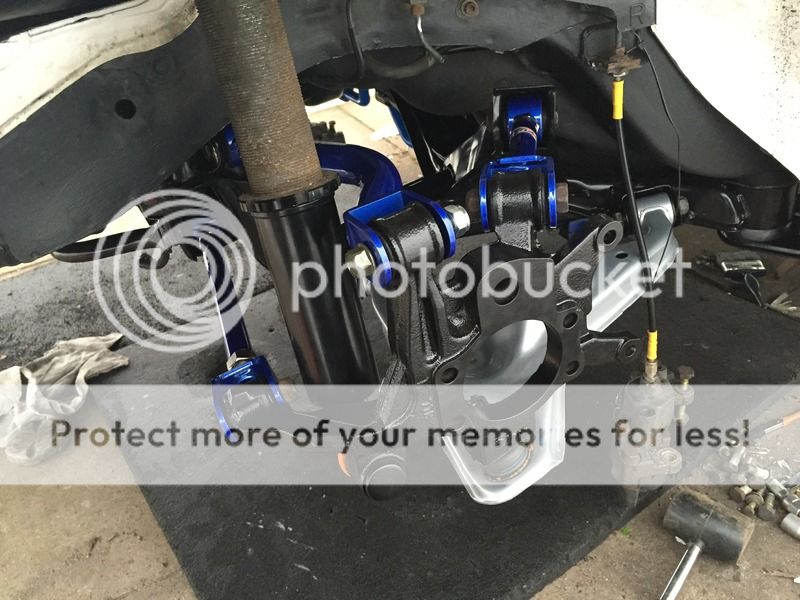
Well now everything was in place, i could reassemble the Tank into the car, and the subframe
I installed the GKTech Eccentric lockout kit, as all the adjustment for alignment will now be made via the adjustable hardrace arms

I also wasnt happy with the tensile strength of the supplied bolts for the arms. I sourced hi-Tensile fasteners
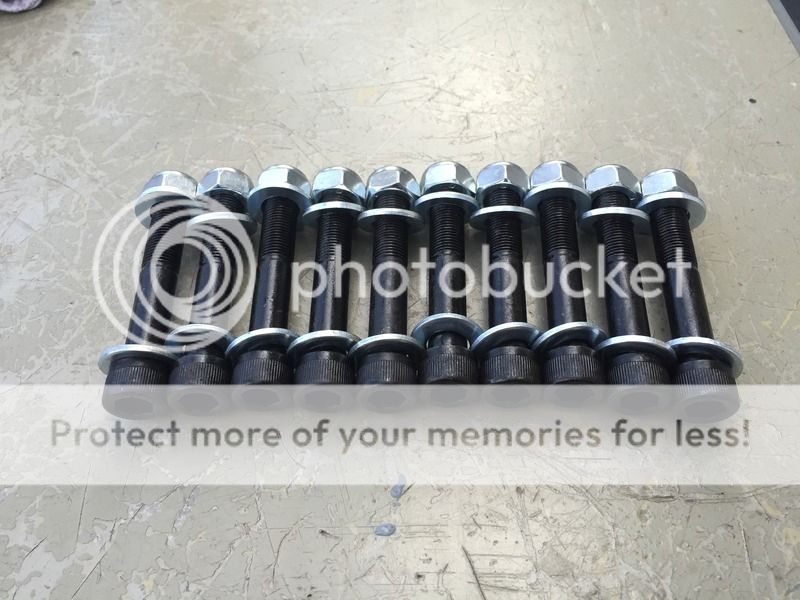
Petrol tank and subframe complete
I installed the GKTech Eccentric lockout kit, as all the adjustment for alignment will now be made via the adjustable hardrace arms
I also wasnt happy with the tensile strength of the supplied bolts for the arms. I sourced hi-Tensile fasteners

Petrol tank and subframe complete


Last edited:
- Joined
- 18 September 2011
- Messages
- 726
- Reaction score
- 1
- Points
- 0
- Location
- West Midlands, England
- Country
-
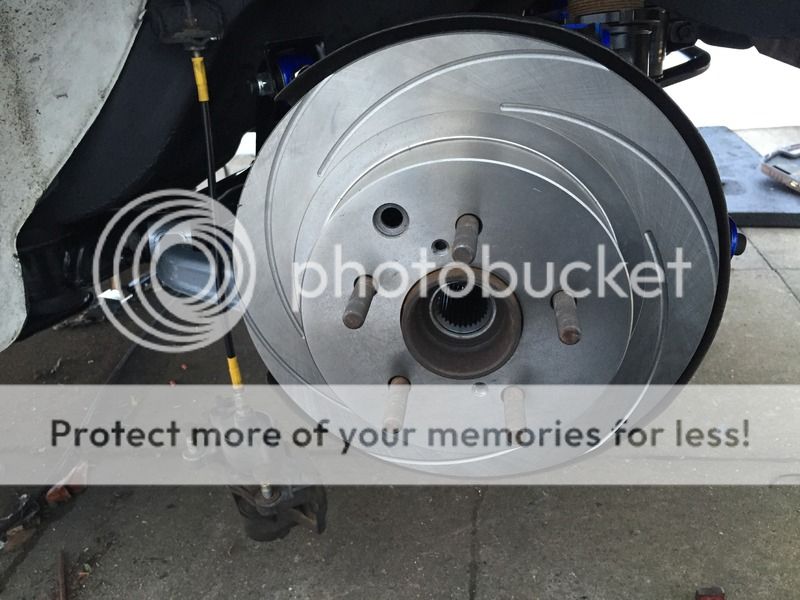
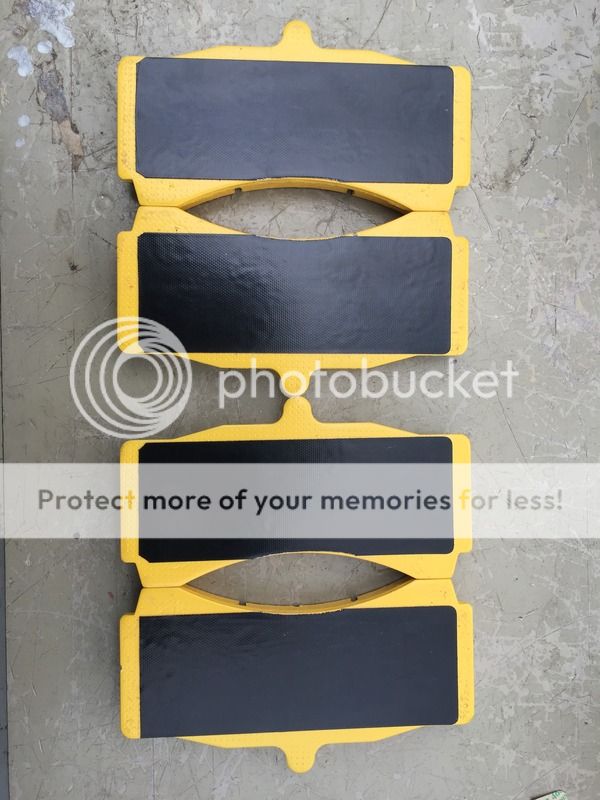
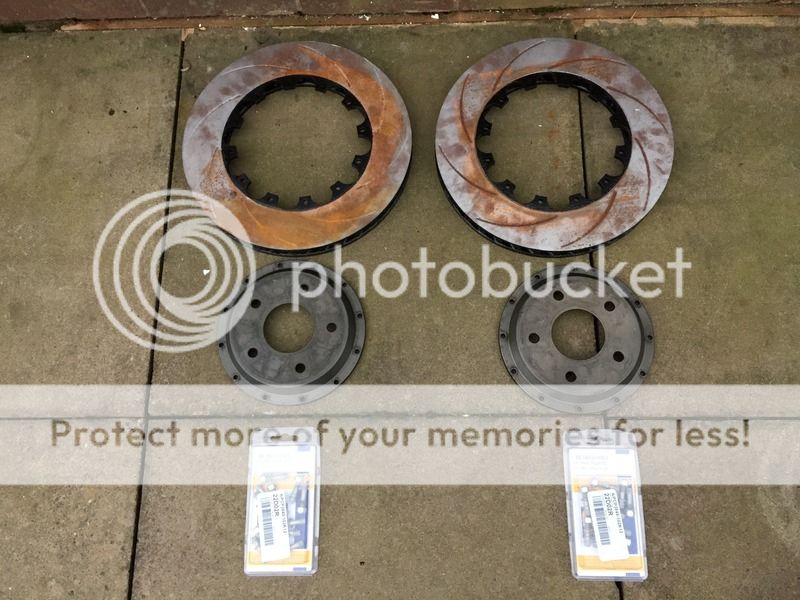
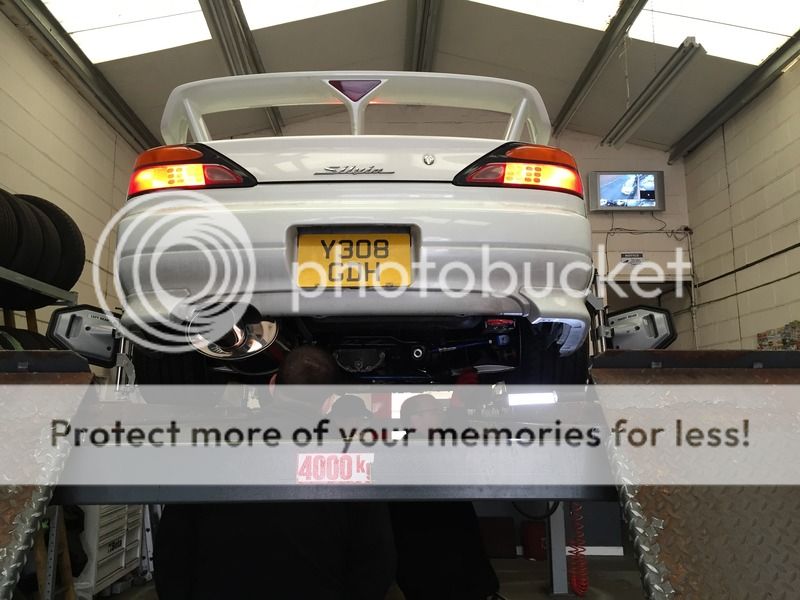
Z32 Rear brake conversion with HEL lines, R33 Handbrake cables, grooved discs to match the front, and EBC Yellow Stuff pads - which ive been very happy with
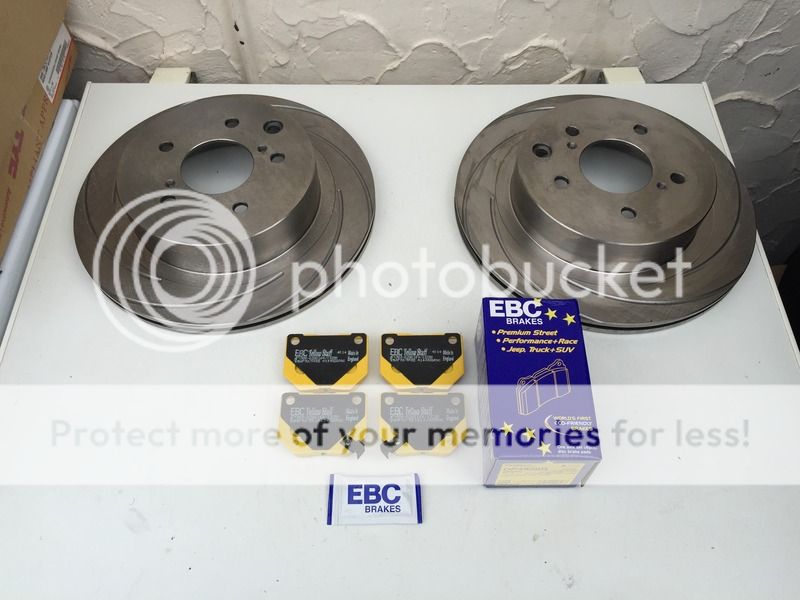
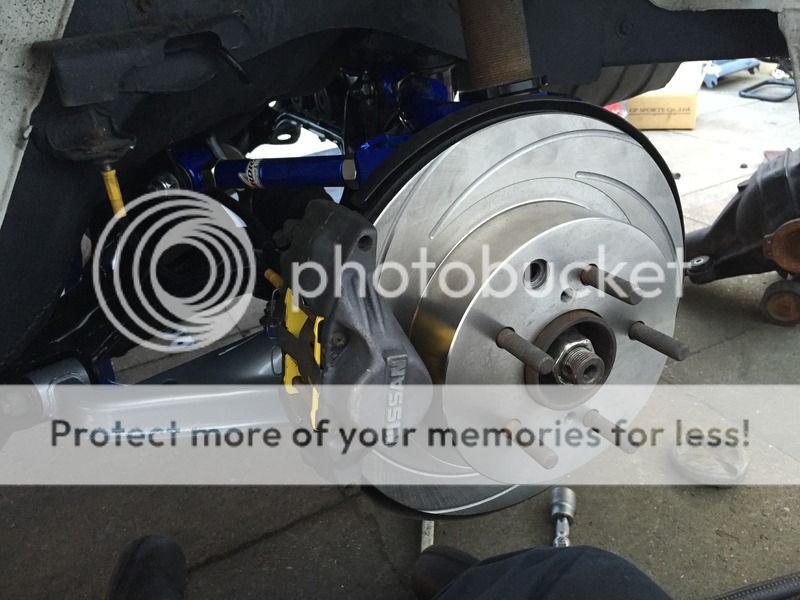
Also fresh pads for the front whilst i was at it
I also got hold of some replacement AP Racing rotors for the front K-Sports.
I decided to shotblast them, and give them some VHT paint to keep them looking good for a while to come
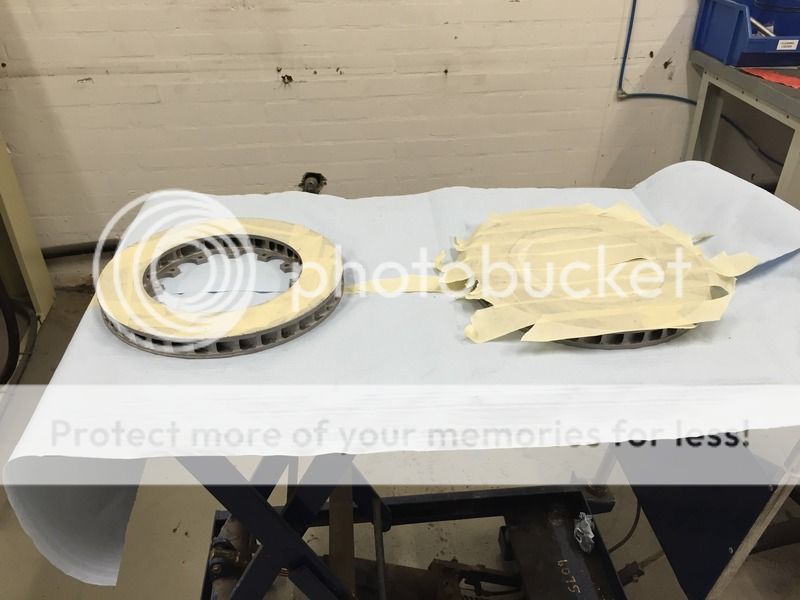
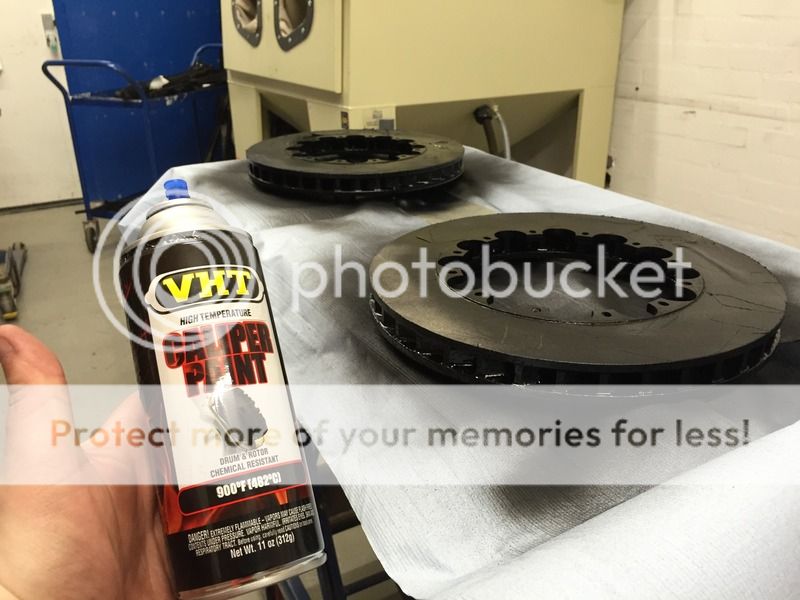
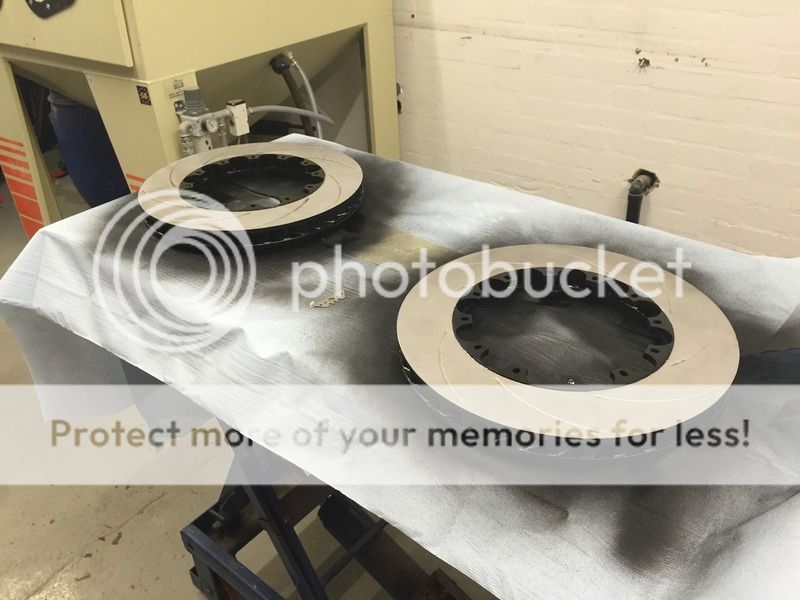
Installed Rotors tot he Bells using brand new AP Racing Hardware


Also fresh pads for the front whilst i was at it

I also got hold of some replacement AP Racing rotors for the front K-Sports.
I decided to shotblast them, and give them some VHT paint to keep them looking good for a while to come


Installed Rotors tot he Bells using brand new AP Racing Hardware


Last edited:
- Joined
- 18 September 2011
- Messages
- 726
- Reaction score
- 1
- Points
- 0
- Location
- West Midlands, England
- Country
-
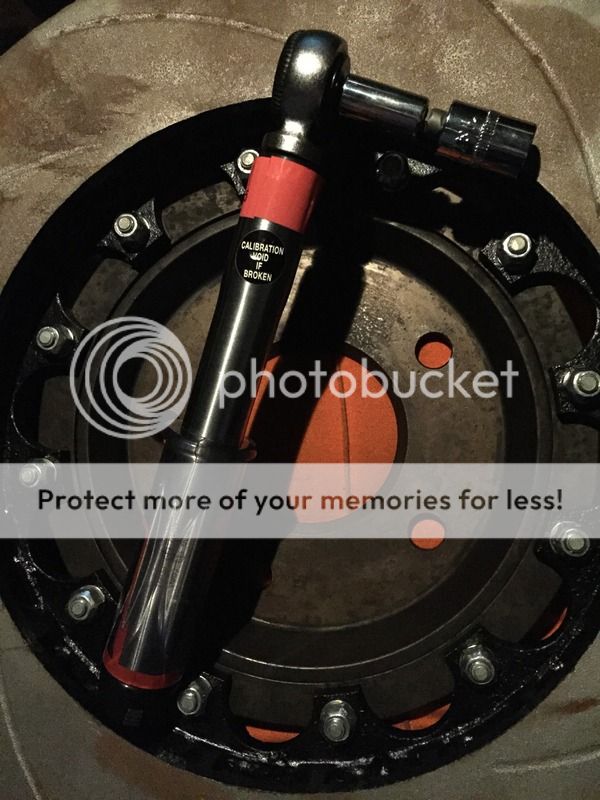
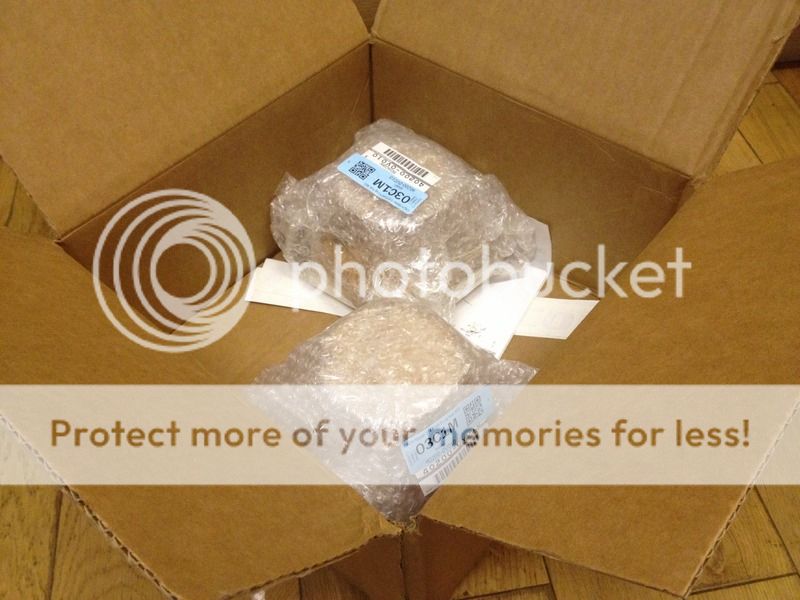
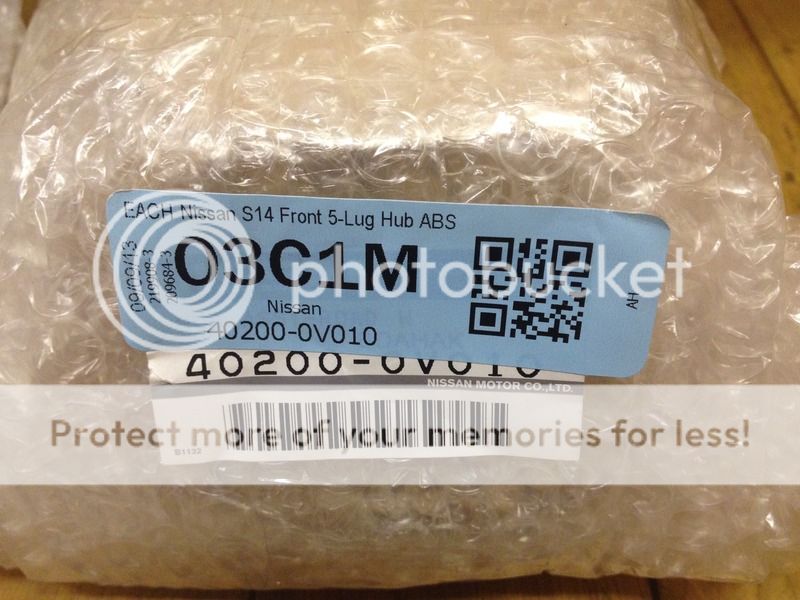
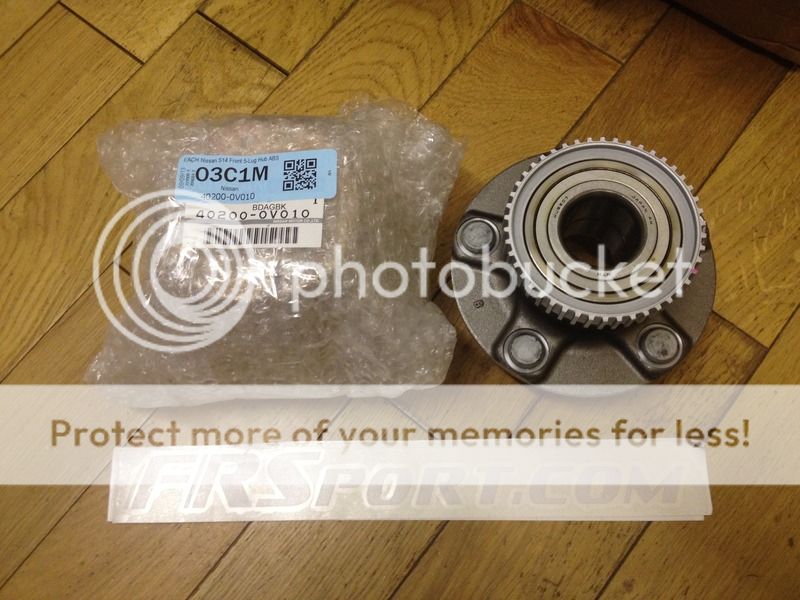
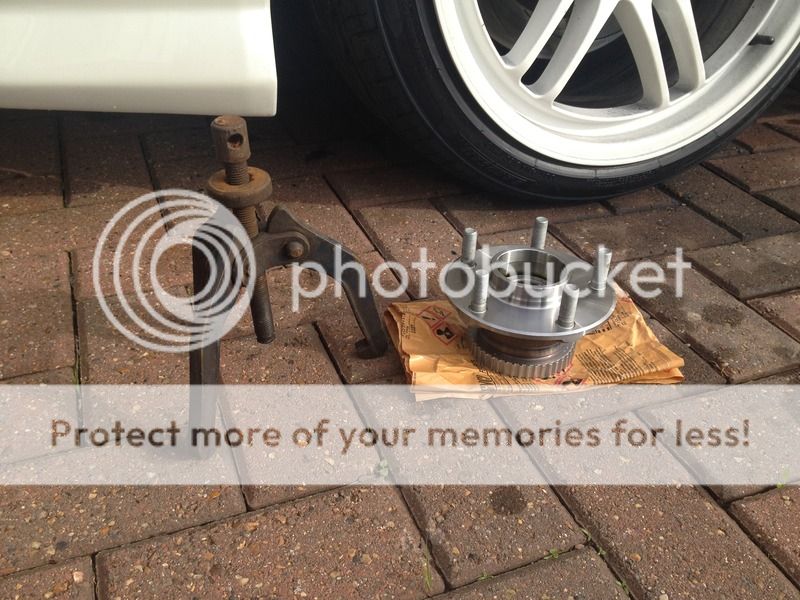
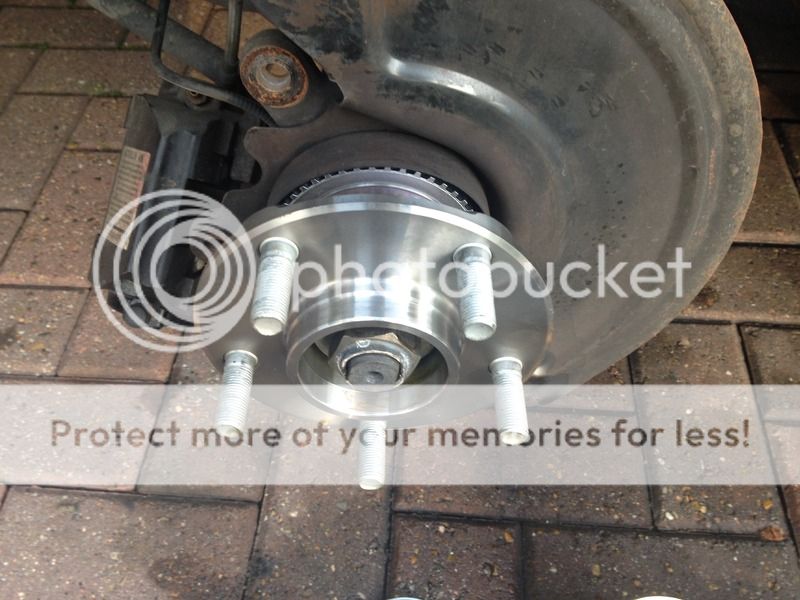
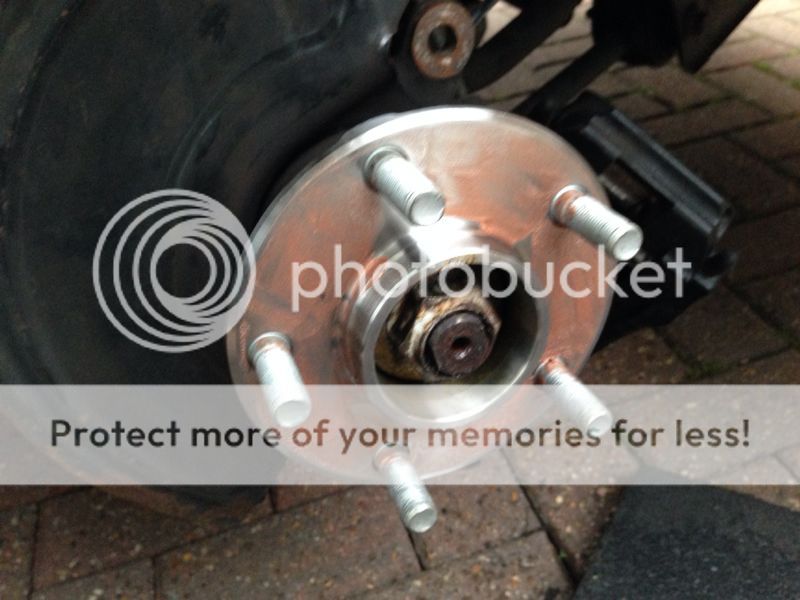
The passenger front wheel bearing i noticed it grumbled a little, so i sourced a pair of Brand New Nissan replacements from FRSPORT.


- Joined
- 18 September 2011
- Messages
- 726
- Reaction score
- 1
- Points
- 0
- Location
- West Midlands, England
- Country
-
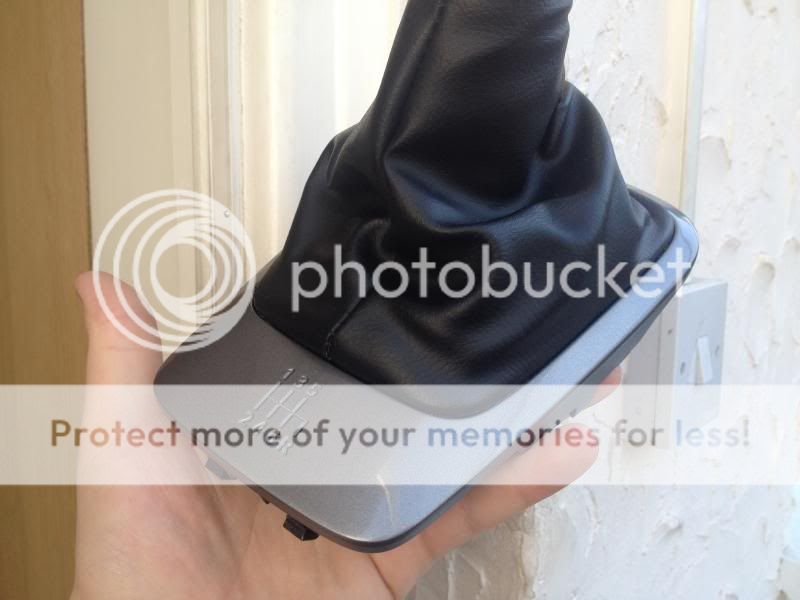
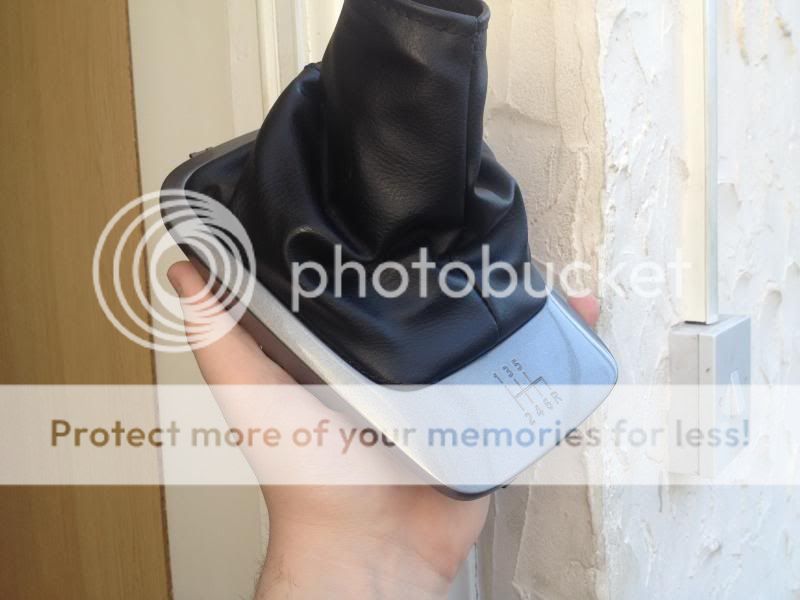
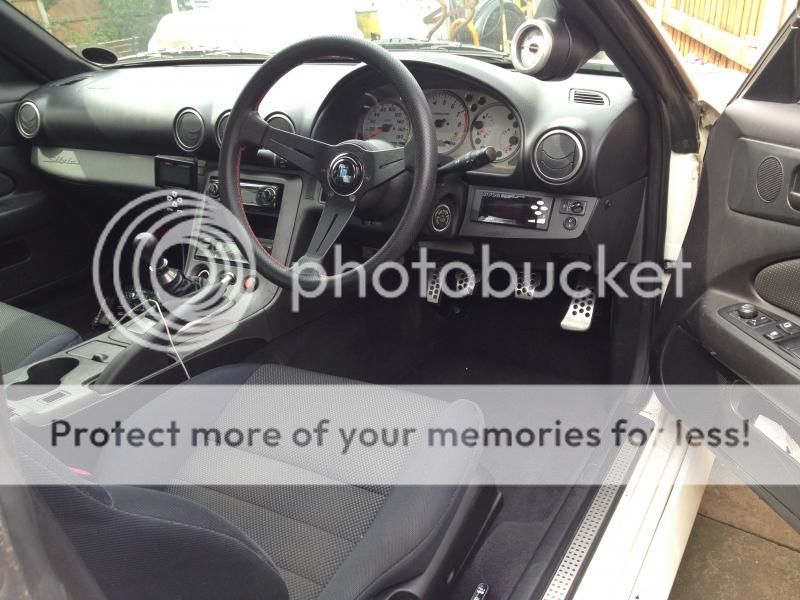
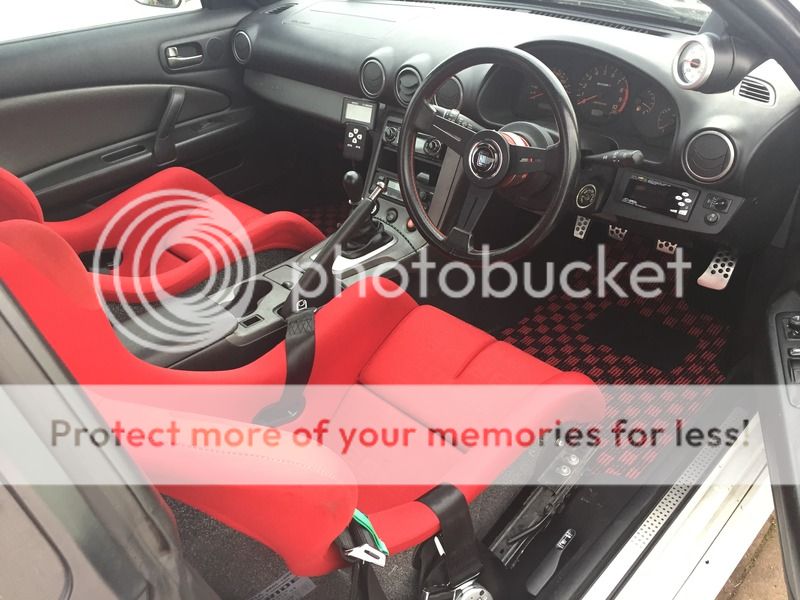
Next, i went ahead and also refurbished the Shifter Surround. I used scotchbright to key the surface, and going on a tip from a fellow S15OC member a while back, i went with ROVER STEEL GREY METALLIC. He was 100% right, it was a PERFECT match for the OEM S15 plastics. Just fantastic!
Info
ROVER STEEL GREY METALLIC
REFERENCE - LBM141
MANUFACTURERS CODE - LMZ/624
Perfect.
Info
ROVER STEEL GREY METALLIC
REFERENCE - LBM141
MANUFACTURERS CODE - LMZ/624
Perfect.


- Joined
- 18 September 2011
- Messages
- 726
- Reaction score
- 1
- Points
- 0
- Location
- West Midlands, England
- Country
-
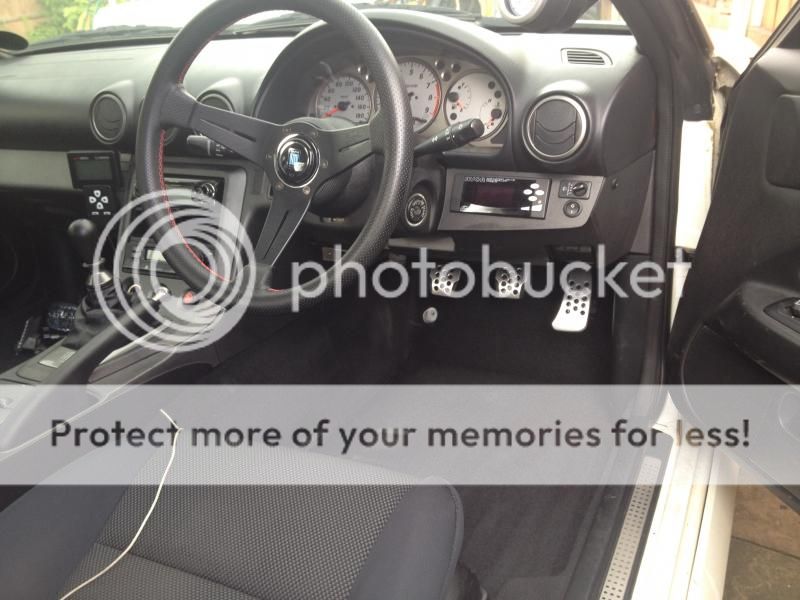
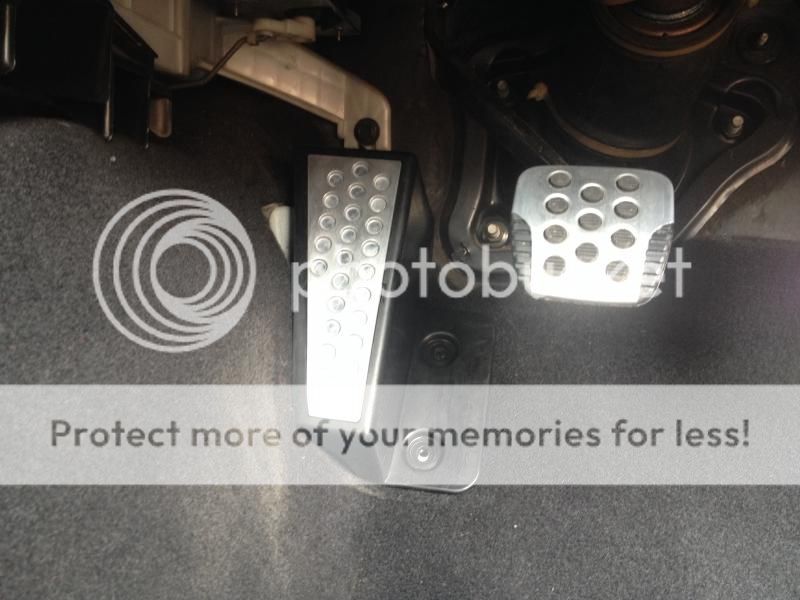
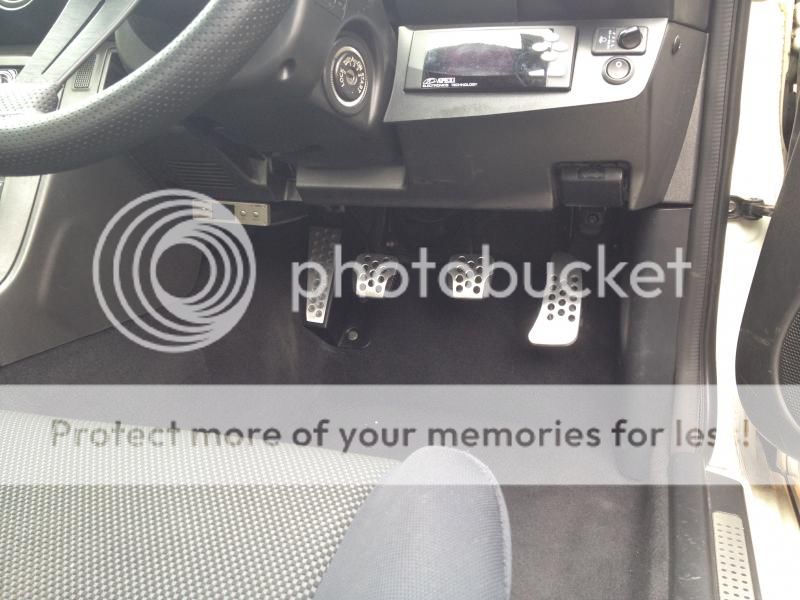
In the whole of the INTERNETZ i could not find much info on the compatibility of these pedals for the S15, and ZERO information on whether the R34 dead pedal could be used on the S15, so i took a gamble and bought the kit. Here is a little guide i put together if you fancy doing this to your S15
S15 GT/R34 GT-R Vspec II Pedal Set

There is two types of Accelerator Pedals Available, it's down to personal preference which you order. The 380RS pedal has an extended lower left corner to aid Heel/Toe, which i opted for.


So once you have your new pedals to hand
start by removing the old rubber pedals from your S15.
- The brake and clutch pedal covers pry-off with ease
- The accelerator requires a clip to be popped off at the top-rear which captivates the pedal to the arm. once that is popped off, the pedal will be able to pivot down and slide off. (if you are having trouble, this can be done when the accelerator arm is off the car - see install stage below)
- Now for the install of the Clutch and Brake pedal covers, i got a bowl of boiling water and put them into it to soften the rubber, and also applied some washing up liquid to the pedal and pedal covers, to aid sliding them on the the pedals, which worked well. have a small electrical screwdriver or other little pry' tool to help get all the lips of the pedal to seat nicely.
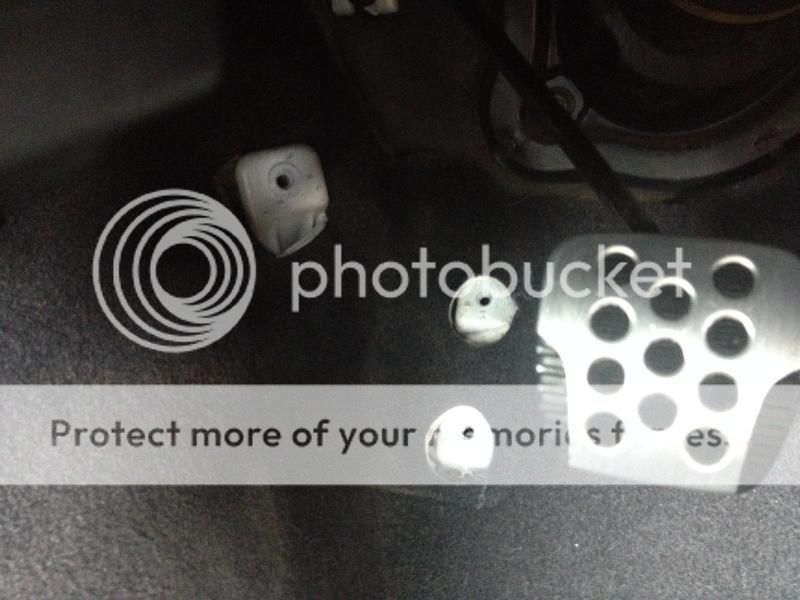
For the Installation of the Accelerator pedal, the OEM S15 accelerator arm has a large piece of metal that will need slightly trimming down for the new alloy pedal to fit.
The best way to do this is to remove the pedal arm assembly.
- The hinge is bolted to the bulkhead with two 10mm nuts which are easily accessible
- The top of the arm is connected to the throttle cable with a plastic clip. simply push the plastic clip out of the 'fork' at the top of the arm and you will be able to withdraw the assembly from the car
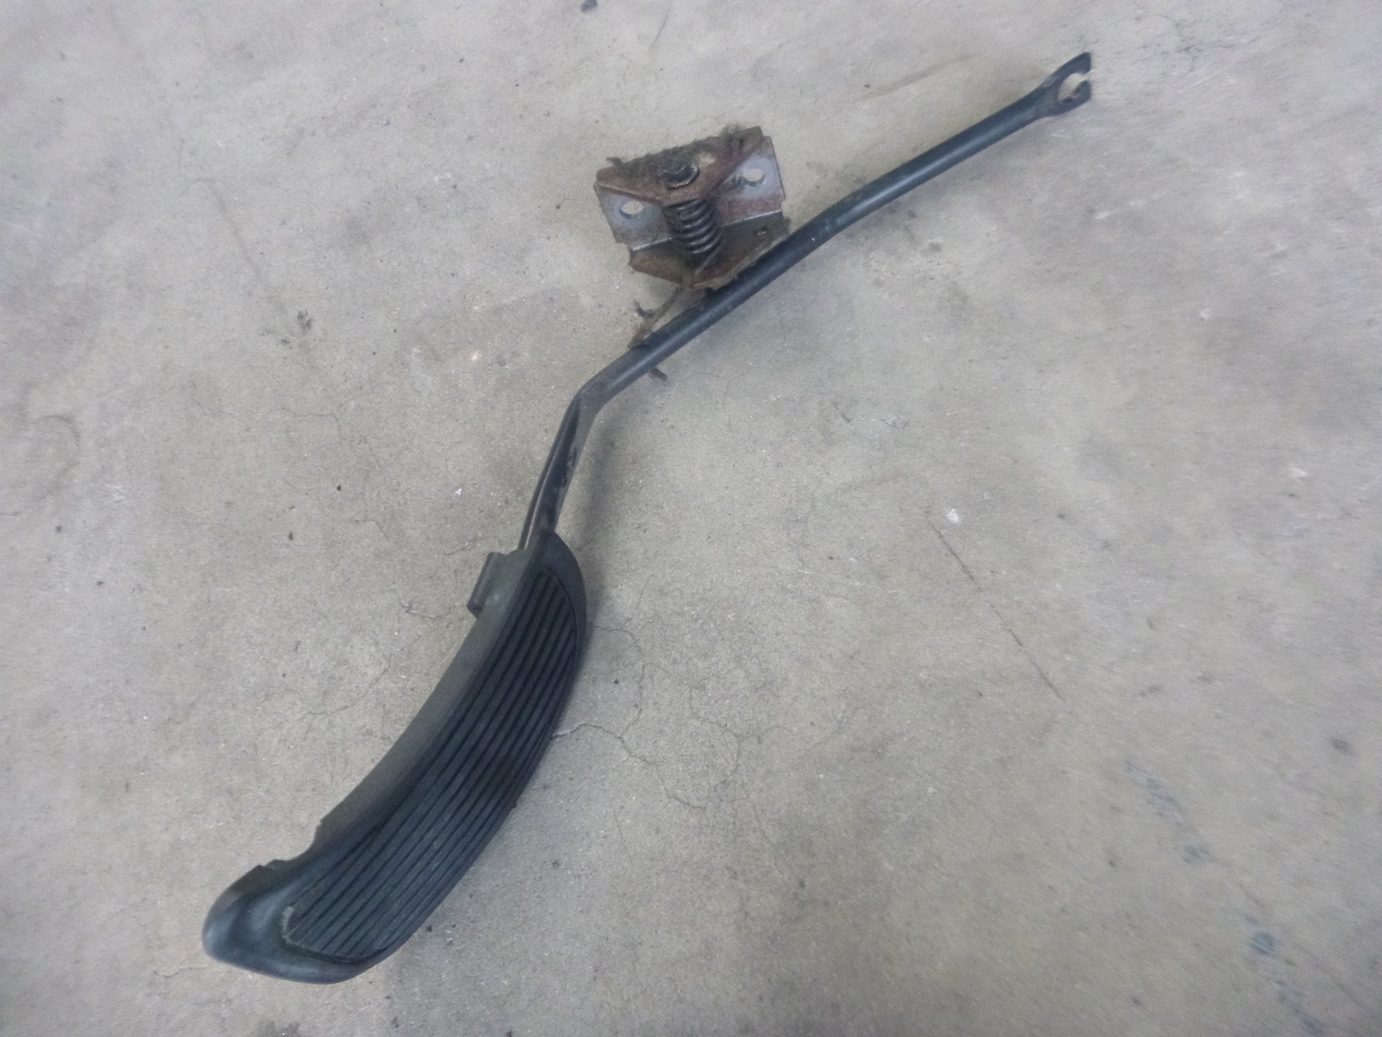
Now once you have got the arm assembly off the car, remove the pedal if you have not already done so.
Simply offer up the new alloy pedal, and you will see exactly how much metal you need to shave off. i used a bench grinder for this, just taking of enough to clear the pedal, then applied rustoleum primer and black paint to re-finish.
Some people prefer to remove the metal piece altogether and leave just the rod, like this:
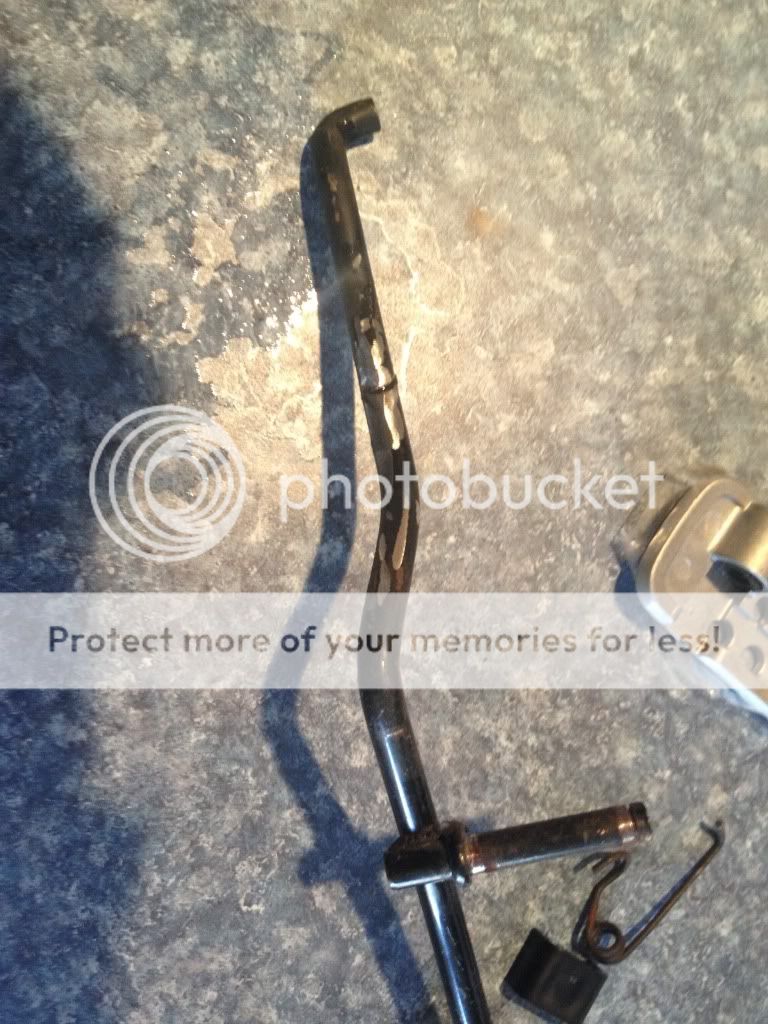
I opted to leave it on and just shave enough off, to add to the 'weighty feel' of the pedal.
Now simply slide the bush into the lower section of the new pedal, and offer it up to the arm.

Now just pivot it up into the seated position, grab your new clip - Snap it into place to secure the pedal, refit the arm assembly and your done.
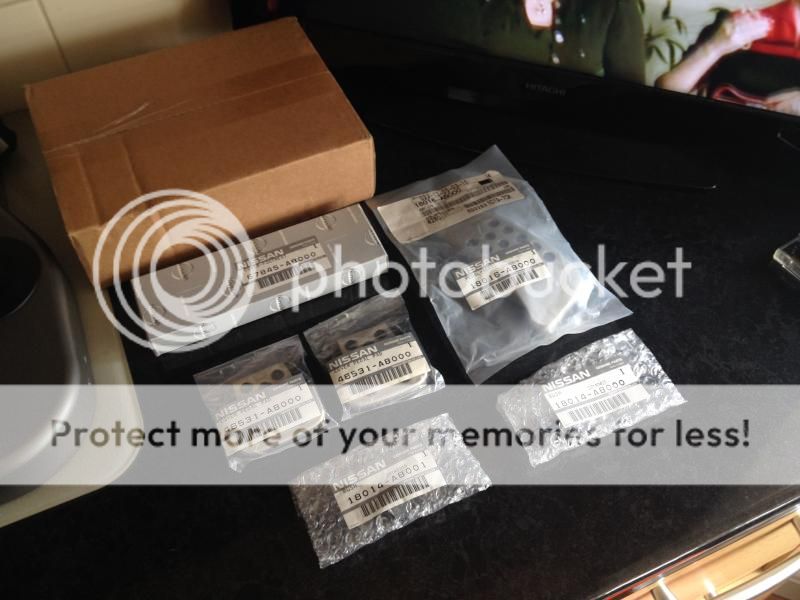
S15 GT/R34 GT-R Vspec II Pedal Set
- 1 genuine Nissan accelerator pedal (S15 GT Pedal - 18016 - AB010 / 380RS Accelerator Pedal- 18016-AB000)
- 1 genuine Nissan accelerator pedal mounting bush (Bushing – 18014-8H601)
- 1 genuine Nissan accelerator pedal mounting clip (Clip - 18014-AB000)
- 1 genuine Nissan brake pedal (Pedal Cover - 46531-AB000)
- 1 genuine Nissan clutch pedal (Pedal Cover - 46531-AB000)
- 1 genuine Nissan footrest pedal (Foot Rest Assembly - 67940 - 70T00)
- 1 genuine Nissan footrest alloy cover/insert (Cover, Footrest 67845-AB000)

There is two types of Accelerator Pedals Available, it's down to personal preference which you order. The 380RS pedal has an extended lower left corner to aid Heel/Toe, which i opted for.
So once you have your new pedals to hand

start by removing the old rubber pedals from your S15.
- The brake and clutch pedal covers pry-off with ease
- The accelerator requires a clip to be popped off at the top-rear which captivates the pedal to the arm. once that is popped off, the pedal will be able to pivot down and slide off. (if you are having trouble, this can be done when the accelerator arm is off the car - see install stage below)
- Now for the install of the Clutch and Brake pedal covers, i got a bowl of boiling water and put them into it to soften the rubber, and also applied some washing up liquid to the pedal and pedal covers, to aid sliding them on the the pedals, which worked well. have a small electrical screwdriver or other little pry' tool to help get all the lips of the pedal to seat nicely.
For the Installation of the Accelerator pedal, the OEM S15 accelerator arm has a large piece of metal that will need slightly trimming down for the new alloy pedal to fit.
The best way to do this is to remove the pedal arm assembly.
- The hinge is bolted to the bulkhead with two 10mm nuts which are easily accessible
- The top of the arm is connected to the throttle cable with a plastic clip. simply push the plastic clip out of the 'fork' at the top of the arm and you will be able to withdraw the assembly from the car
Now once you have got the arm assembly off the car, remove the pedal if you have not already done so.
Simply offer up the new alloy pedal, and you will see exactly how much metal you need to shave off. i used a bench grinder for this, just taking of enough to clear the pedal, then applied rustoleum primer and black paint to re-finish.
Some people prefer to remove the metal piece altogether and leave just the rod, like this:
I opted to leave it on and just shave enough off, to add to the 'weighty feel' of the pedal.
Now simply slide the bush into the lower section of the new pedal, and offer it up to the arm.
Now just pivot it up into the seated position, grab your new clip - Snap it into place to secure the pedal, refit the arm assembly and your done.

- Joined
- 18 September 2011
- Messages
- 726
- Reaction score
- 1
- Points
- 0
- Location
- West Midlands, England
- Country
-
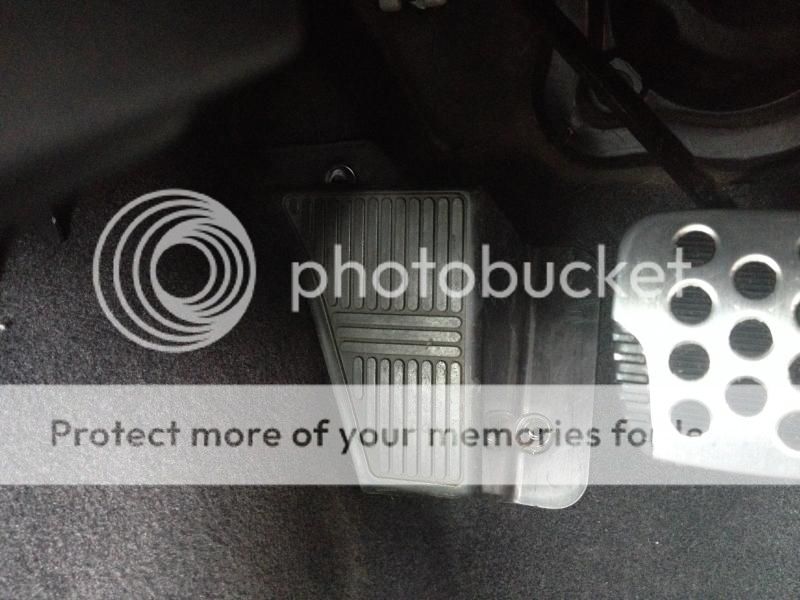
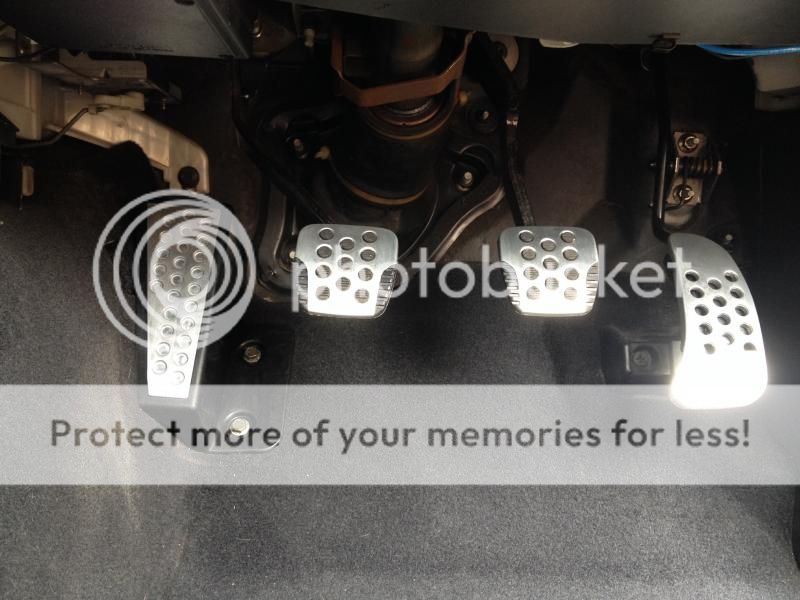
Part 2. The Dead Pedal
Now you have your nice new pedals installed, the OEM dead pedal/foot rest looks pretty poor in comparison. Nissan doesnt do a matching dead pedal for the GT model, and R34/380RS dead pedals are different, so where does that leave you?
Now recently i worked on my friends R33 Skyline and the similarity's between them and S-Body's was surprising to say the least. a huge amount of the chassis is the same.
This encouraged me to take a gamble and purchase an R34 dead pedal (R33 dead pedals are exactly the same BTW), and see if i could modify it to fit.
Firstly i removed the OEM S15 dead pedal.
One bolt on the upper left, one on the lower right
I then compared it to the R34 Pedal
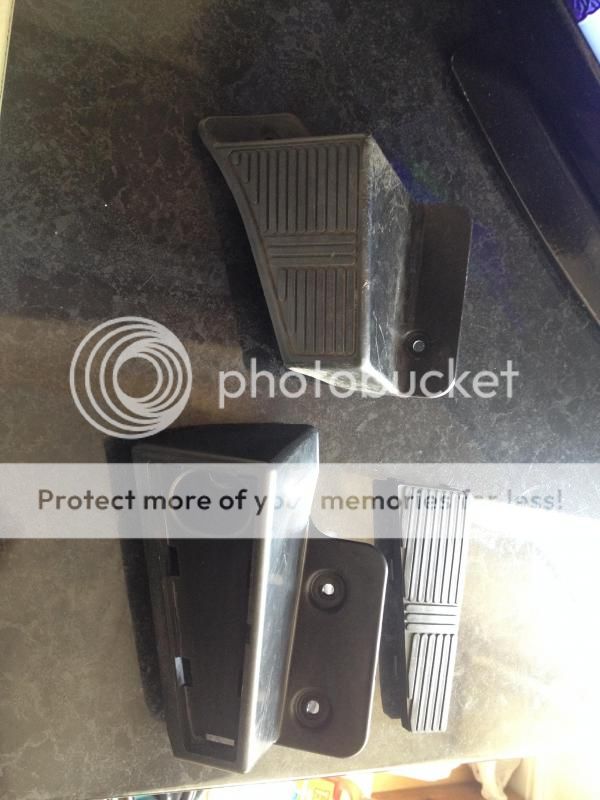
As you can see, the R34 pedal has 3 mounting points as opposed to the S15's 2.
But, i did notice the S15 pedal had a blank
I went back out to the car, and sure enough - the S15 is pre-drilled to accept the second mounting point of the R34 pedal
Next i offered it up to see if they did in fact line up - yes, yes they did indeed :thumbs:
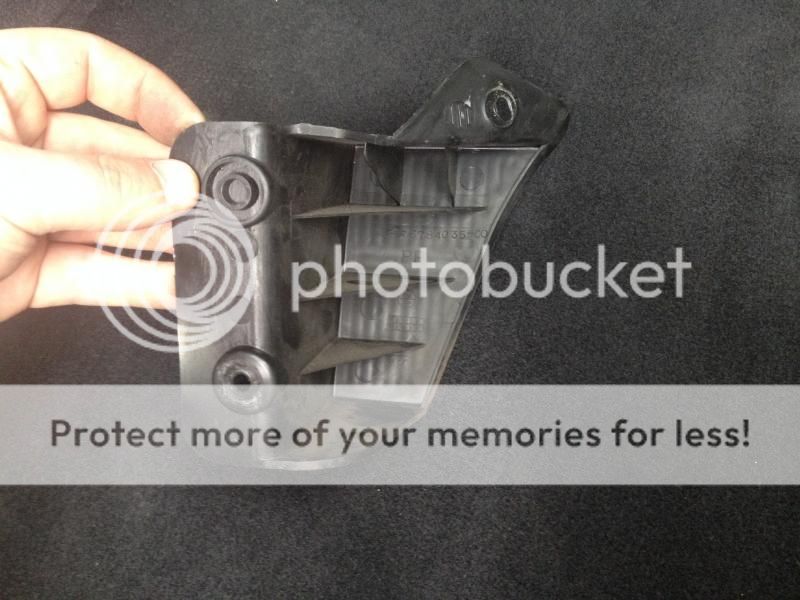
The only thing is that the tab nissan welded onto the gearbox tunnel to mount the S15 dead pedal comes through the carpet, which looks a little messy.
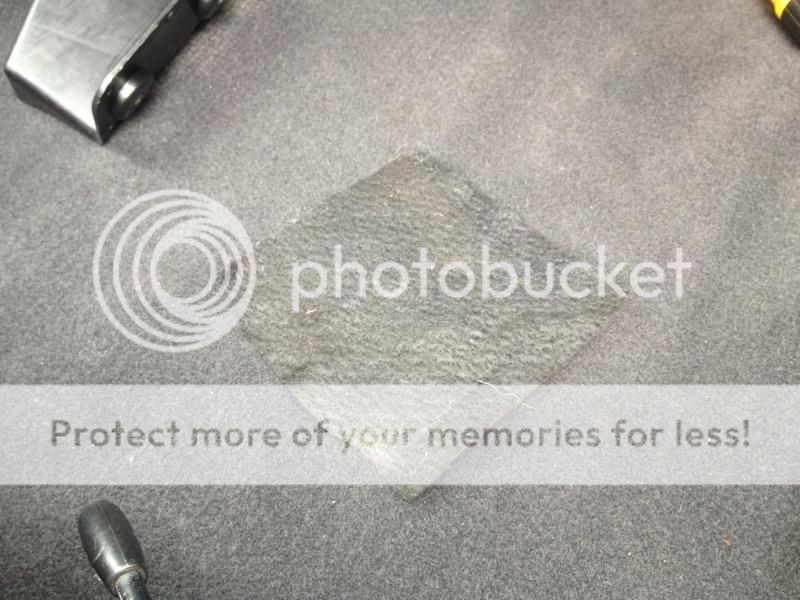
I decided to find some carpet that matched the OEM S15 carpet, feed it behind and cover the bracket up.
Bolted it all up, and this is how she now looks
and the important part - it does not foul the OEM floor mats either

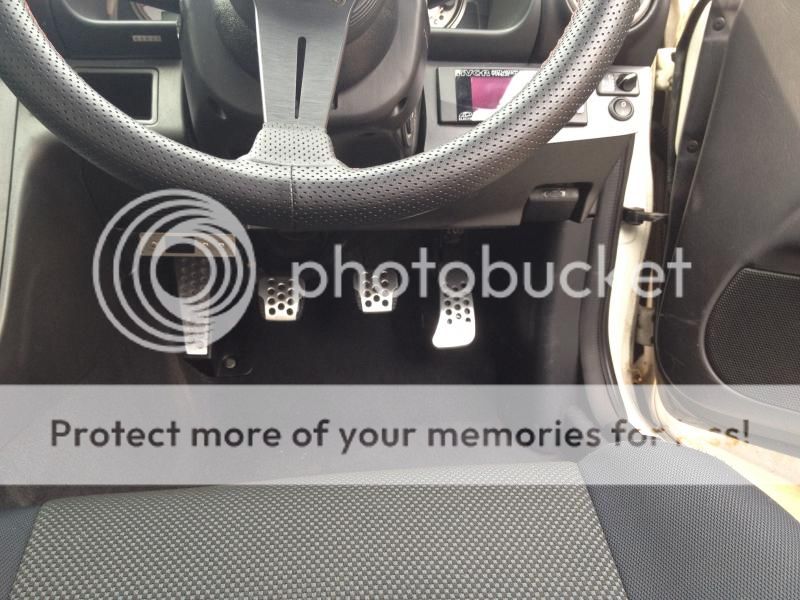
Very Happy with the Result Very Sturdy, and i feel it is much more comfortable than the OEM foot rest, and it really finishes off the interior.
Doing my research, and having a little faith all paid off :thumbs:
Now you have your nice new pedals installed, the OEM dead pedal/foot rest looks pretty poor in comparison. Nissan doesnt do a matching dead pedal for the GT model, and R34/380RS dead pedals are different, so where does that leave you?
Now recently i worked on my friends R33 Skyline and the similarity's between them and S-Body's was surprising to say the least. a huge amount of the chassis is the same.
This encouraged me to take a gamble and purchase an R34 dead pedal (R33 dead pedals are exactly the same BTW), and see if i could modify it to fit.
Firstly i removed the OEM S15 dead pedal.
One bolt on the upper left, one on the lower right

I then compared it to the R34 Pedal

As you can see, the R34 pedal has 3 mounting points as opposed to the S15's 2.
But, i did notice the S15 pedal had a blank

I went back out to the car, and sure enough - the S15 is pre-drilled to accept the second mounting point of the R34 pedal

Next i offered it up to see if they did in fact line up - yes, yes they did indeed :thumbs:

The only thing is that the tab nissan welded onto the gearbox tunnel to mount the S15 dead pedal comes through the carpet, which looks a little messy.
I decided to find some carpet that matched the OEM S15 carpet, feed it behind and cover the bracket up.

Bolted it all up, and this is how she now looks


and the important part - it does not foul the OEM floor mats either


Very Happy with the Result
Very Sturdy, and i feel it is much more comfortable than the OEM foot rest, and it really finishes off the interior. Doing my research, and having a little faith all paid off :thumbs:

- Joined
- 18 September 2011
- Messages
- 726
- Reaction score
- 1
- Points
- 0
- Location
- West Midlands, England
- Country
-
Now, after having it's first Nurburgring trip under its belt in 2013:
2013 Trip Review
"Well after months of Prep work, the S15 was finally ready for the Ring trip, and what an experience it was! 5 days of car heaven. Along with a K20 EG Civic, 3 20v Turbo VW's, a Mk1 Golf, a Mk2 Golf and a Mk2 Scirocco, A Pulsar GTI-R, 106 GTI, 106 GTI TURBO (unbelievably fast), E46 M3, and 4 bikes - a ZX6R, ZX10R, GSXR 600 & CBR 600F, we had a blast on and off track.
The S15 performed faultlessly all trip, it surpassed my expectations in every way - perfectly suited to the Nordschleife in my opinion.
Despite it being my first trip to the Nurburgring, i have spent countless hours of learning the track on GT5, watching lap videos (which teaches you the track layout-not much more) and getting advice from more experienced 'ring drivers, which got me up-to-speed, so to speak, much quicker than someone that has never looked at the ring before.
Here are the Videos:
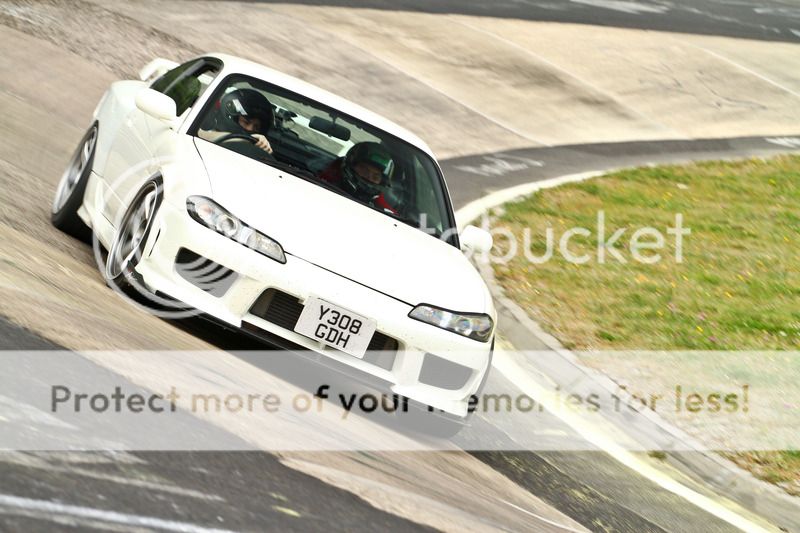
This was my 2nd lap,and maybe the most entertaining video lol. The track offered huge amounts of grip throughout, lots of rubber down from the 24hr Race the previous week, which was very encouraging to comfortably push, until the last 1/4 of the lap. As i entered Pflanzgarten 3, i failed to judge just how wet it was. That section of the track was still damp, you actually see the water spray as we continued passed the Fiat Panda. I also turned in too early, making the corner tighter and as it was wet - it bit me - and we got a little sideways. I was in attack mode so it didn't break my stride until we finished the lap, and you can see the relief on my face lol.
In Summary, i was pushing maybe too hard for the damp section, as i made the mistake of turning in too early, it bit me. All a learning curve, and just makes you more determined to try and master the course.
Here is the Full Lap - Bridge-to-Gantry: 9min17sec
FINALBOSS S15 - NURBURGRING 2013 : 2nd Lap : Pflanzgarten 3 Slide - YouTube
Short Clip of Just the Slide
FINALBOSS S15 - NURBURGRING Pflanzgarten 3 Slide - YouTube
Here are also my 3rd & 4th Laps on Video
3rd Lap - Bridge-to-Gantry: 8min55sec
FINALBOSS S15 - NURBURGRING 2013 :3rd Lap - YouTube
4th Lap
FINALBOSS S15 - NURBURGRING 2013 :3rd Lap - YouTube
2013 Trip Review
"Well after months of Prep work, the S15 was finally ready for the Ring trip, and what an experience it was! 5 days of car heaven. Along with a K20 EG Civic, 3 20v Turbo VW's, a Mk1 Golf, a Mk2 Golf and a Mk2 Scirocco, A Pulsar GTI-R, 106 GTI, 106 GTI TURBO (unbelievably fast), E46 M3, and 4 bikes - a ZX6R, ZX10R, GSXR 600 & CBR 600F, we had a blast on and off track.
The S15 performed faultlessly all trip, it surpassed my expectations in every way - perfectly suited to the Nordschleife in my opinion.
Despite it being my first trip to the Nurburgring, i have spent countless hours of learning the track on GT5, watching lap videos (which teaches you the track layout-not much more) and getting advice from more experienced 'ring drivers, which got me up-to-speed, so to speak, much quicker than someone that has never looked at the ring before.
Here are the Videos:
This was my 2nd lap,and maybe the most entertaining video lol. The track offered huge amounts of grip throughout, lots of rubber down from the 24hr Race the previous week, which was very encouraging to comfortably push, until the last 1/4 of the lap. As i entered Pflanzgarten 3, i failed to judge just how wet it was. That section of the track was still damp, you actually see the water spray as we continued passed the Fiat Panda. I also turned in too early, making the corner tighter and as it was wet - it bit me - and we got a little sideways. I was in attack mode so it didn't break my stride until we finished the lap, and you can see the relief on my face lol.
In Summary, i was pushing maybe too hard for the damp section, as i made the mistake of turning in too early, it bit me. All a learning curve, and just makes you more determined to try and master the course.
Here is the Full Lap - Bridge-to-Gantry: 9min17sec
FINALBOSS S15 - NURBURGRING 2013 : 2nd Lap : Pflanzgarten 3 Slide - YouTube
Short Clip of Just the Slide
FINALBOSS S15 - NURBURGRING Pflanzgarten 3 Slide - YouTube
Here are also my 3rd & 4th Laps on Video
3rd Lap - Bridge-to-Gantry: 8min55sec
FINALBOSS S15 - NURBURGRING 2013 :3rd Lap - YouTube
4th Lap
FINALBOSS S15 - NURBURGRING 2013 :3rd Lap - YouTube
- Joined
- 18 September 2011
- Messages
- 726
- Reaction score
- 1
- Points
- 0
- Location
- West Midlands, England
- Country
-
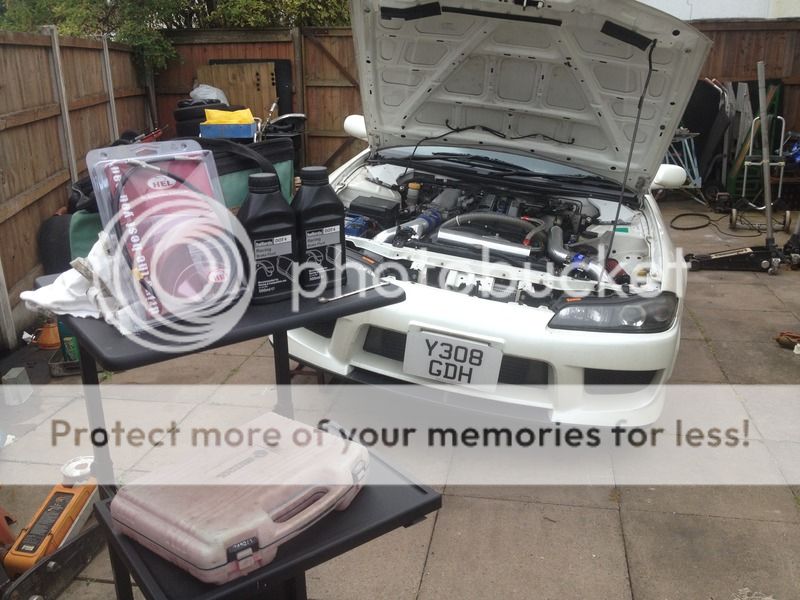
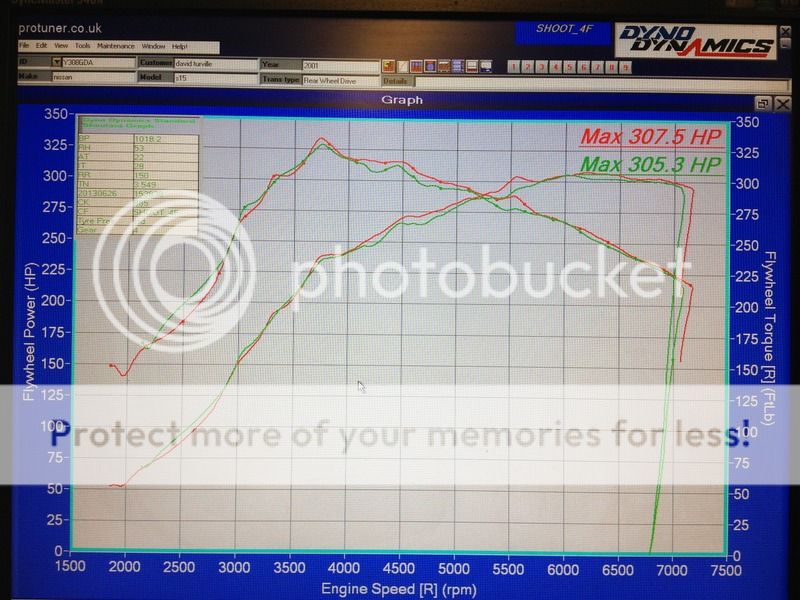
So it was time to book our next trip, this time with all of the modifications completed, and a fresh map by Hreg Gush @ Protuner.
He had mapped the car to a safe 276bhp before our first trip in 2013. This time the car went back to him to hardwire the fuel pump, to enable us to get more power.

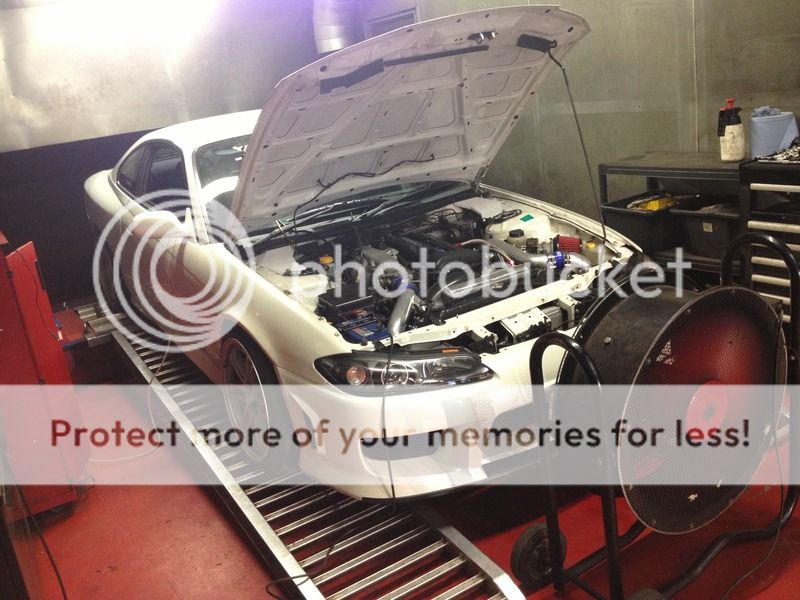
Greg as always VERY thorough, carrying out tests before mapping. He remarked at how good the compression was, as he usually see's ropey old S14's haha.
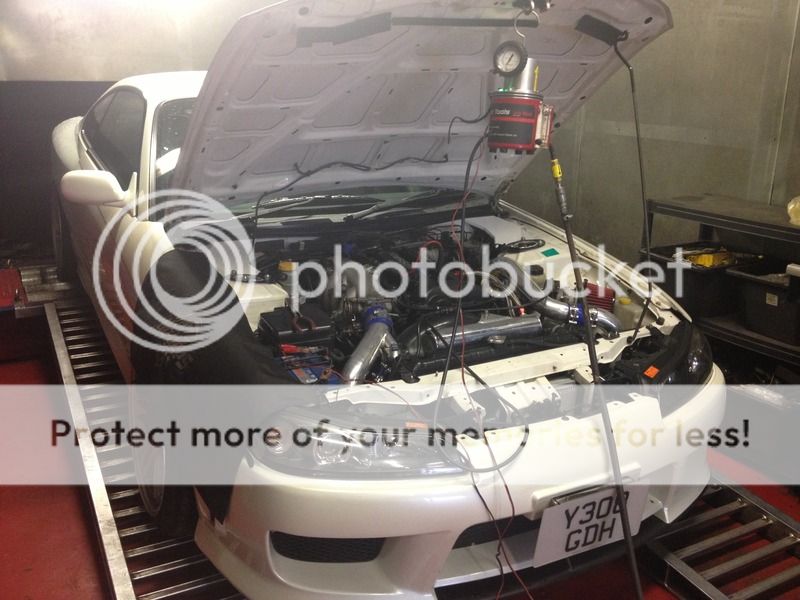
getting down to business

The outcome: 307.5bhp - A nice safe, reliable figure.
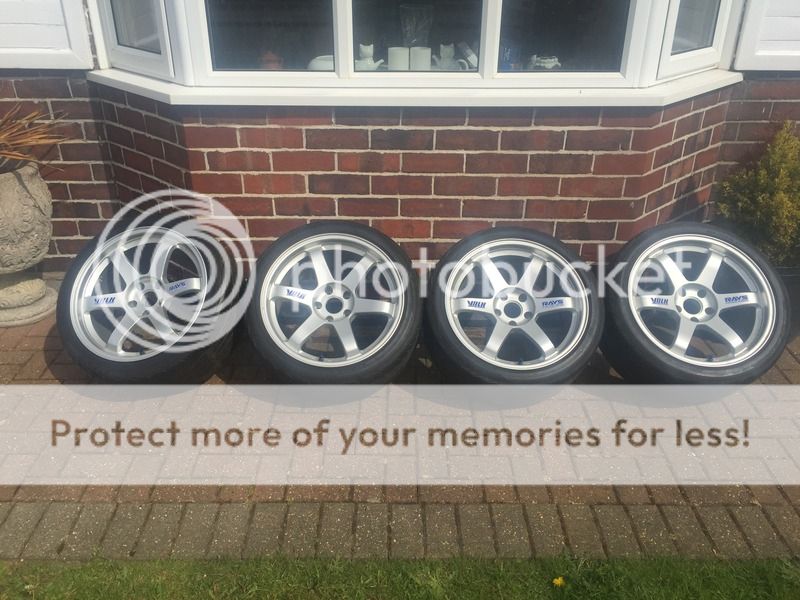
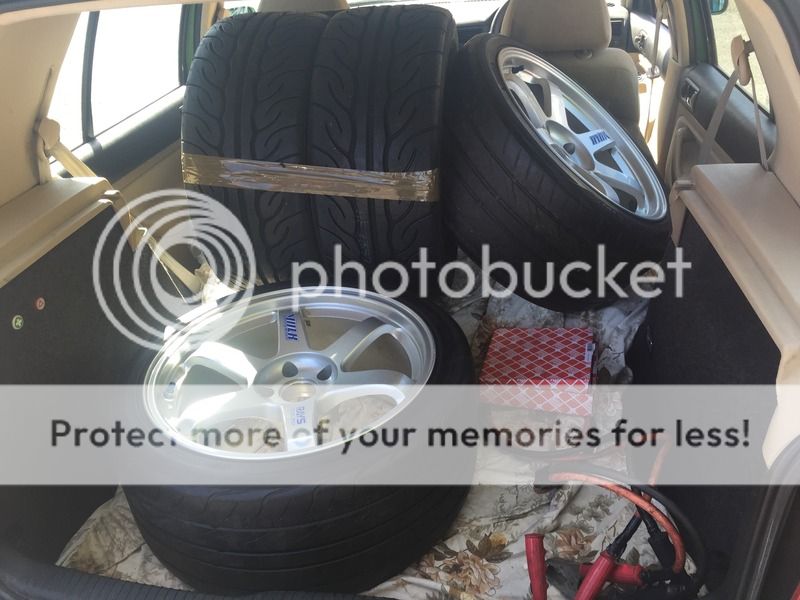
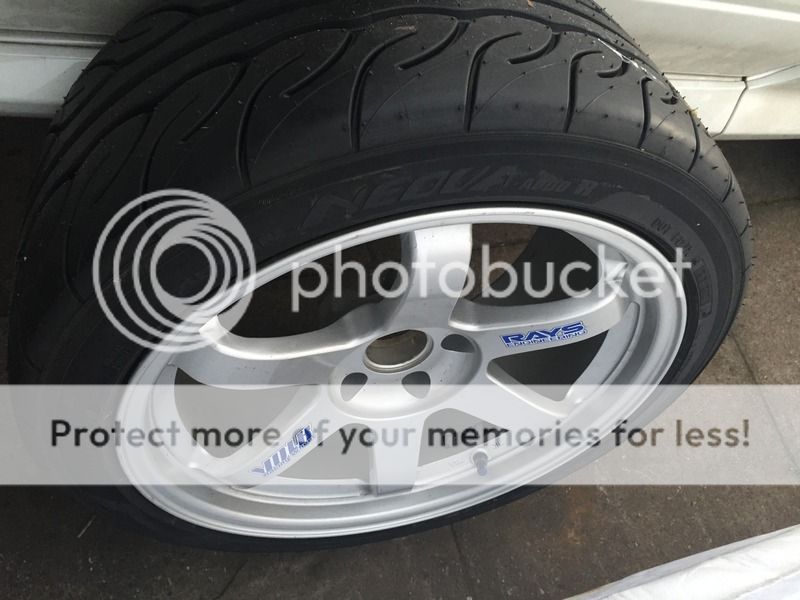
A few last minute additions before the trip.............TE37 18X9.5 wrapped in Advan AD08R's ofcourse! What else!
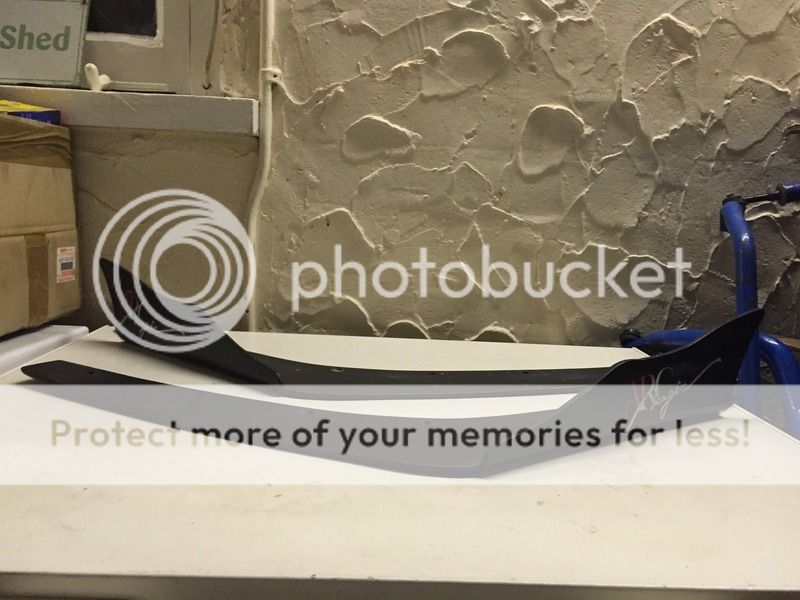
Super Rare ARC Winglets
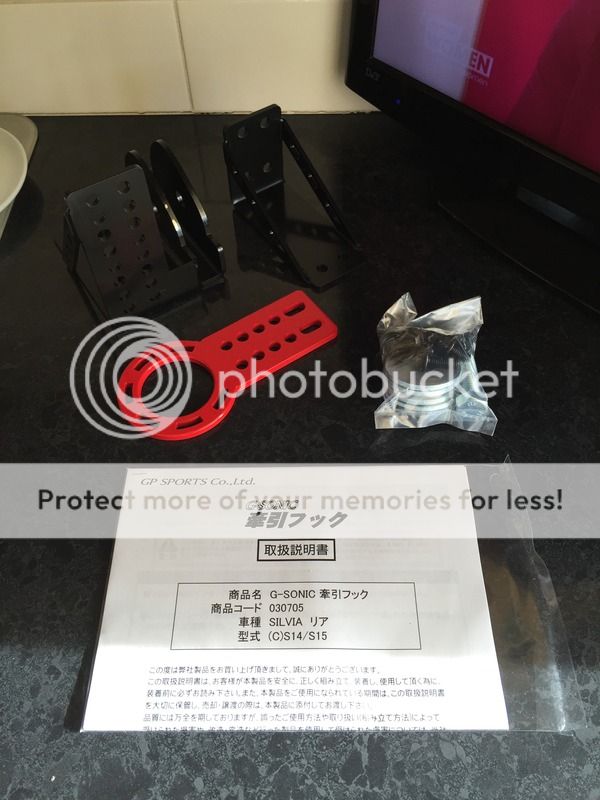
GP Sports Rear Tow Hook, 'just in case' lol
Oh, and of course a pair of Bride ZETA III, and Takata Harnesses. Safety First!!! ha
Quick visit to A-Line, and she was ready to rock
He had mapped the car to a safe 276bhp before our first trip in 2013. This time the car went back to him to hardwire the fuel pump, to enable us to get more power.


Greg as always VERY thorough, carrying out tests before mapping. He remarked at how good the compression was, as he usually see's ropey old S14's haha.

getting down to business

The outcome: 307.5bhp - A nice safe, reliable figure.

A few last minute additions before the trip.............TE37 18X9.5 wrapped in Advan AD08R's ofcourse! What else!


Super Rare ARC Winglets

GP Sports Rear Tow Hook, 'just in case' lol

Oh, and of course a pair of Bride ZETA III, and Takata Harnesses. Safety First!!! ha

Quick visit to A-Line, and she was ready to rock


Last edited:
- Joined
- 18 September 2011
- Messages
- 726
- Reaction score
- 1
- Points
- 0
- Location
- West Midlands, England
- Country
-
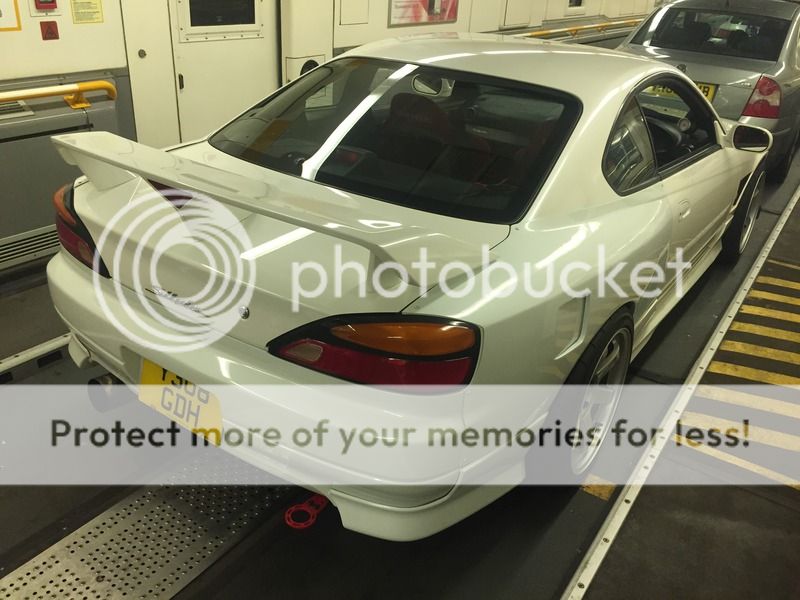
Obligatory Eurotunnel Picture
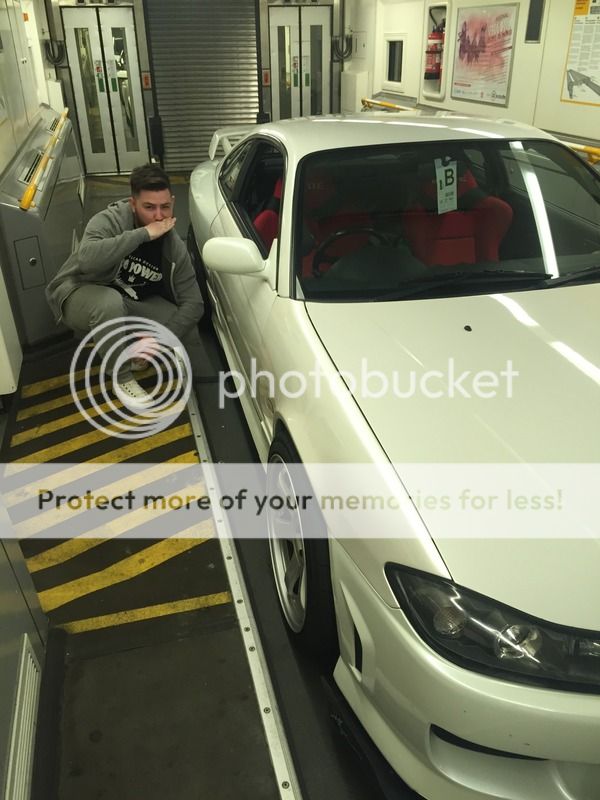
What a car! She did not disappoint. Didn't miss a beat all journey, and the modification has made it an absolute dream out on track.
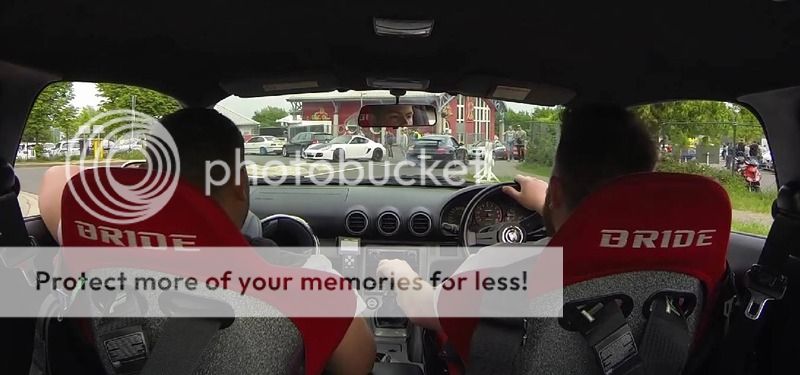
Due to having battery problems on my GoPro i only managed to get one full video of a lap, one of the slower laps which was disappointing, but here it is:
Try and lock on to a 997 Turbo, look how bloody quick they are in a straight line! But the S15 closed him down in the corners. It was the first time driving in angor with the new mods, and we Struggled with grip on that lap, mostly front end grip which we softened the ARB settings which made a big improvement on the next lap.
Nissan Silvia S15 - Nurburgring - May 25th 2015 - YouTube


What a car! She did not disappoint. Didn't miss a beat all journey, and the modification has made it an absolute dream out on track.


Due to having battery problems on my GoPro i only managed to get one full video of a lap, one of the slower laps which was disappointing, but here it is:
Try and lock on to a 997 Turbo, look how bloody quick they are in a straight line! But the S15 closed him down in the corners. It was the first time driving in angor with the new mods, and we Struggled with grip on that lap, mostly front end grip which we softened the ARB settings which made a big improvement on the next lap.
Nissan Silvia S15 - Nurburgring - May 25th 2015 - YouTube
Last edited:
- Joined
- 18 September 2011
- Messages
- 726
- Reaction score
- 1
- Points
- 0
- Location
- West Midlands, England
- Country
-
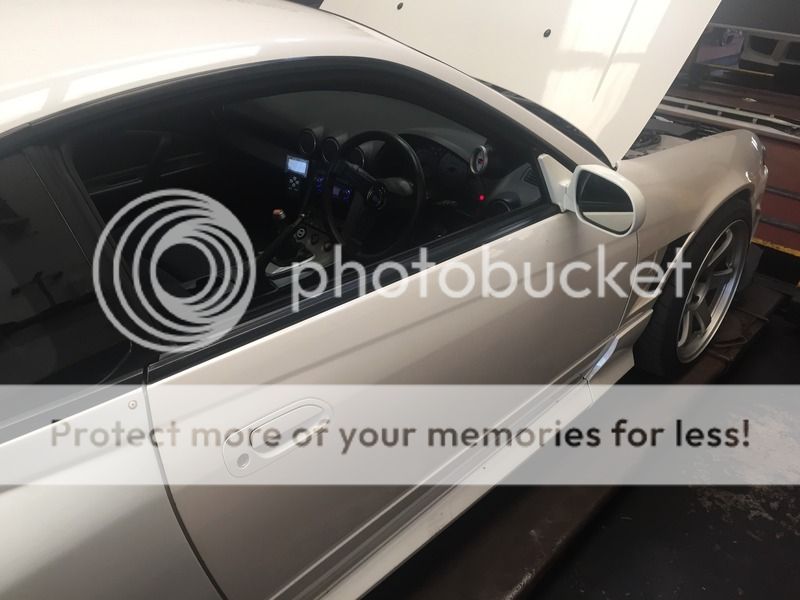
After the Nurburgring trip i reverted back to the OEM seats etc. for street use, i might be getting old but bucket seats are NOT the most comfortable place to be.
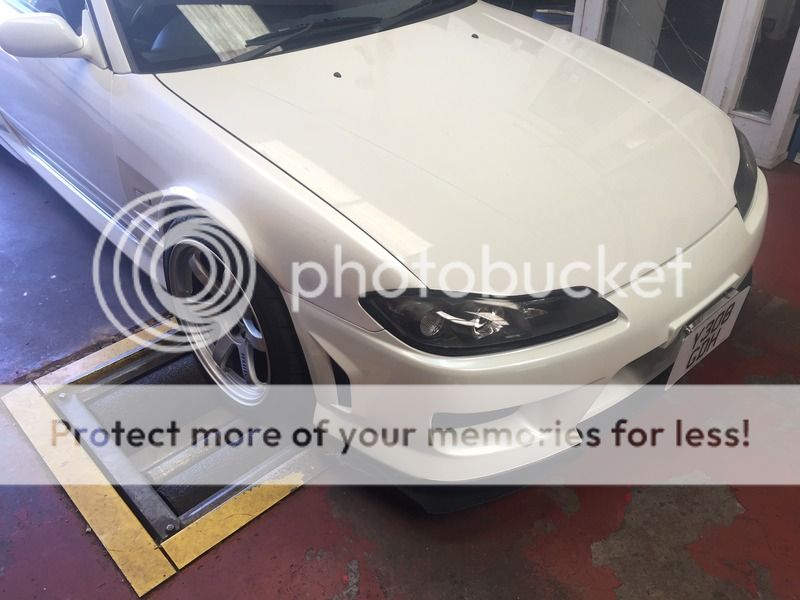
Annual Health Check - MOT Time!
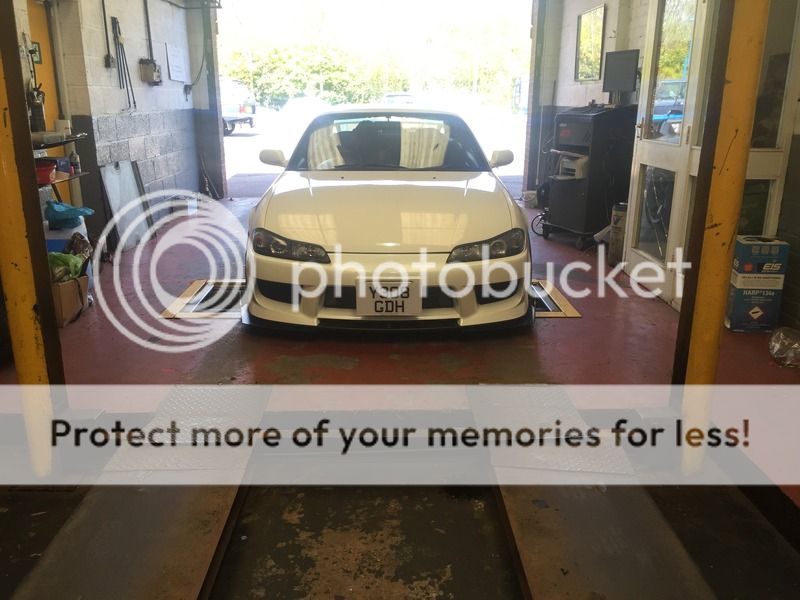

Back at Home tucked up

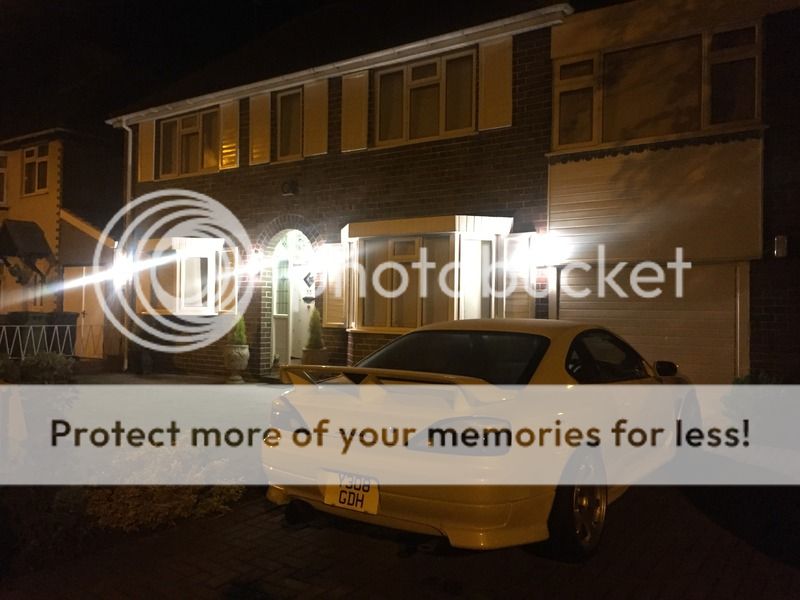
Annual Health Check - MOT Time!


Back at Home tucked up


- Joined
- 18 September 2011
- Messages
- 726
- Reaction score
- 1
- Points
- 0
- Location
- West Midlands, England
- Country
-
Now i never intended to ever part with my S15........I built it to be a comfortable, nice place to be, that performs extremely well, a GT Car if you will. It was to travel to the Nurburgring annually, and visit other European tracks. It was always a long term project, hence the quality of the build.
A few months ago, me & the GF were in the process of buying our first home, and about to start a family.
Matt Stokes, aka Sgt. Slaughter, a close friend of mine who knew and appreciated the car since importing it, offered me cold hard cash for the keys.........With the impending house purchase my head ruled over my heart, and i agreed to sell.
It made it a little easier, seeing how enthusiastic he was about the car, and his future plans he has really impressed me with how he has progressed the build even further, and i hope he can continue this build to showcase his progress
About Us
This owners club has been made in the benefit of owners of the Nissan Silvia chassis, allowing them to socially integrate and share their knowledge and advice.
We also intend to create events and social activities for members to take part in to help members meet and get to know each other.
We also intend to create events and social activities for members to take part in to help members meet and get to know each other.
Online statistics
- Members online
- 0
- Guests online
- 900
- Total visitors
- 900
Totals may include hidden visitors.